Project Schedule - Configure Schedule (Build Project Calendar(s) and Define Project Resources
Steps:
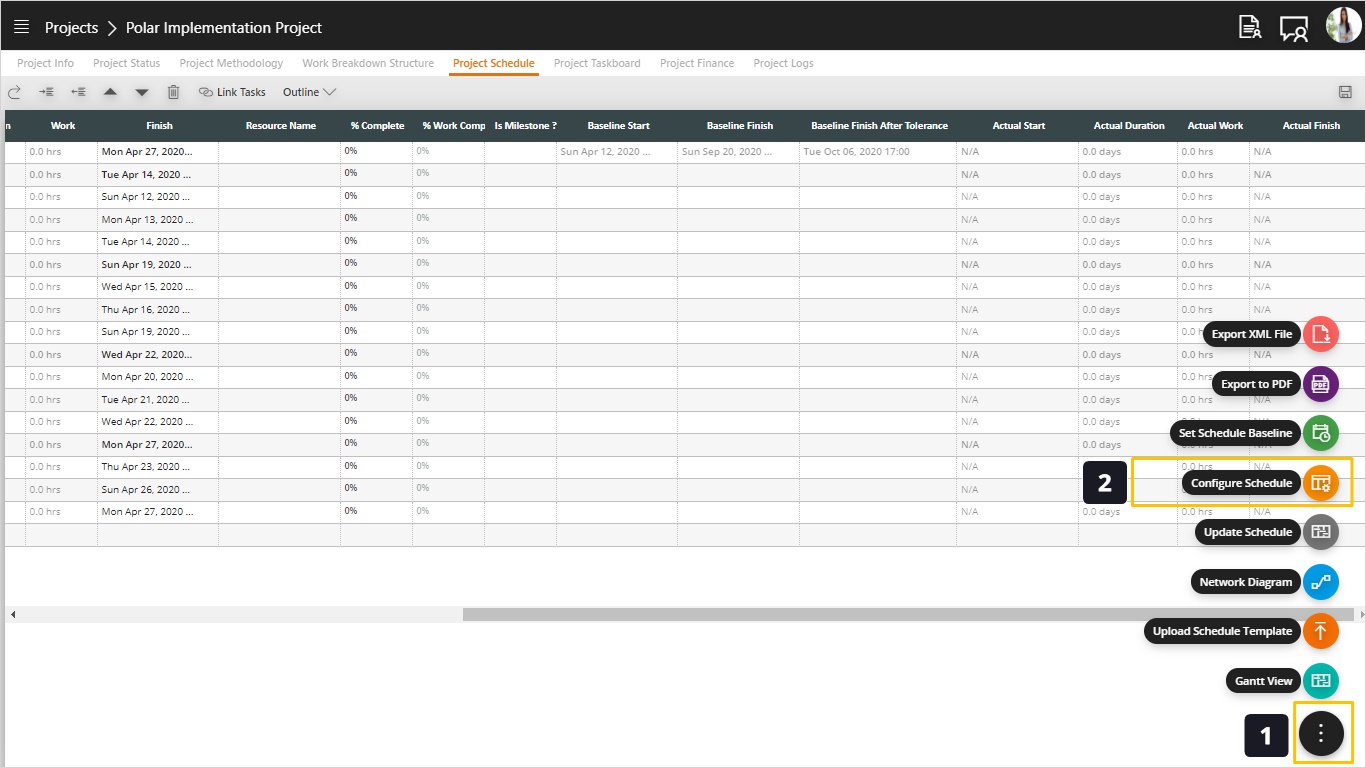
- To configure your calendar(s) and define your resource sheet for this project, start by opening the FAB menu.
- Select the Configure Schedule option.
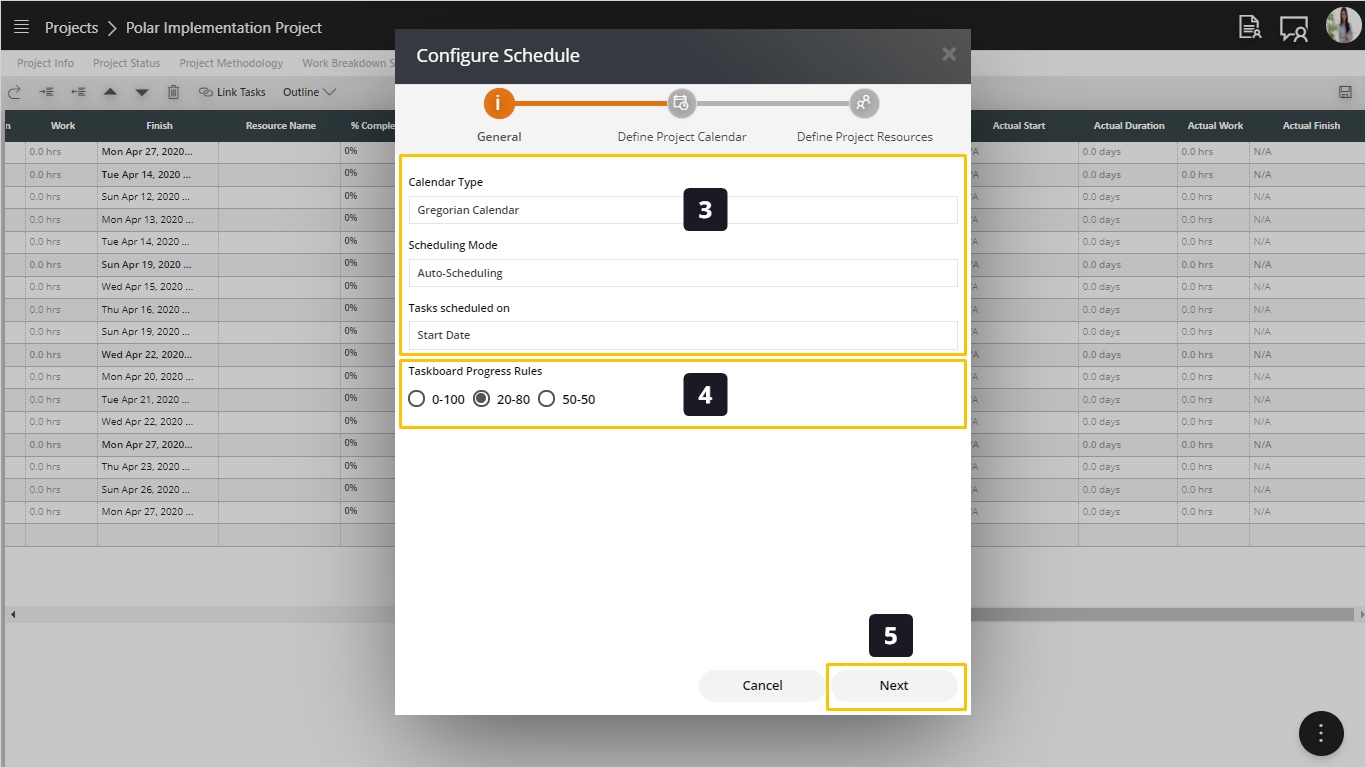
- The first three options will be disabled, because we want them to be fixed to this behavior. Those include using the Gregorian Calendar as the default and only supported calendar. It also enforces Auto-Scheduling since we don’t support the manual scheduling. Finally, we define the scheduling behavior to depend on the start date of the task.
- Taskboard Progress Rules. Those rules are defaulted from the PMO but you can specify them per project. This screen includes what we call Progress Rules in regards to tasks progress and completion percentage. Let’s go through it one by one.
The Project Management Institute – PMI came up with three progress rules for task completion percentages. Usually we face problems when asking resources about their task status or percent of completion. It is predicted that you will not have accurate info from your resources as this estimation is objective and judgmental.
PMI Came up with three rules for progress 0-100, 20-80 and 50-50.
- 0-100 Rule: It is a very pessimistic and conservative rule. It states that tasks are either done or not done. Even if the resources started working on the task it will have 0% of completion until it becomes done. If you are a vendor, using this rule will not be for your good, as when you are reporting your progress to your customer, you will find that many tasks have 0% completion while they are actually started. This will cause delays in receiving your payments. This rule will serve you well if you are from a customer side as a bank or IT Company as they can delay their vendors payments.
- 20-80 Rule: This rule states that any started task will get 20% completion and it will keep this value until the task becomes fully completed, then you will add the 80% to have a done task with 100% completion.
- 50-50 Rule: This rule gives the task 50% completion when it starts, and it will keep the 50% progress till it becomes done. They turn it to 100% completed task.
- Click Next
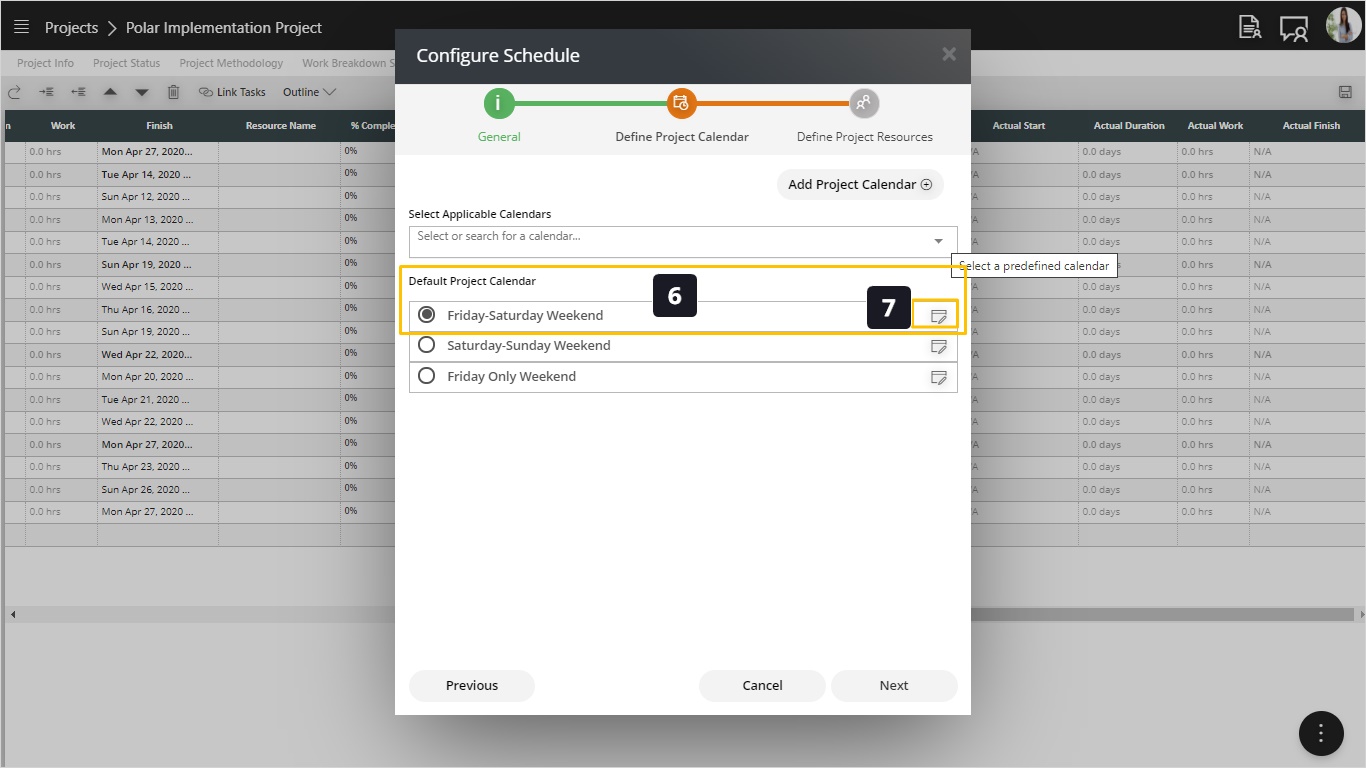
- Notice that the default calendar set by the PMO team is automatically selected for you.
- If you like customize this calendar specifically to your project you can use the edit action.
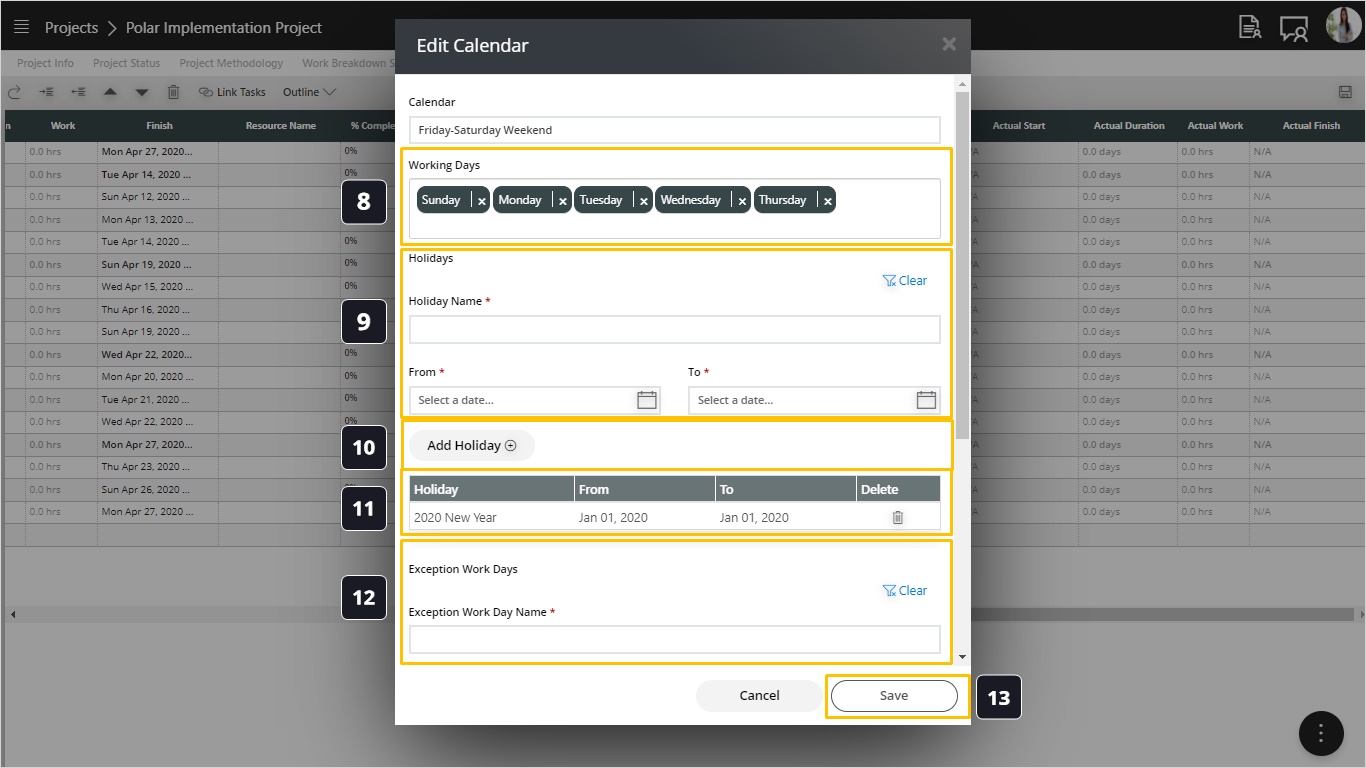
- Inside the calendar notice the Working days are listed. Here you can add or remove days by clicking in the box.
- In the holidays section you can add a holiday by giving it a name and start/finish date.
- Click the Add Holiday action to add it to the holidays list for this calendar.
- Notice the list of holidays defined for this calendar. You can remove any of them using the Delete action in the table.
- Click Save to keep your changes on this calendar.
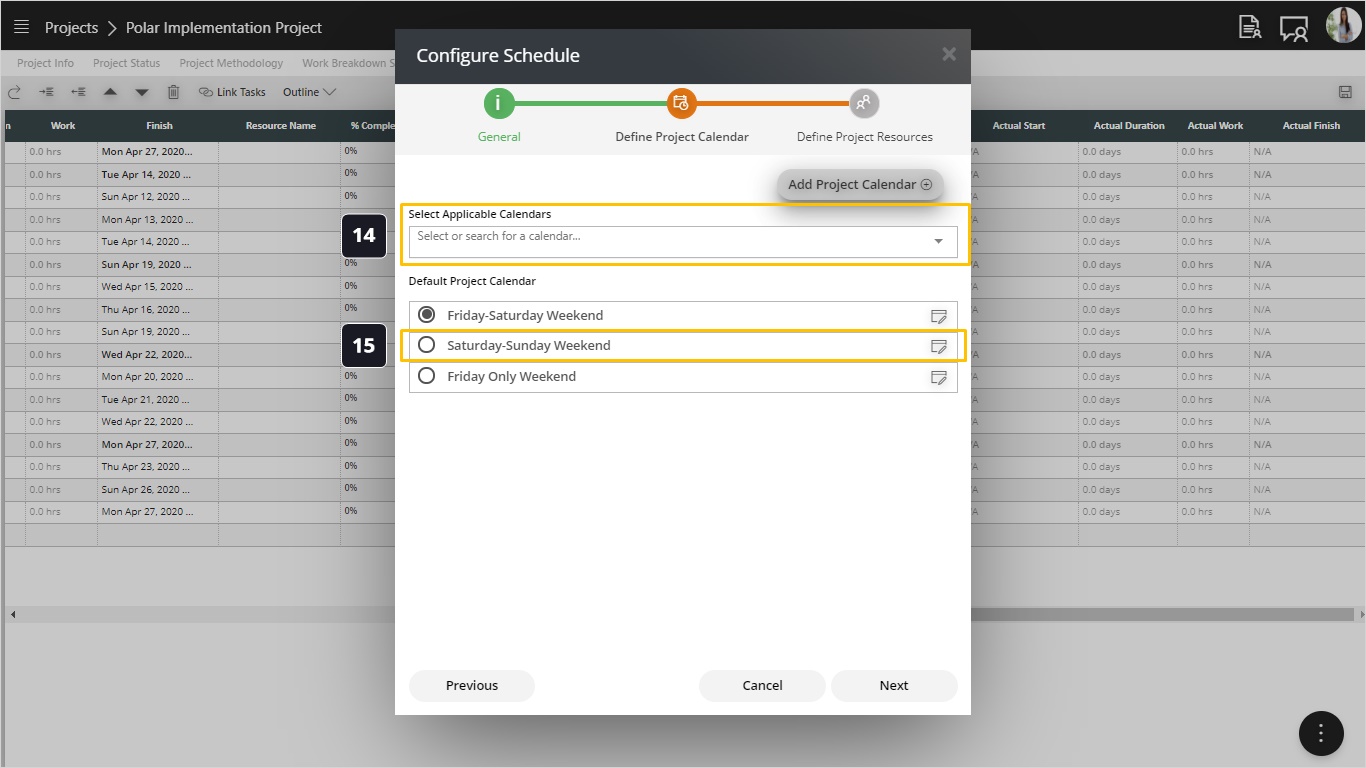
- In some projects, specially when project resources work from different countries, you would typically need multiple calendars to cover different countries. To do that open the drop-down list to see the available calendars defined by your PMO.
- Select the desired calendars.
Tip: If you want to create your own calendars from scratch you can use the Add Project Calendar action on the top right corner of this screen.
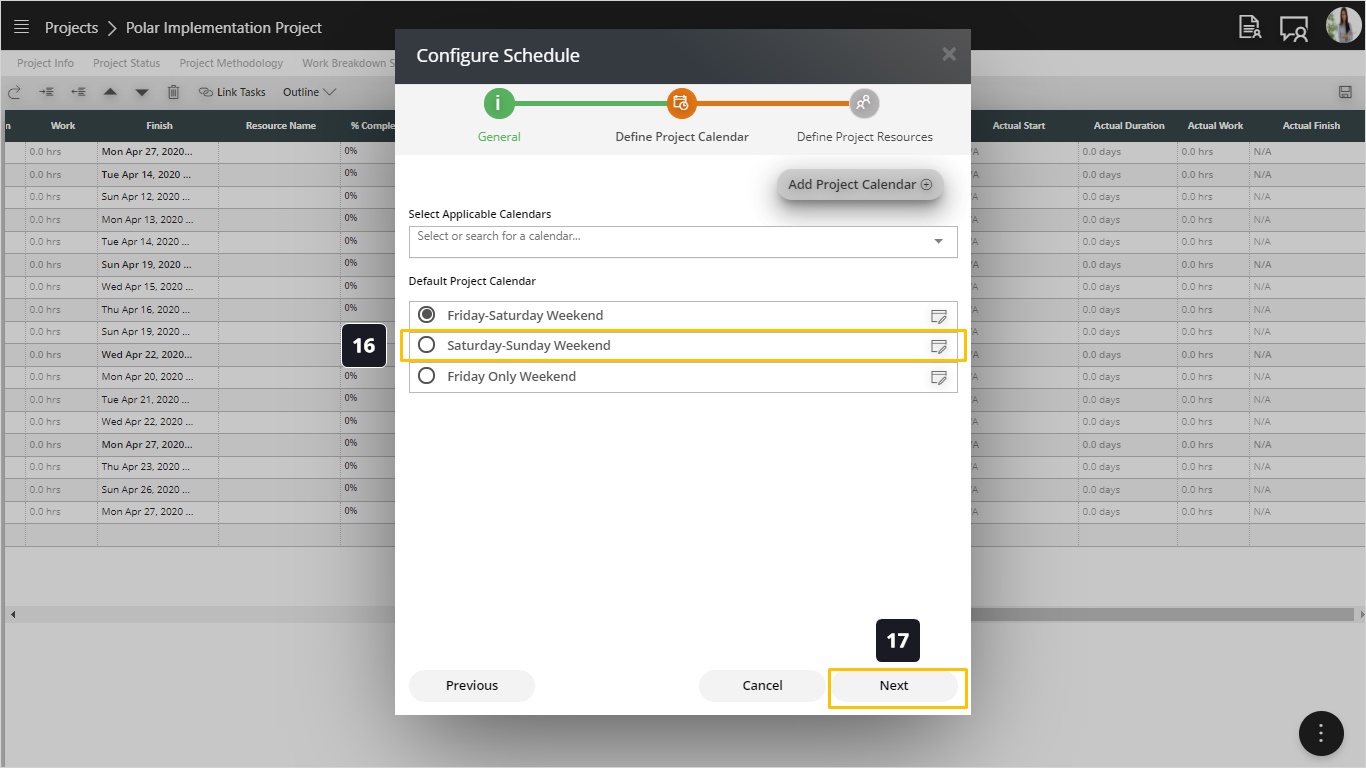
- You can edit and customize any of the selected calendars.
- Click Next to proceed.
- Now we are in the resources sheet for this project. If the PMO has defined standard roles for this type of projects, you will see them populated here. If not you can define your own resources.
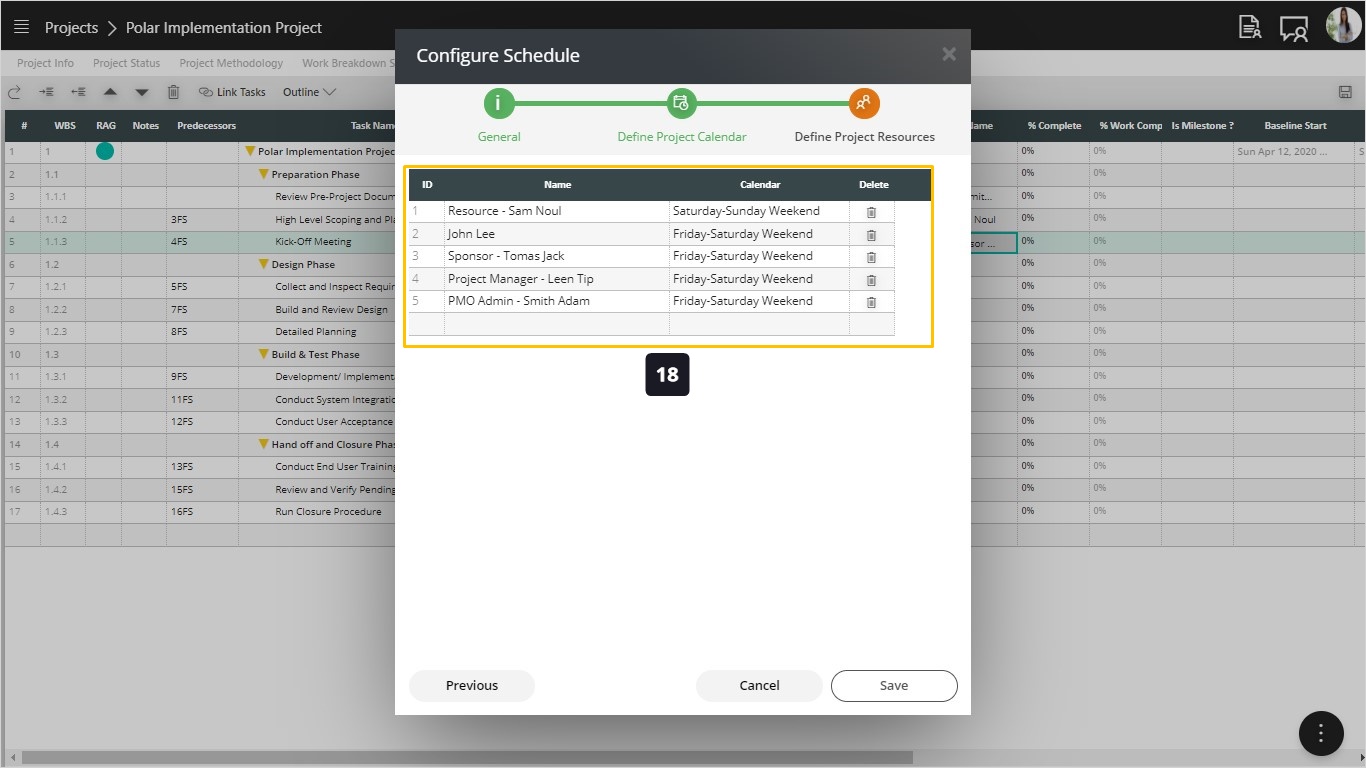
- Use the Type-Ahead list to replace roles with names, or to assign any desired resources to this project. The assigned resources can see their tasks on their taskboard.
- Select the desired resource.
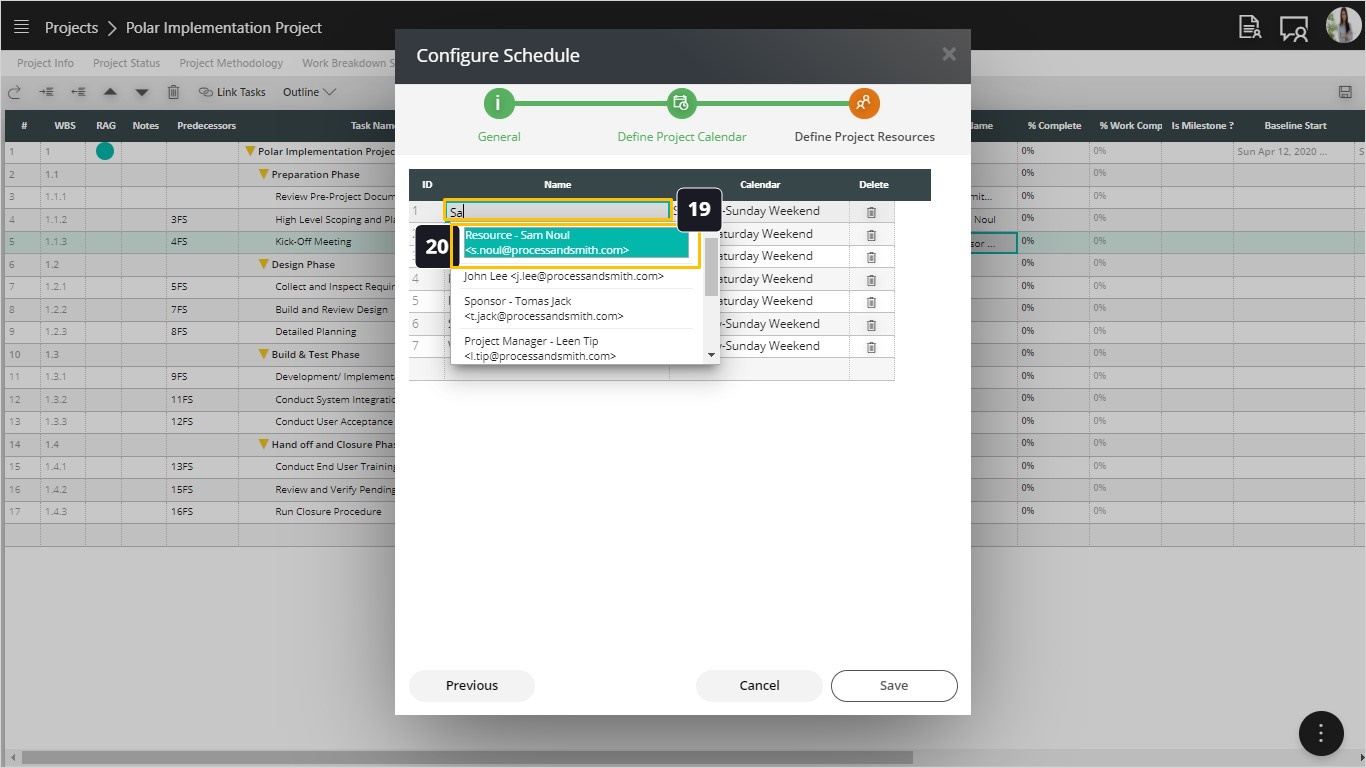
- You can select additional resources from the list of resources (resource pool) of your organization.
- Select the desired resource.
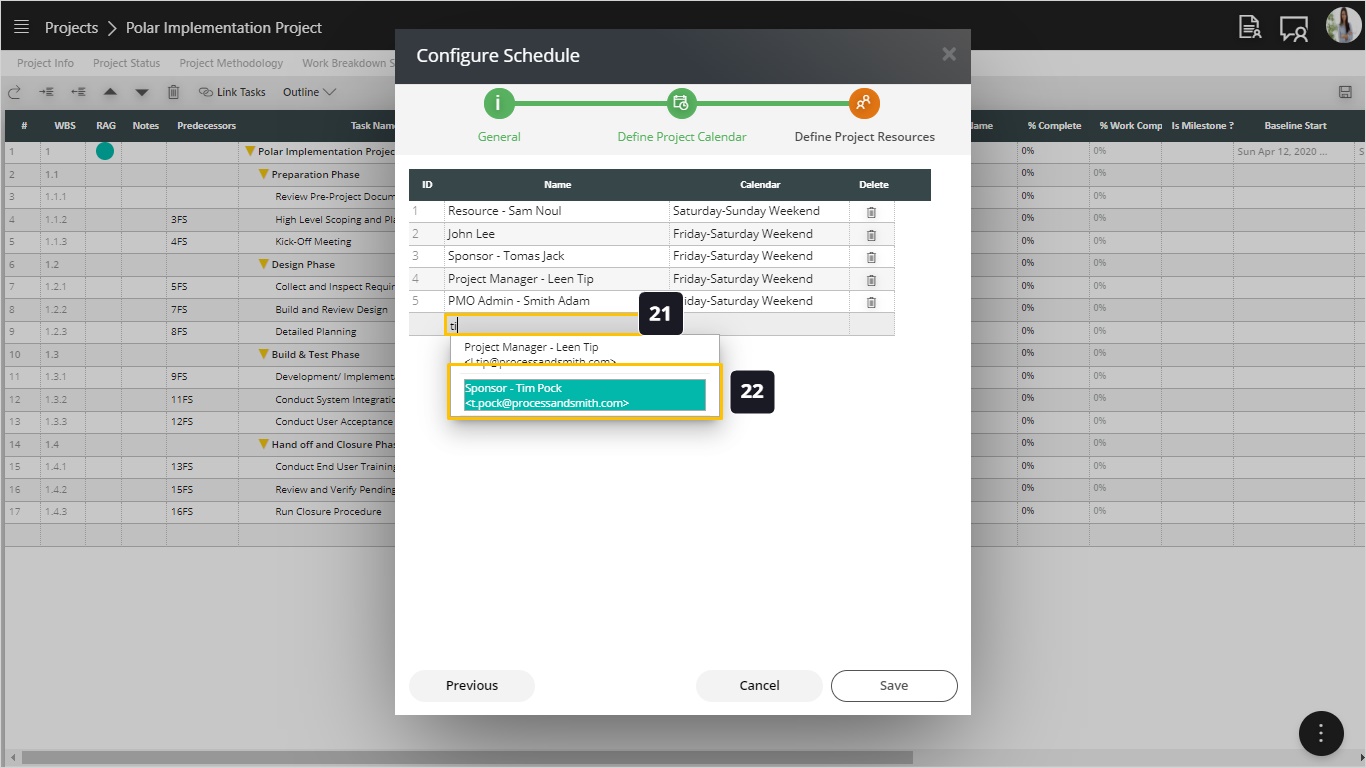
- Double-click to preview the available calendars for those resources. This will show the applicable calendars we defined earlier.
- Select the desired calendar.
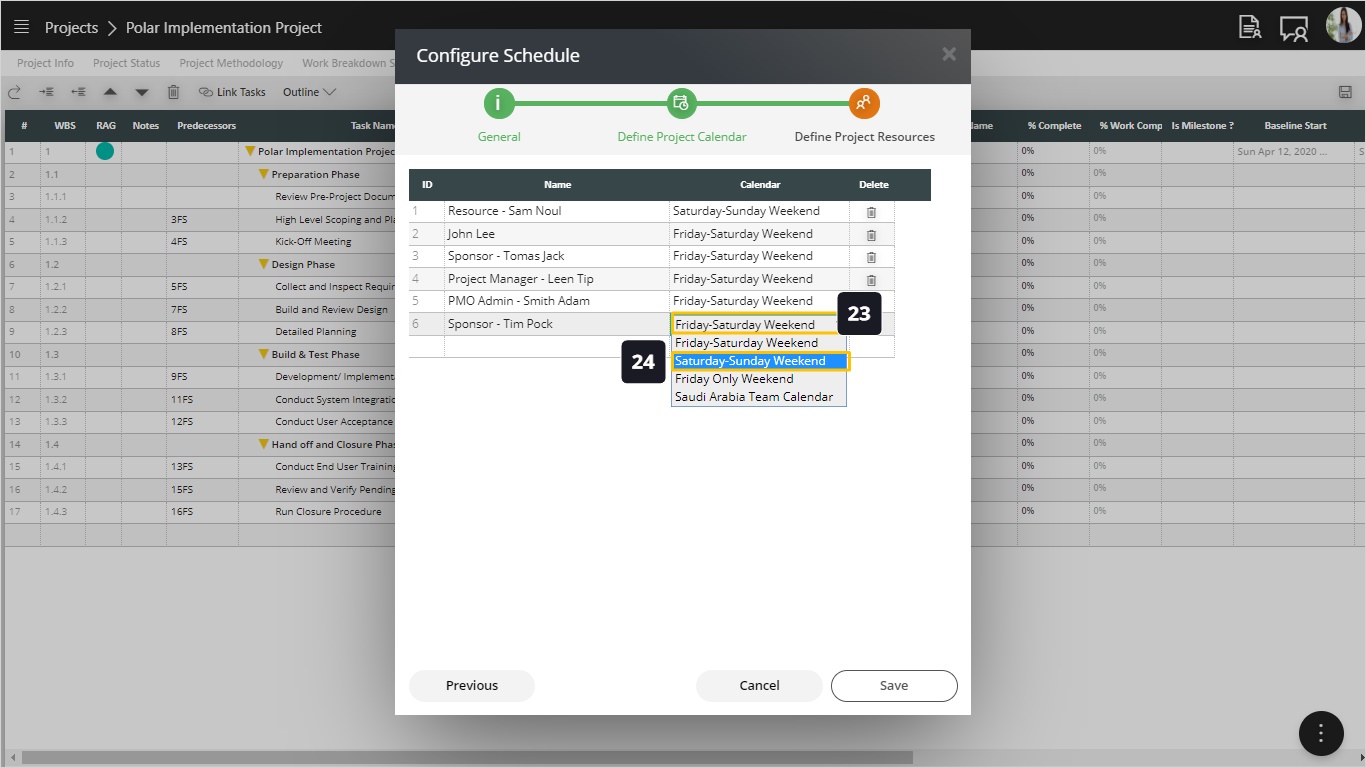
- You can type a resource name that doesn’t exist in the organization’s resource pool and it would be specific to this project.
- Click Save.
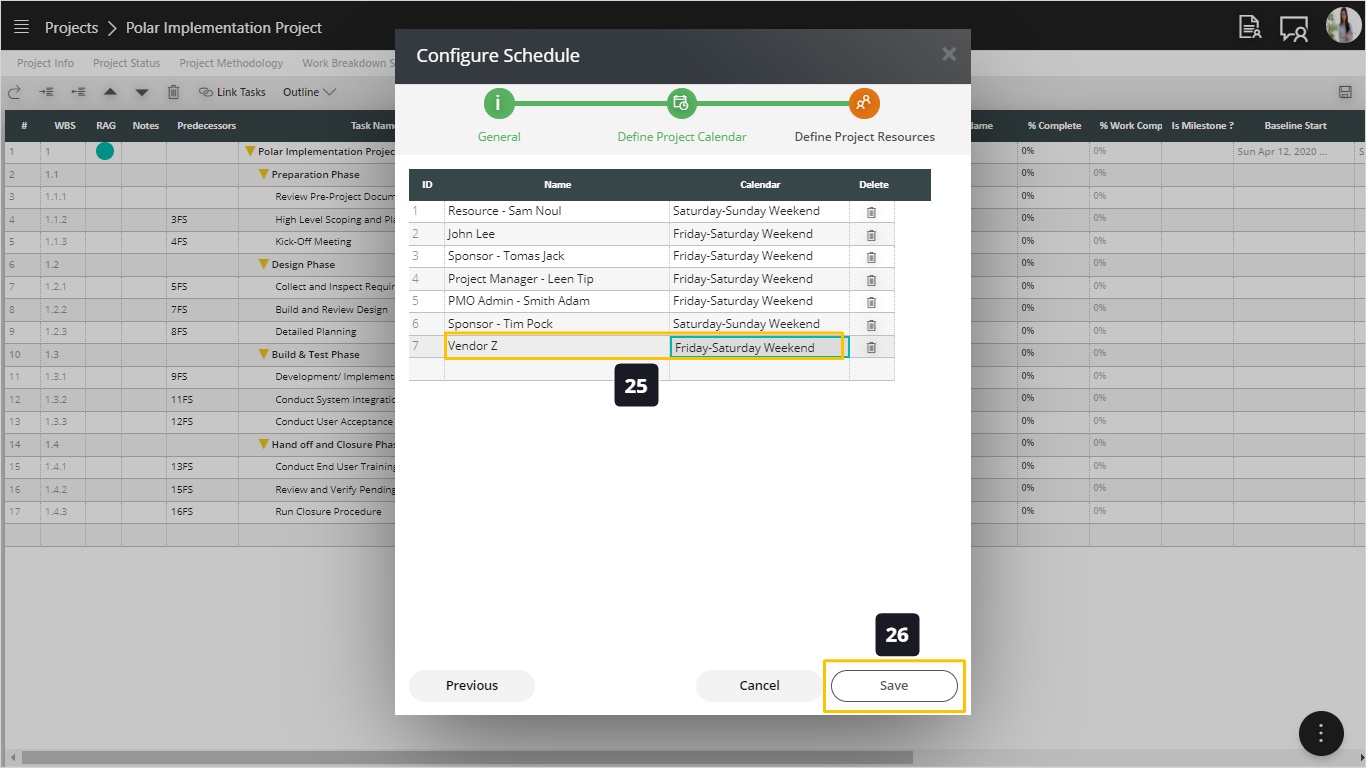
- Double-click to see the list of all resources defined for this project.
- Observe the list of project resources available. Select one or more resources to be assigned on the task as needed.
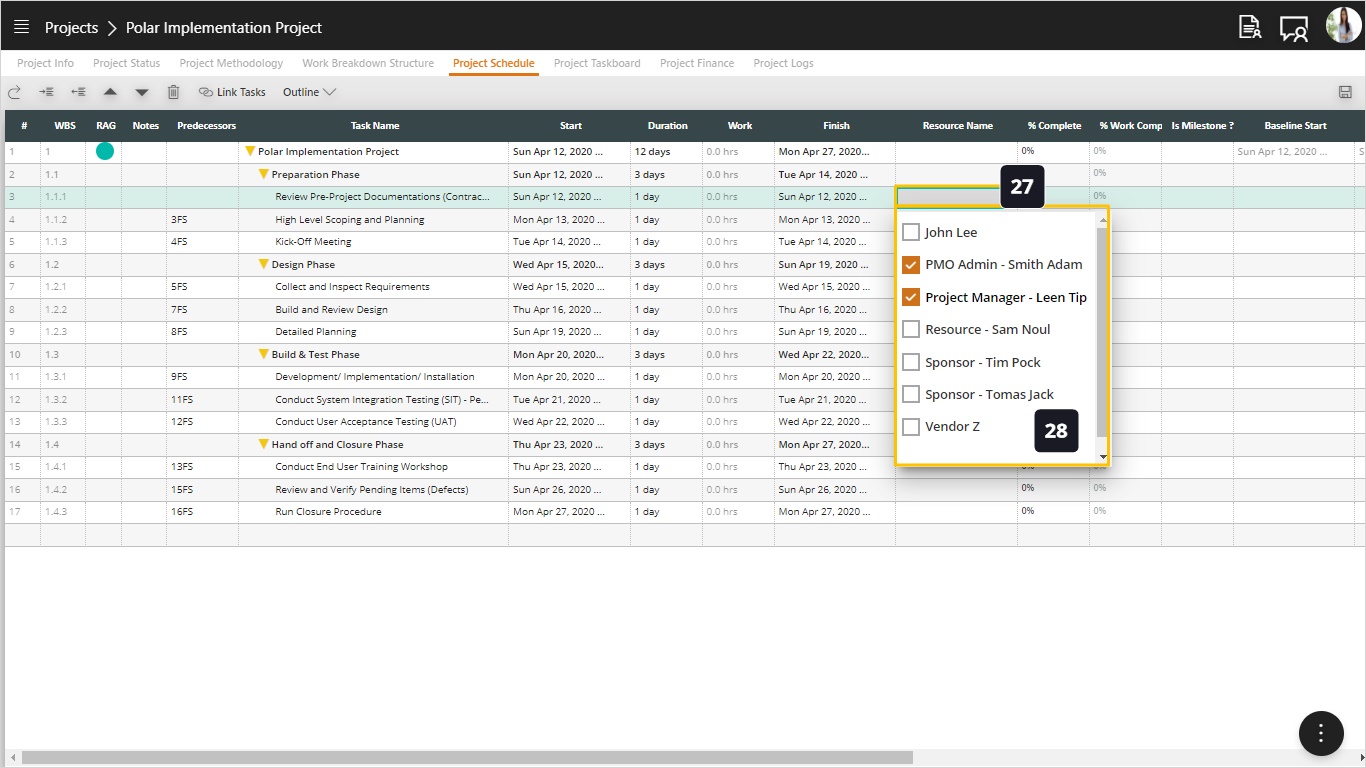
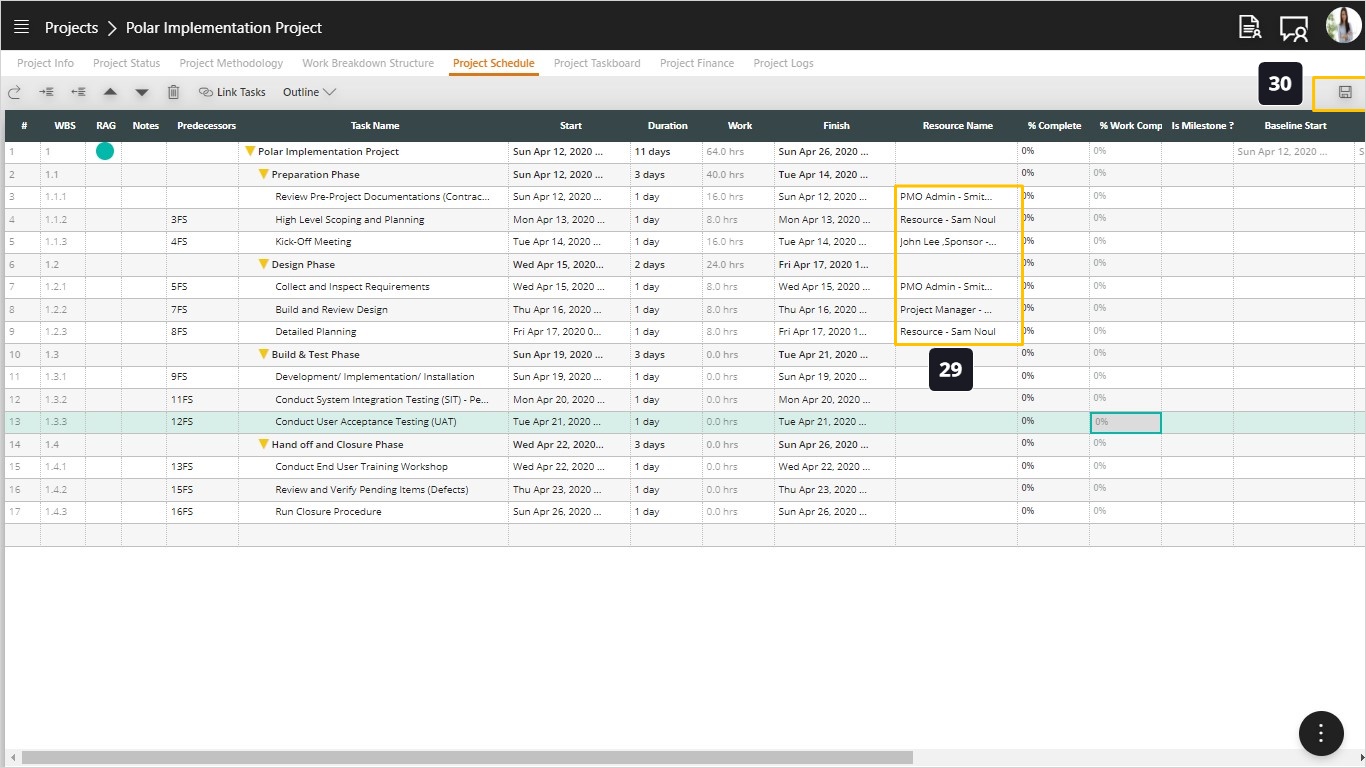
- Notice the selected resources for the tasks. Notice how we converted the role names to actual resources on the project.
- Save your schedule with latest changes.
