Project Schedule - Add-Edit-Delete Task & Resource
Steps:
- To add a new task, select or highlight the row to add a task before.
- Click the Insert Task icon or use Control-Plus shortcut.

- Notice that a new task is added. The default name is “New Task”.
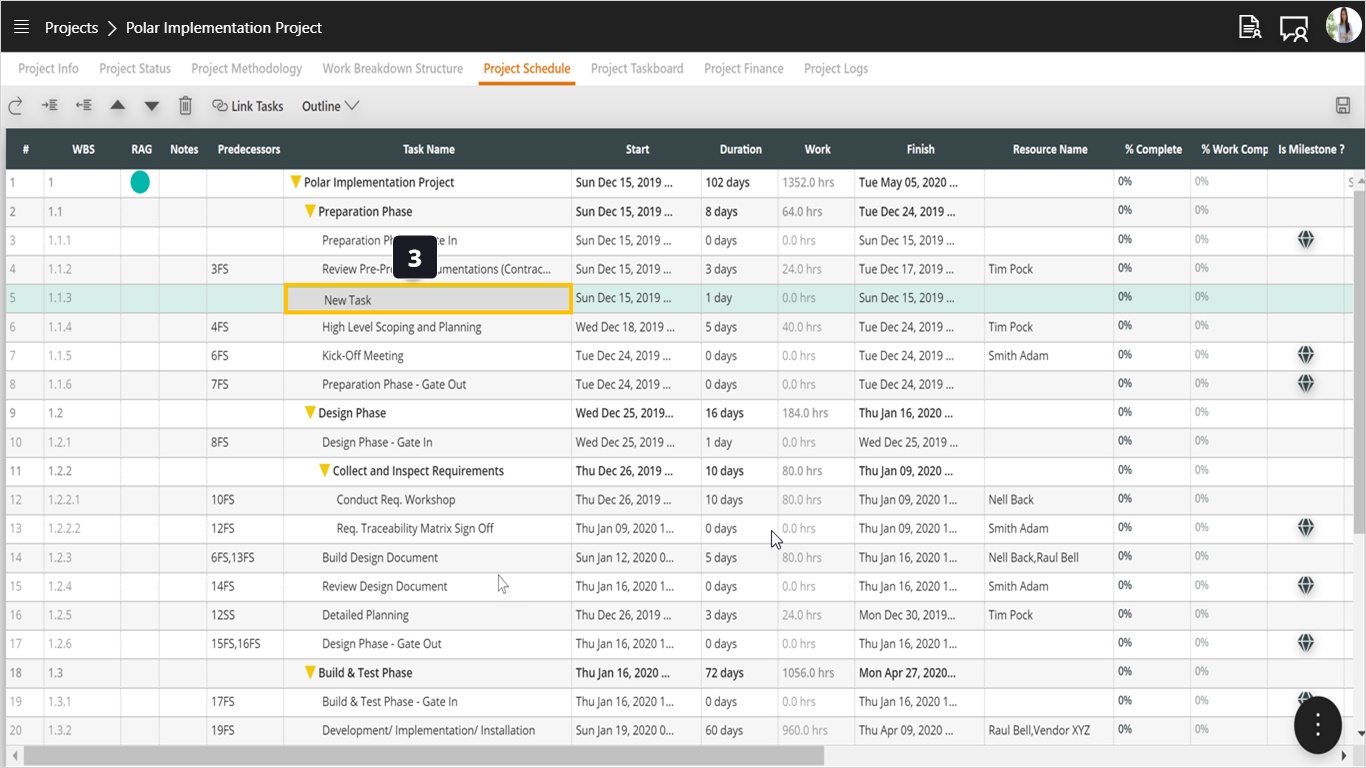
- To rename this task, either double-click or press Enter and edit the task name.
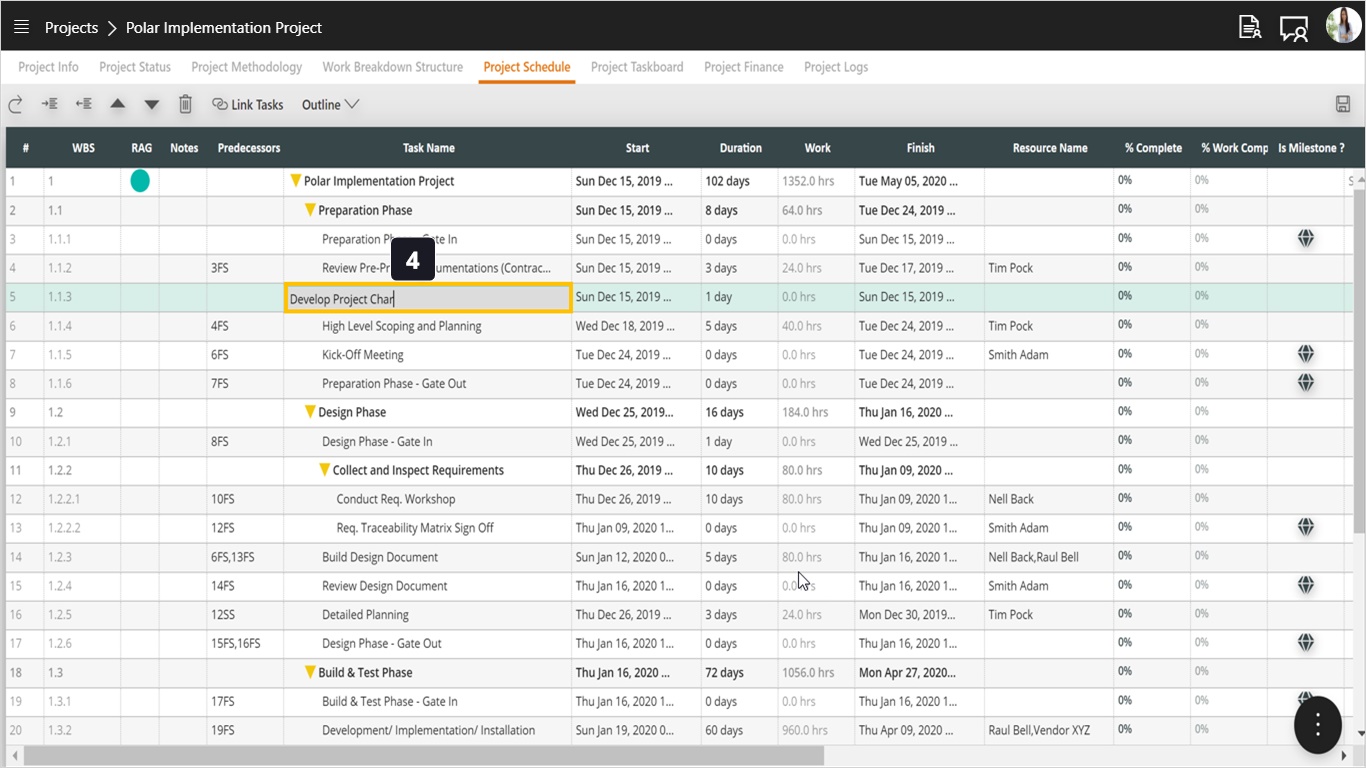
- To add a note to the task, double-click and start typing.
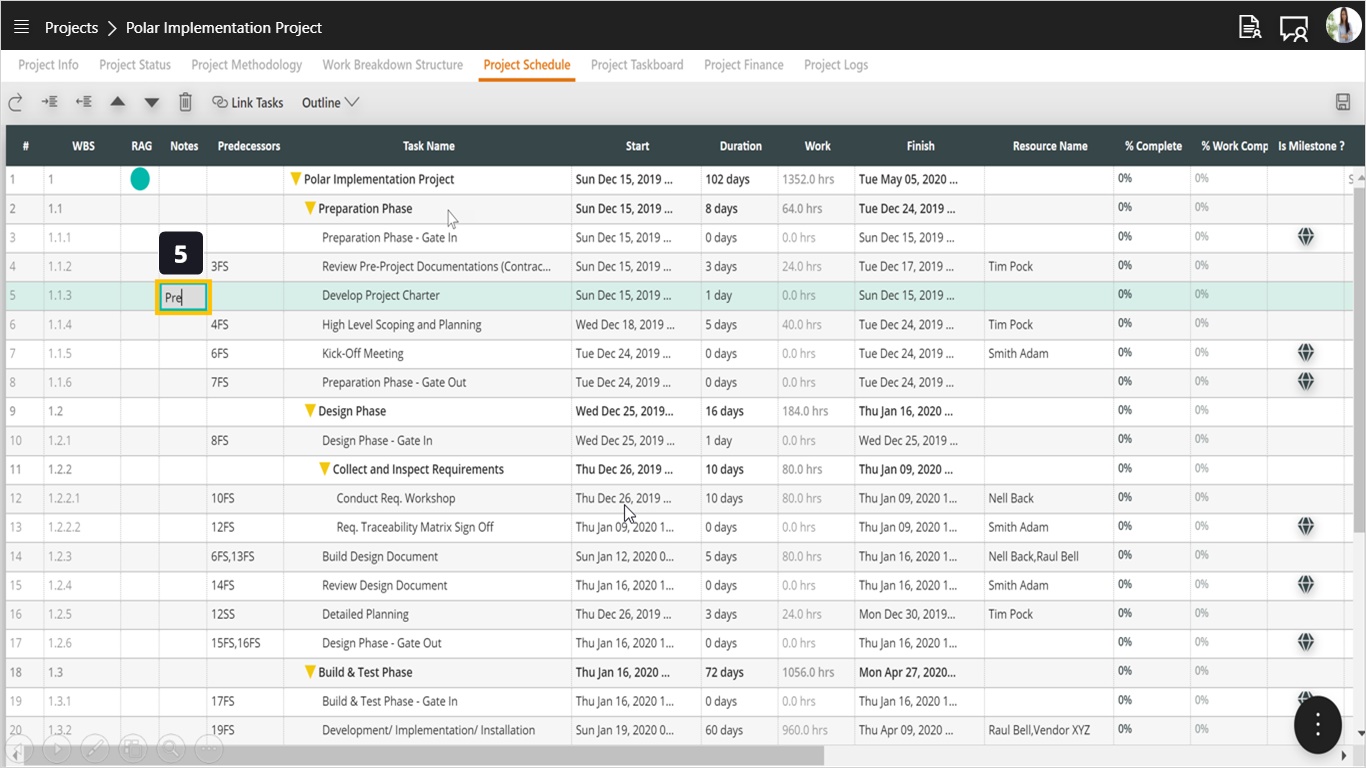
- Notice that tasks which have notes will be marked with a special icon.
- Define the predecessor(s) for this task by double-clicking and defining the predecessors. You can define the task ID only and in this case the relation will be assumed to be Finish-to-Start (FS).
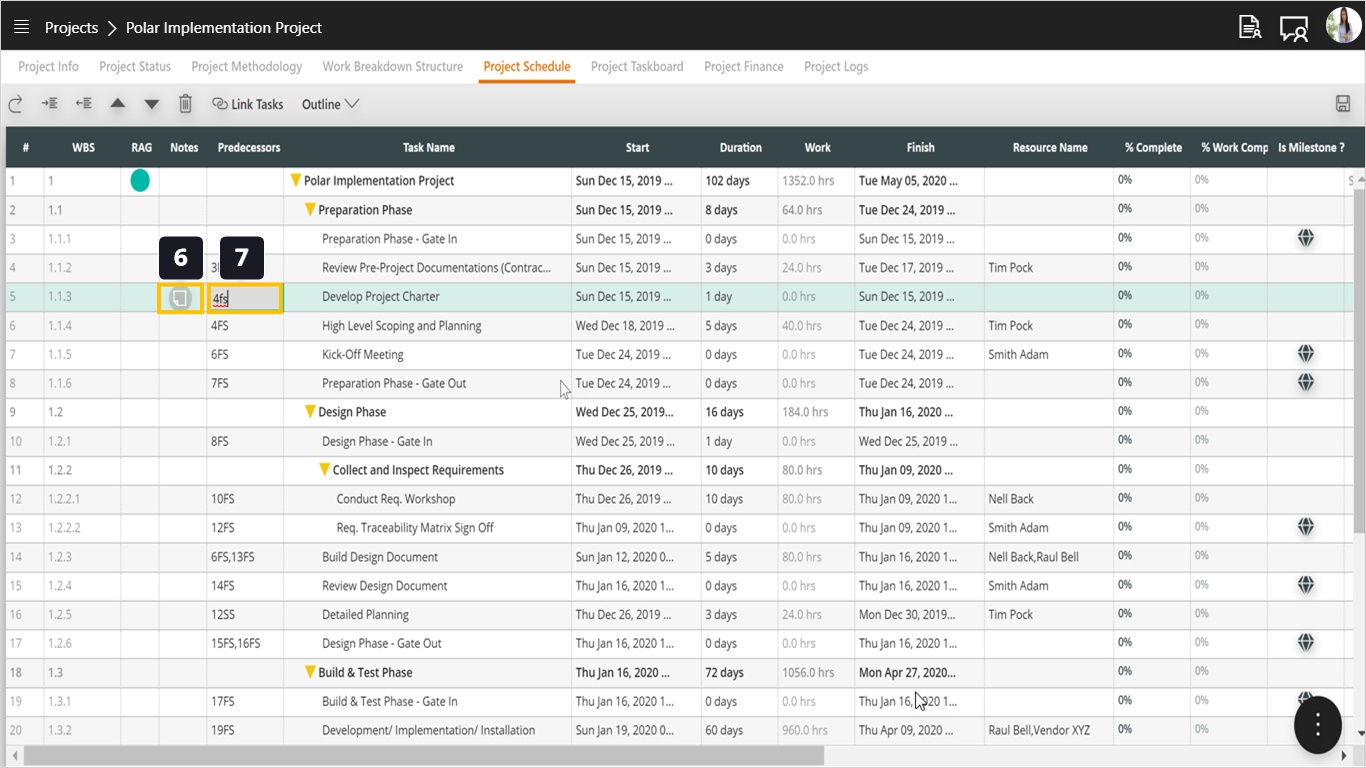
- Double-click to rename the task if needed.
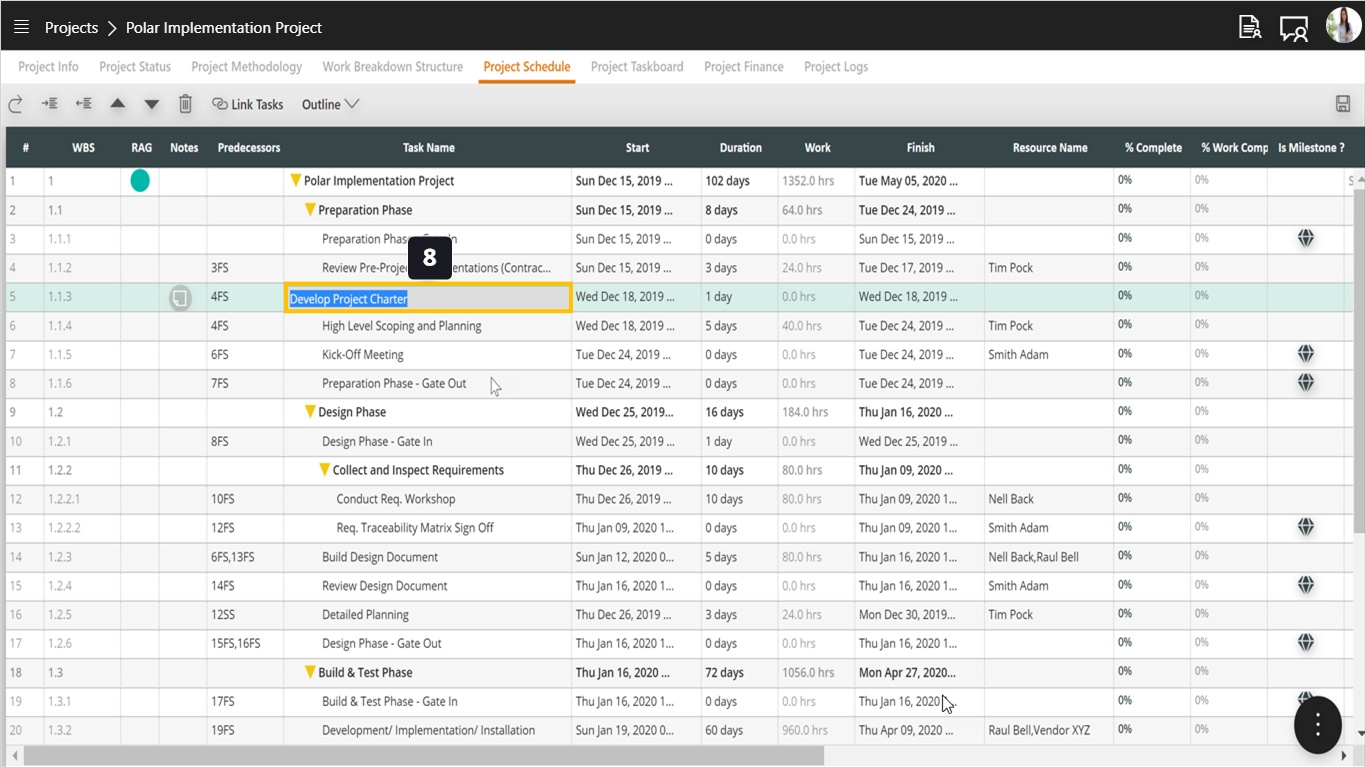
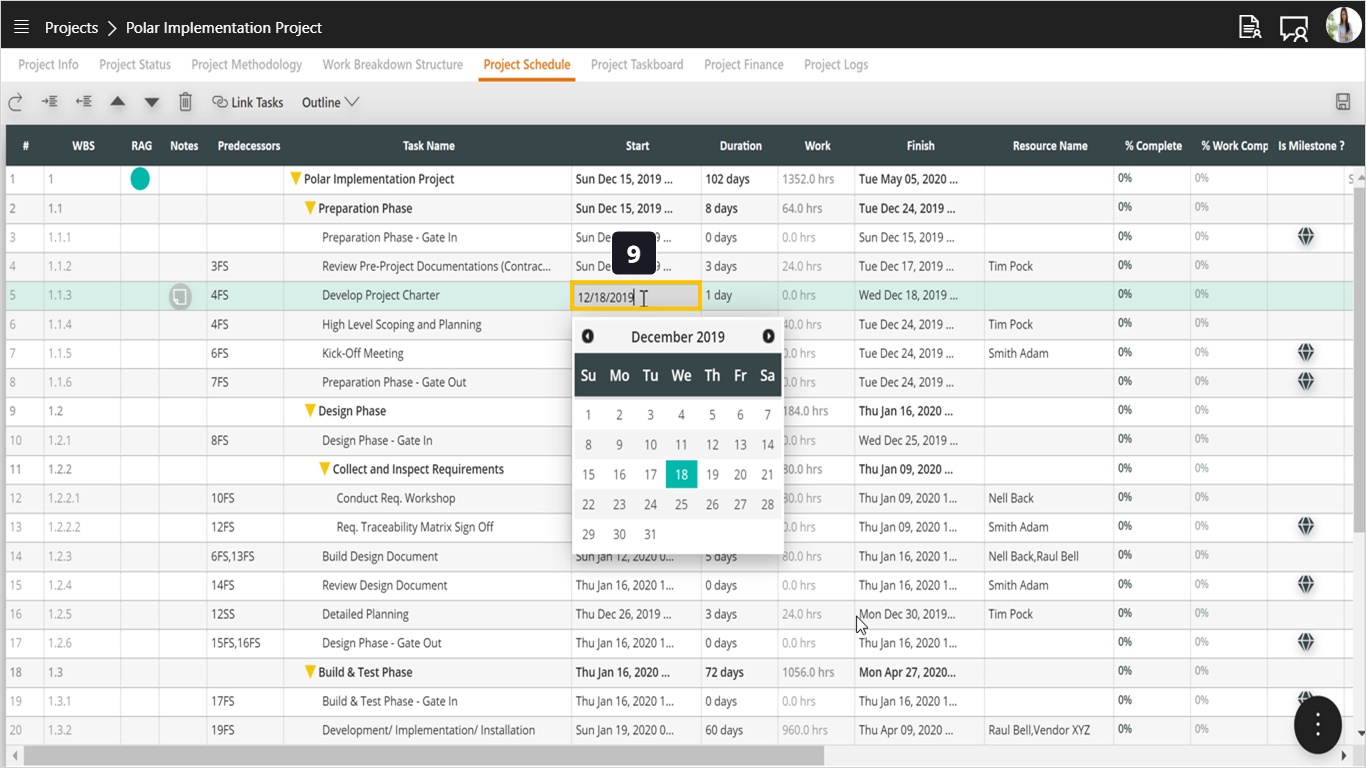
- Notice that by default, the start date is set based on the predecessor and relation selected. However, you can override this date by double-clicking the start date field and selecting a date from the calendar.
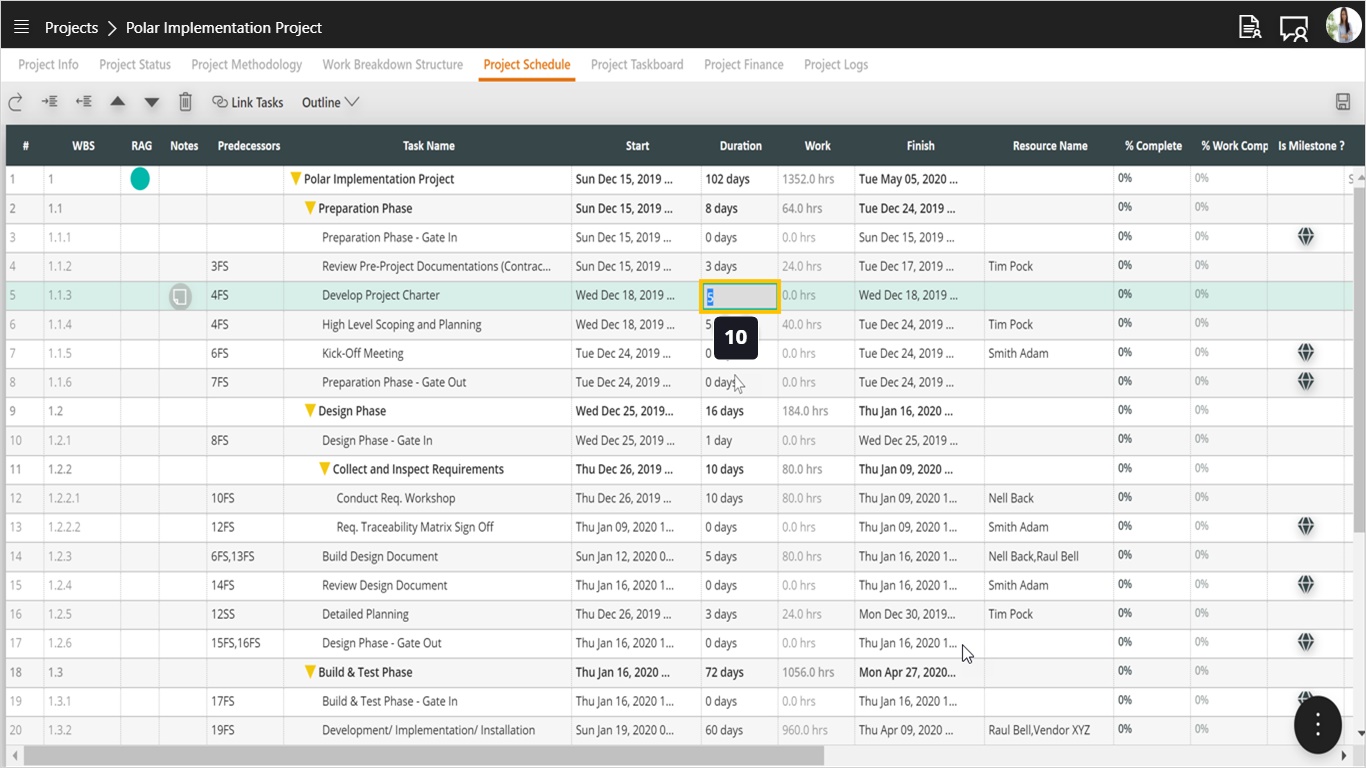
- Double-click or press enter in the duration field to specify your duration in days.
- Notice that the work field is disabled and is calculated based on the following equation:
Work = Duration * 8 hours * (No. of Resources * Percentage of Allocation)
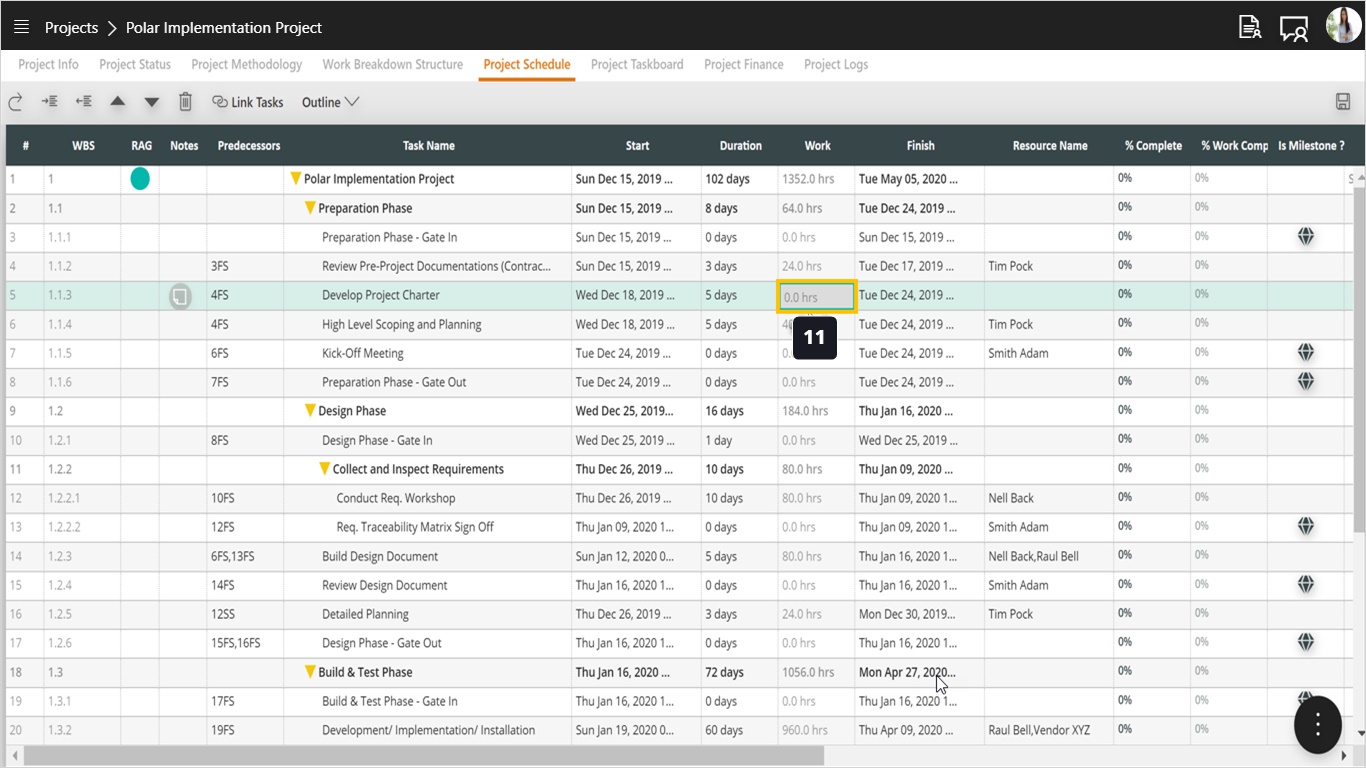
- Finish date is automatically calculated but you can manually override it and it will impact the duration value.
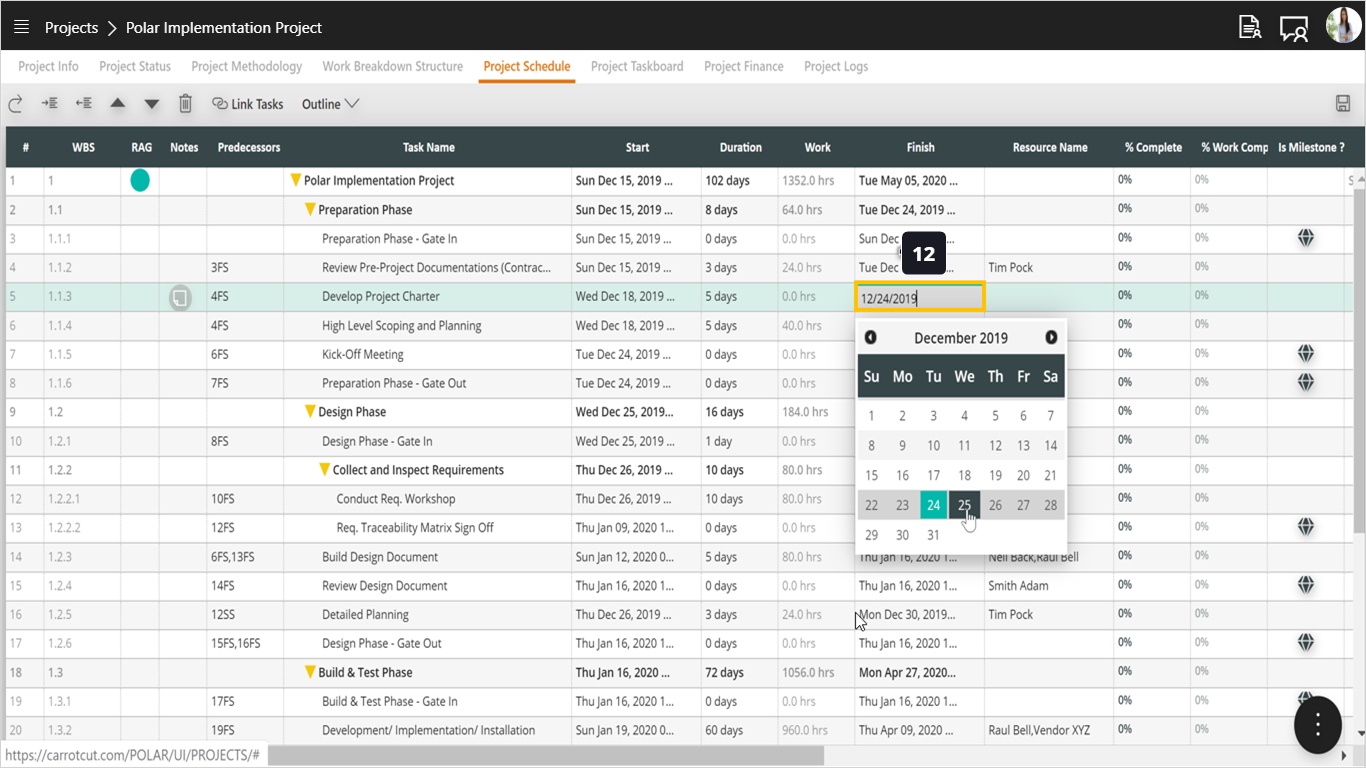
- To select resources for this task, double-click in the field to open the drop-down list of resources.
- Mark one or more resources to select.
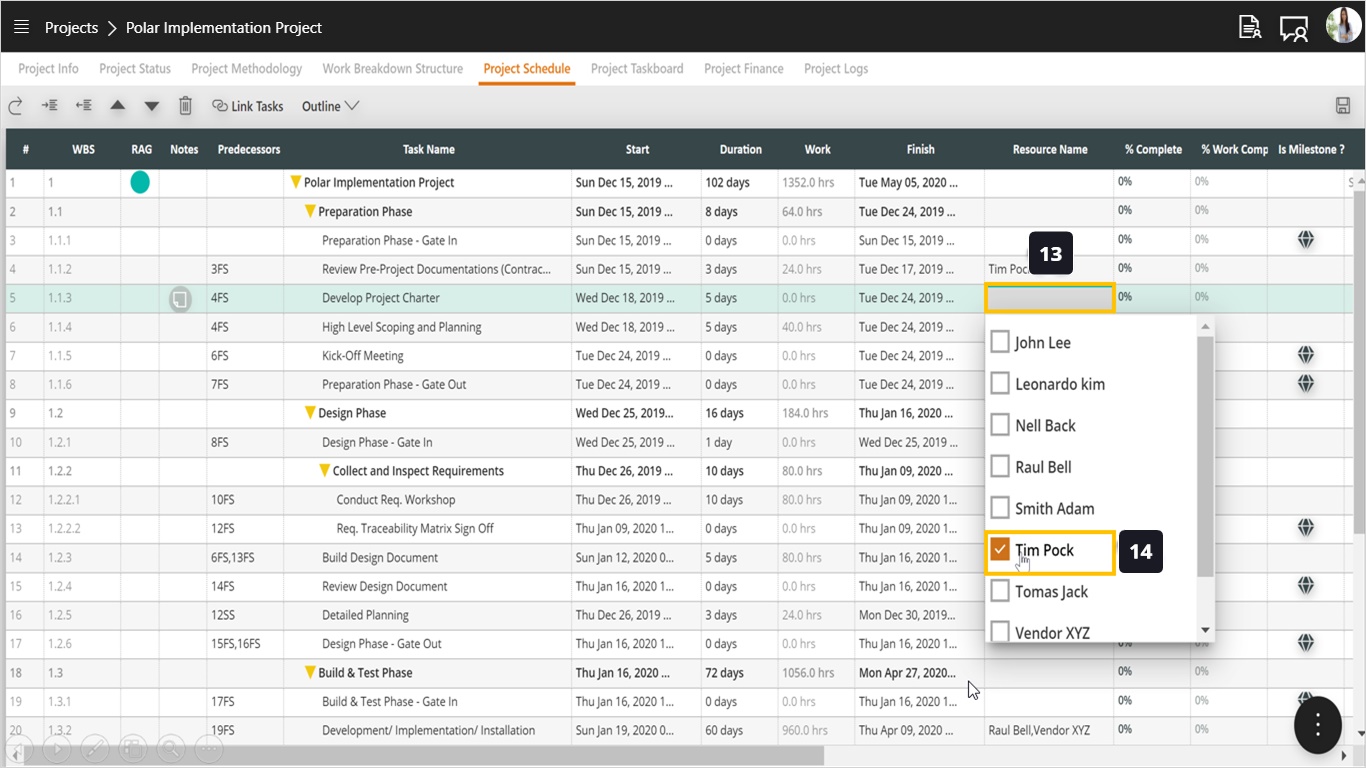
- Percentage of Completion, you can either edit this field manually or leave it to update automatically as your resources move their tasks to Doing or Done in the taskboard and follow the progress rules we defined before.
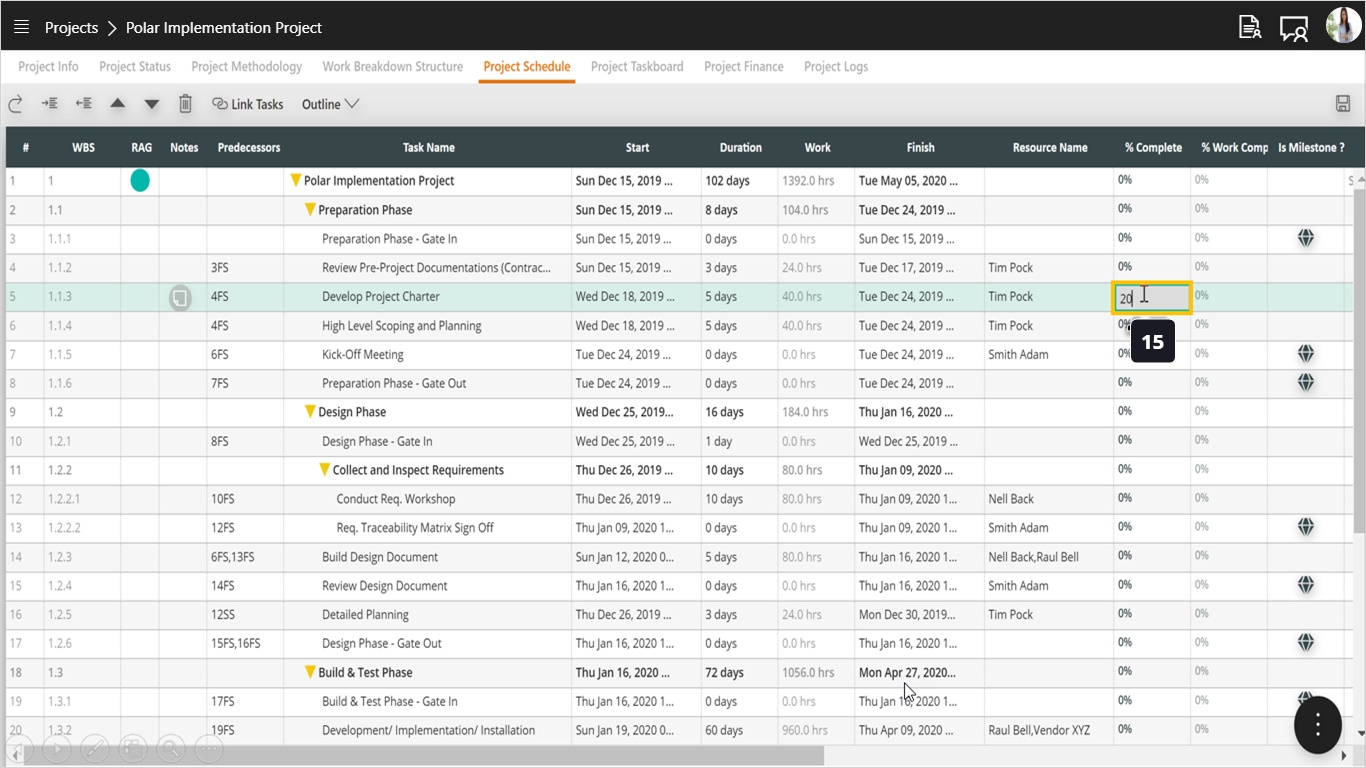
- Notice that once a % Complete is specified to anything between more than zero and less than 100%, the start date and predecessor fields are now disabled because this task is considered to be started.
- Notice that the % Work Complete is also disabled and automatically calculated based on the work. This would be zero if no resources are assigned to this task.
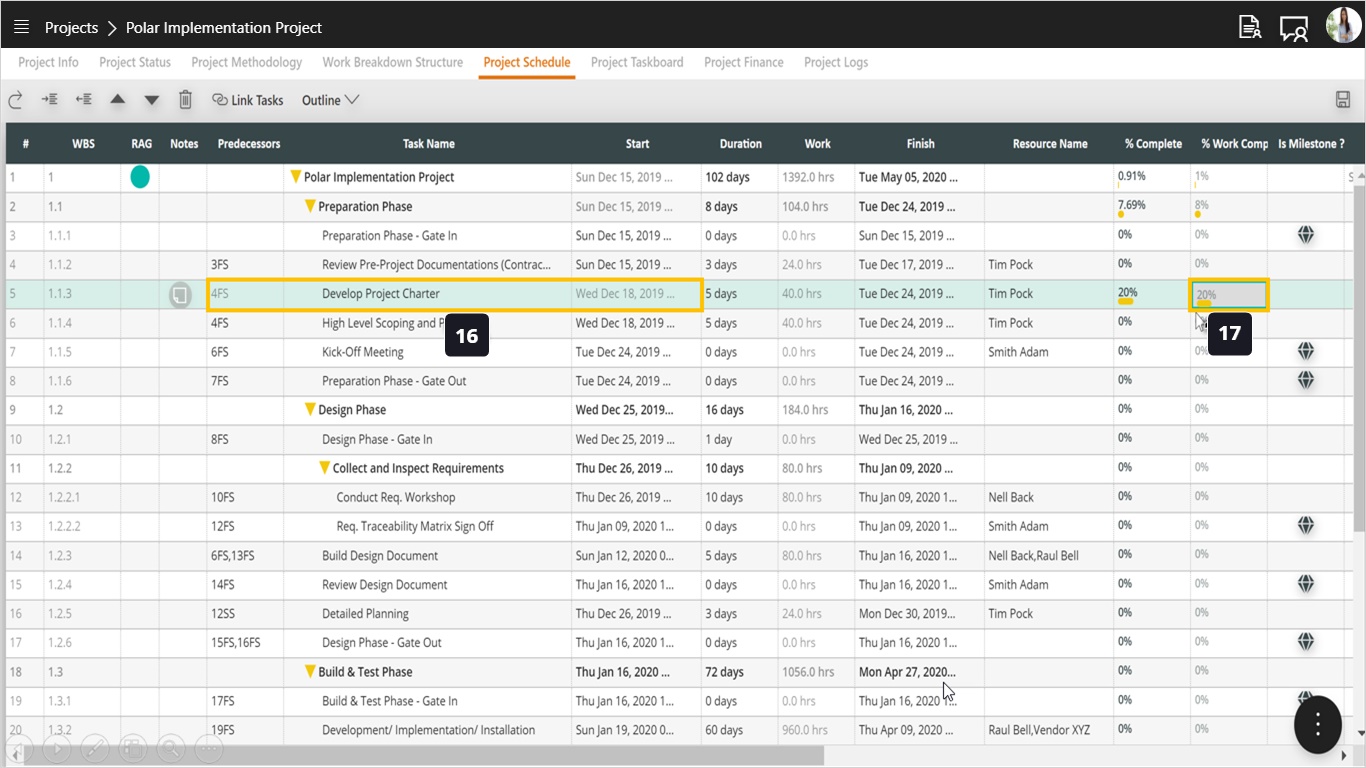
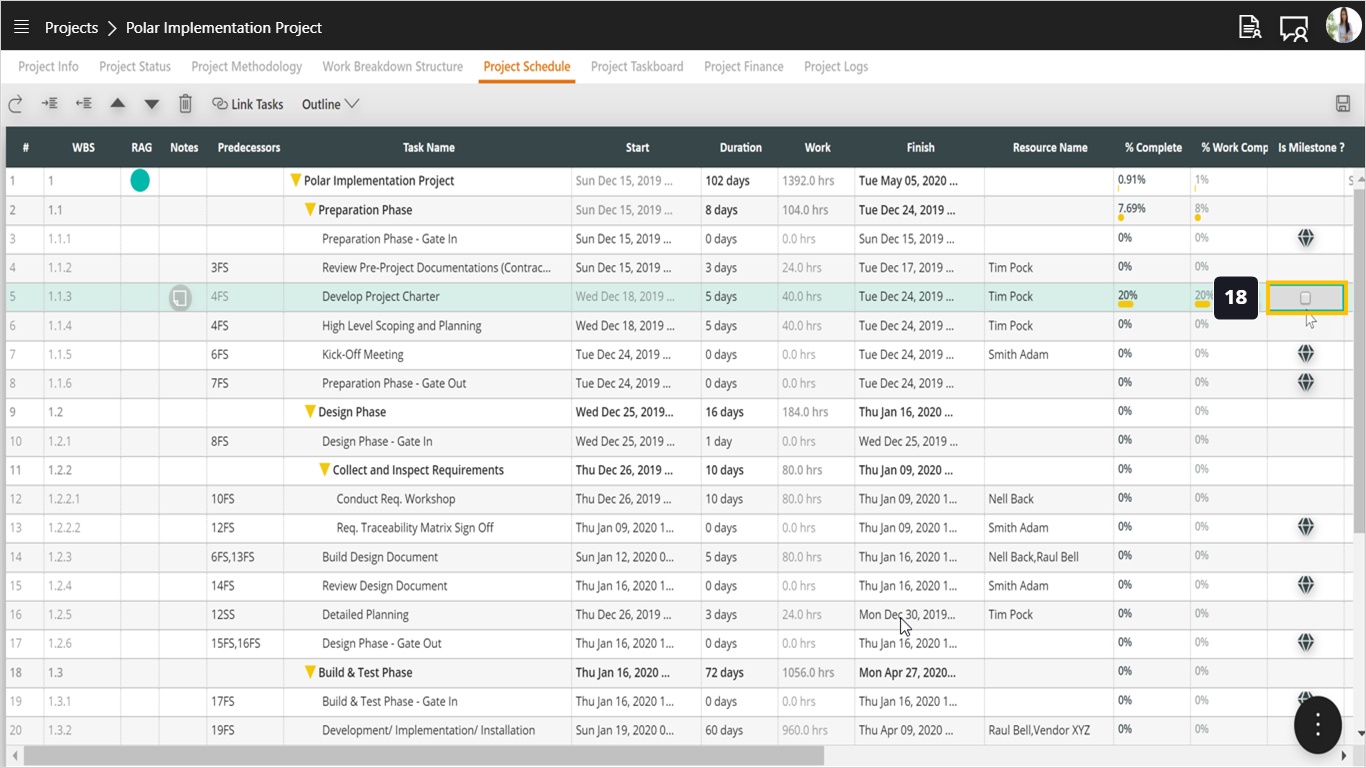
- Is Milestone, you can double click this field to set it as milestone, however any task with zero duration will be automatically set as milestone.
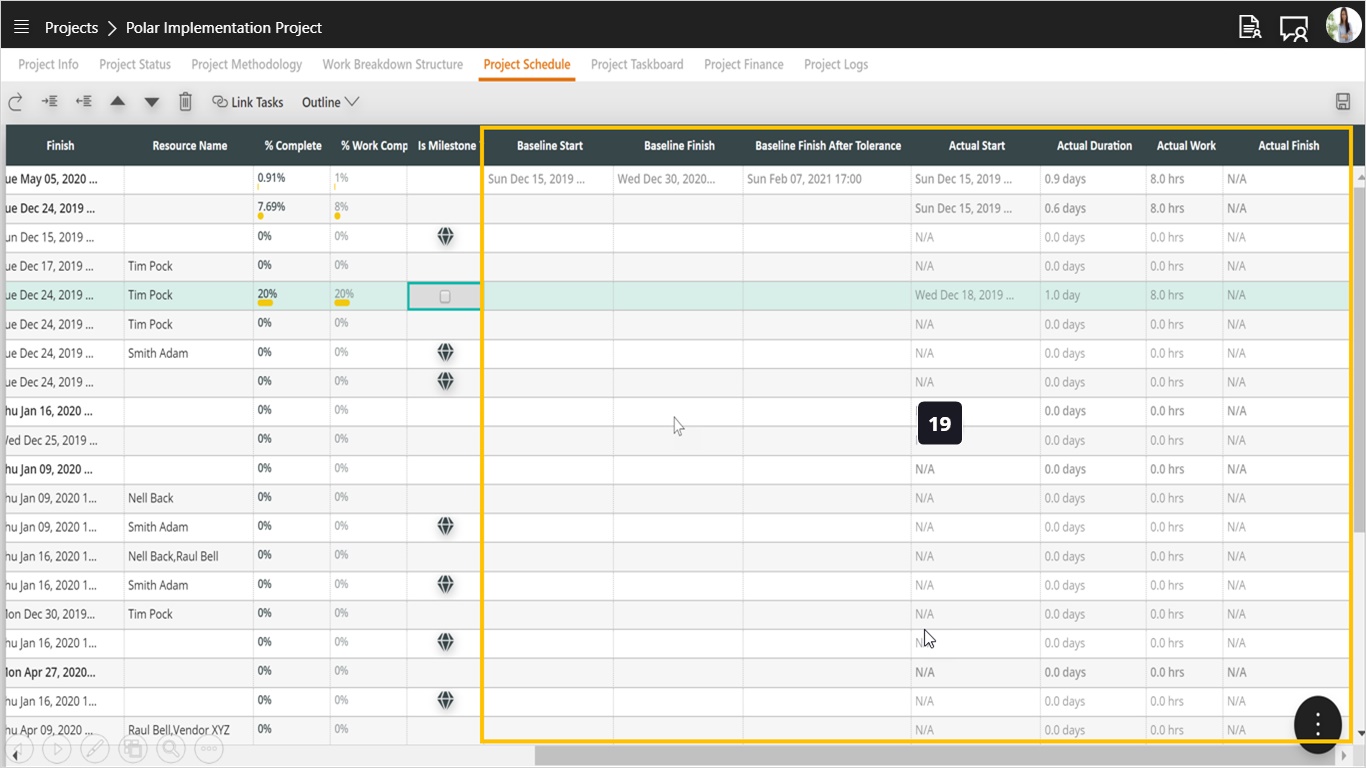
- Notice that set of actual fields and baseline fields are disabled.
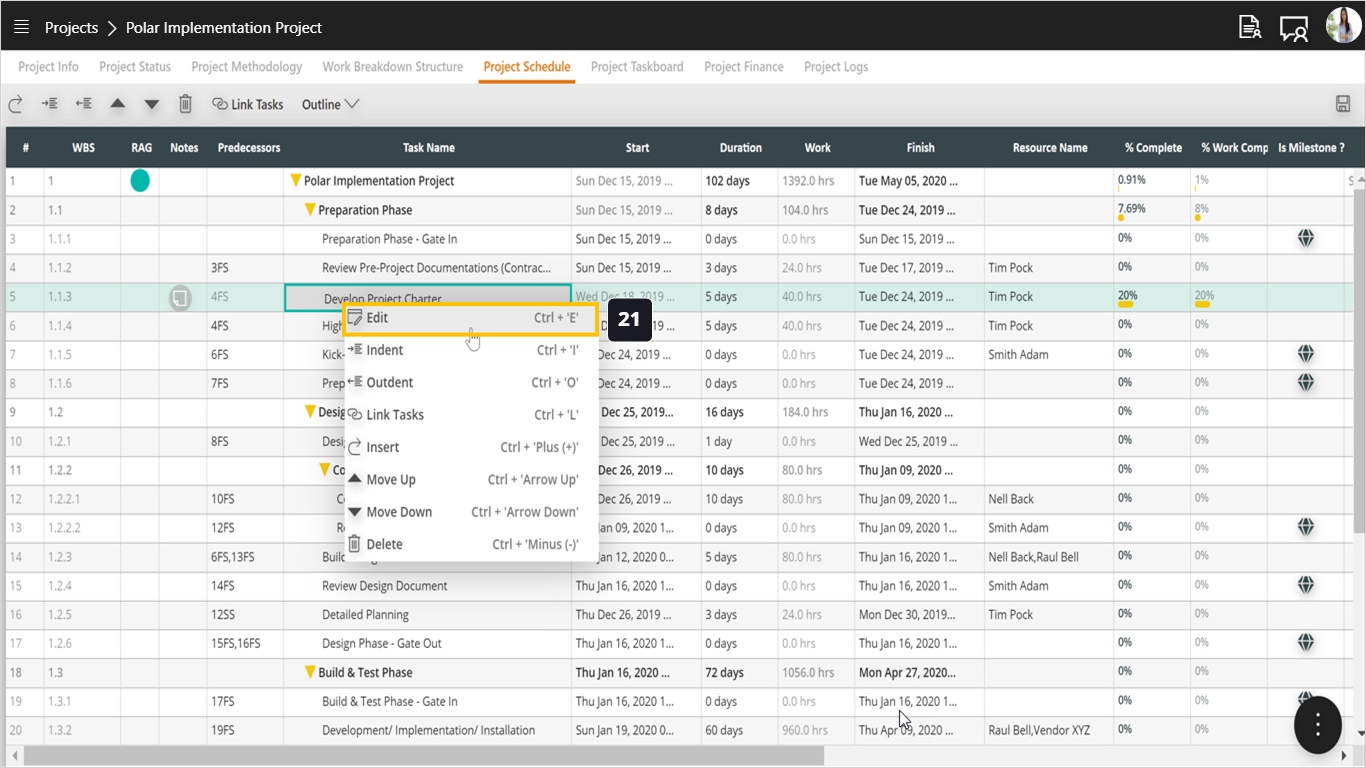
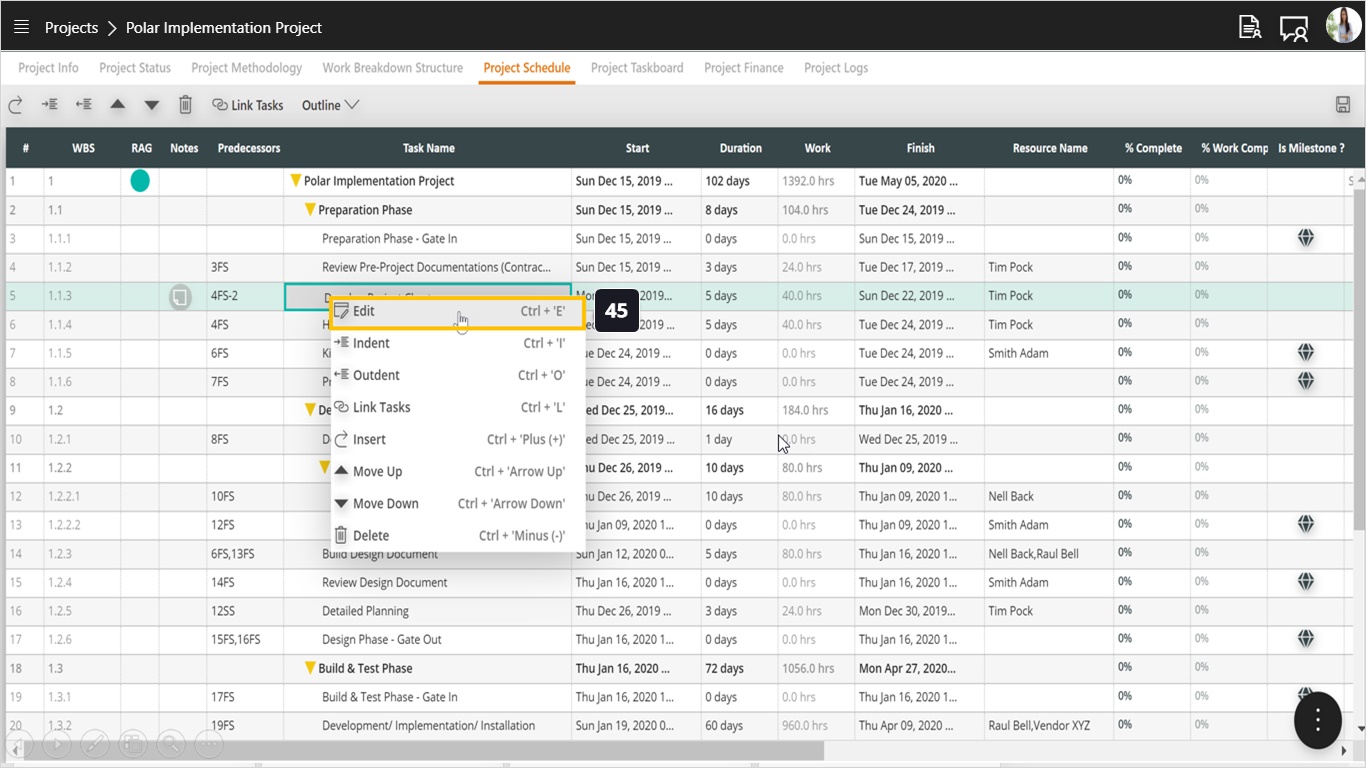
- To use any of the features on the schedule, you can use right-click to pull down the menu.
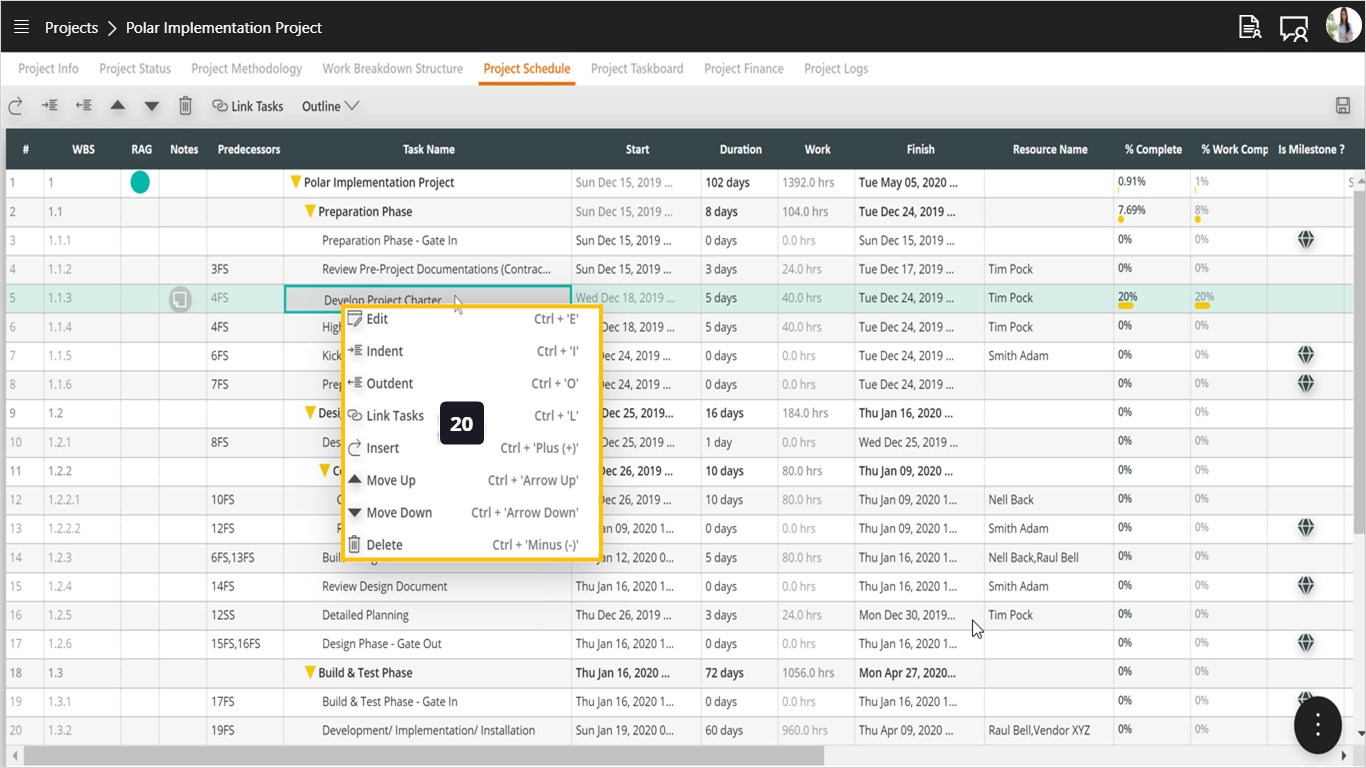
- To edit any task, use the Edit option or press Control-E.
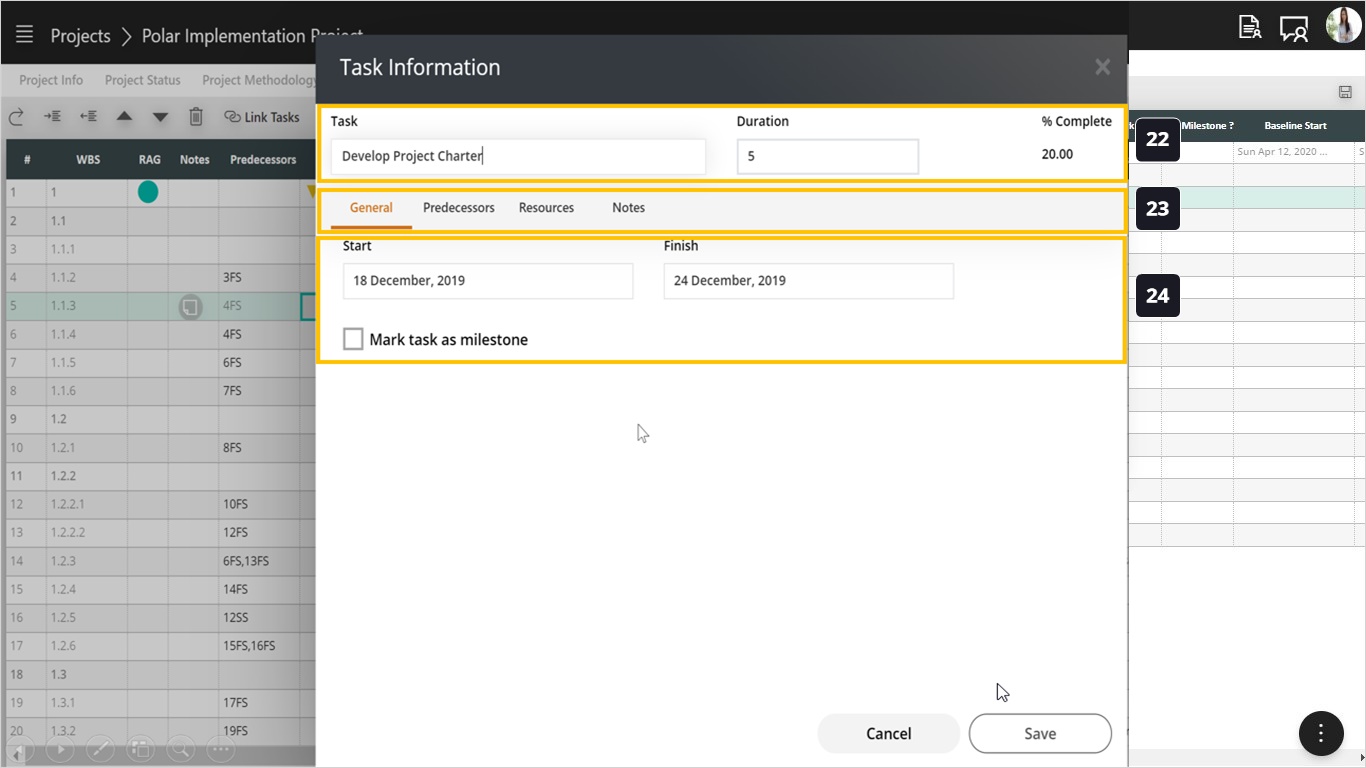
- On the header line we can find the task name, duration, and % complete.
- The task details include several tabs and by default the General tab will be presented.
- In the General tab we can define the start date, finish date and mark this task as milestone if you like.
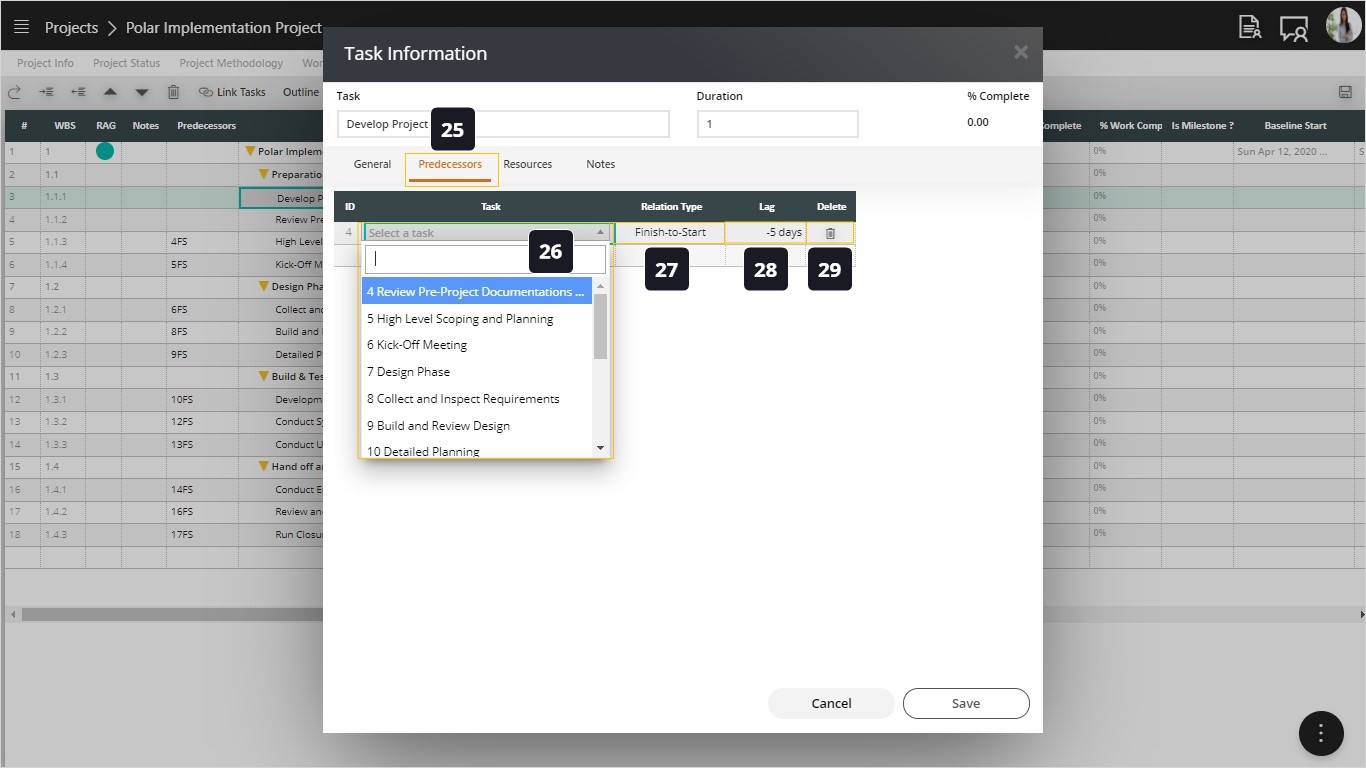
- Click the Predecessors tab.
- Double-click to open the drop-down list of all tasks in this project. Select the desired task.
- In the Relation Type select one of the relation types (FS, SS, FF).
- Define lead or lag time. This field takes positive and negative values. Use a negative value to define lead time. For example, FS-5 means to start this task 5 days before the predecessor tasks finishes (overlapping). Use a positive number to specify lag time. For example, FS+3 means to start this task 3 days after the finish date of the predecessor task (waiting time).
- Use this option to delete any predecessor.
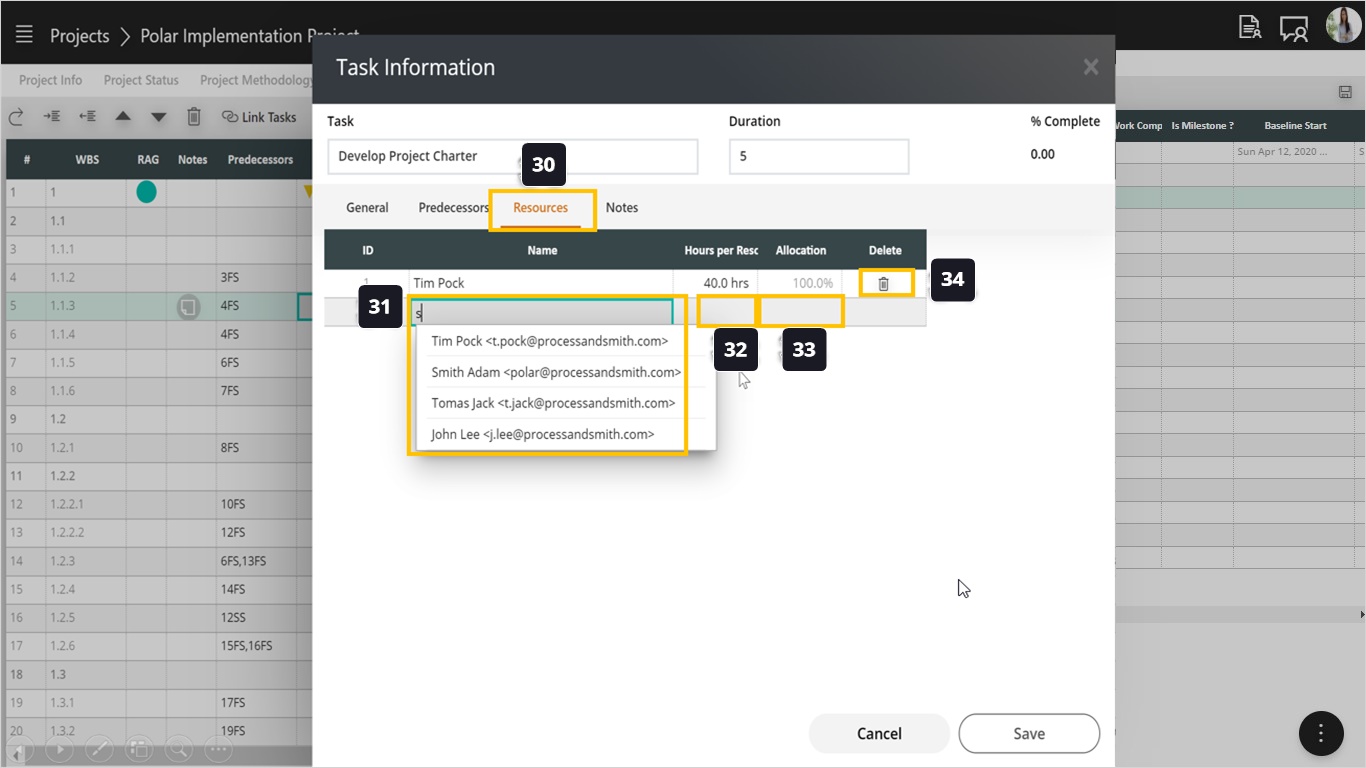
- Click the Resources tab.
- Double-click the field and use type-ahead to find and select your resources from the project’s resource sheet.
- Specify how many hours will this resource work on the task. For example, a task with 5 days duration but the resource will work on it 2 hours a day. The allocation percentage will be 25% (2 hours per day for the resource allocated hours * 5 days / 8 hours per day which is the full allocation * 5 days).
- Allocation will be automatically calculated for you.
- Delete any resources that should not be assigned to this task.
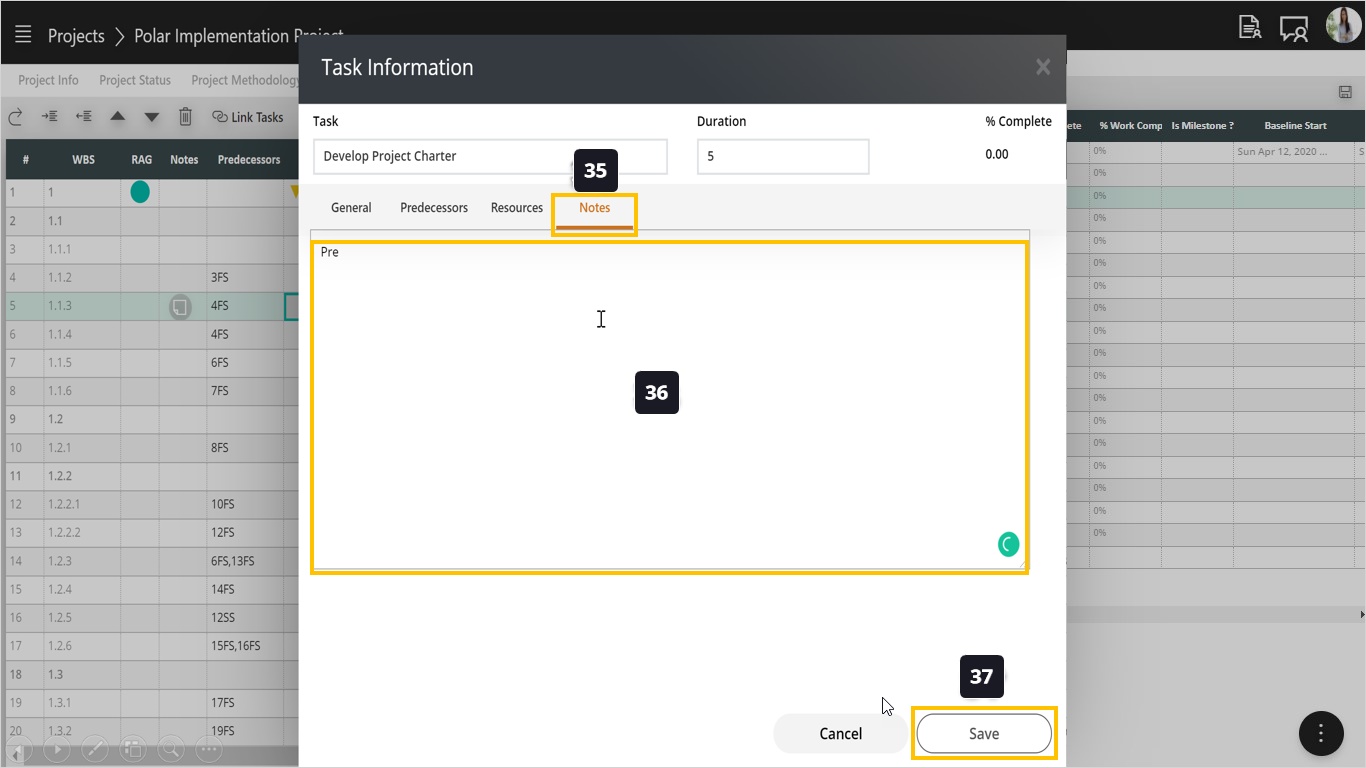
- Click on Notes.
- Edit the text to add or modify your notes.
- Save your changes to this task.
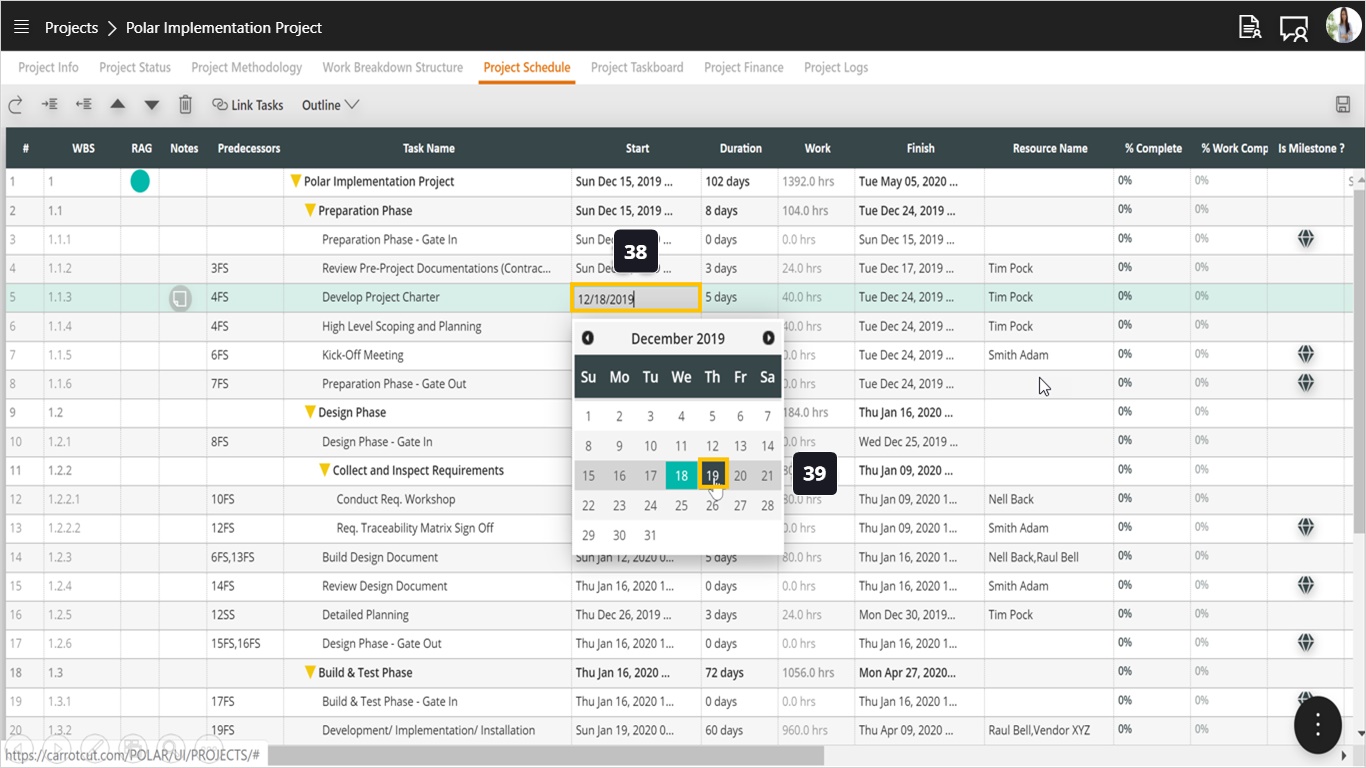
- To see how lead and lag works, let’s change the start date of a task which is 18-Dec-2019.
- From the date dialog, change the date to 19-Dec-2019.
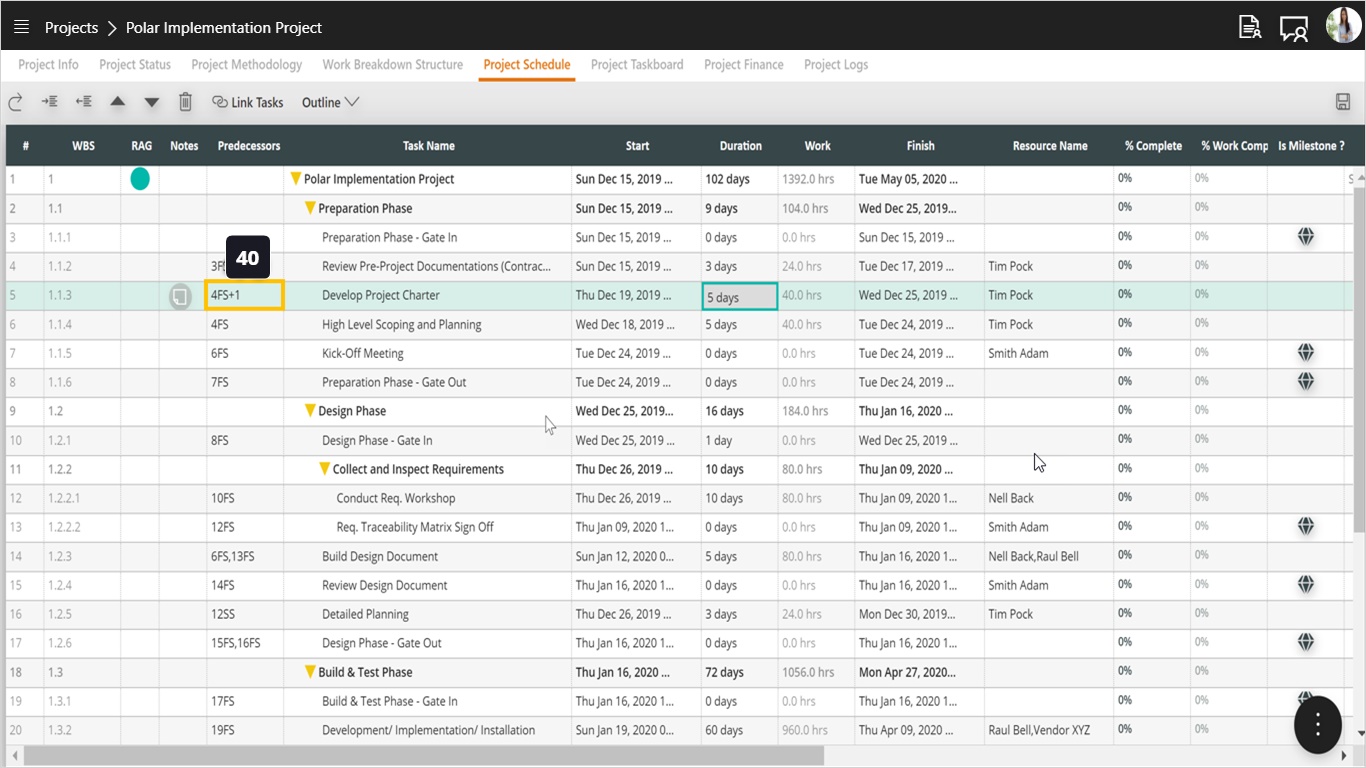
- Observe the predecessor field showing FS+1 which indicates a lag time of one day. The task start date is now 19-Dec-2019.
- Open the same calendar again.
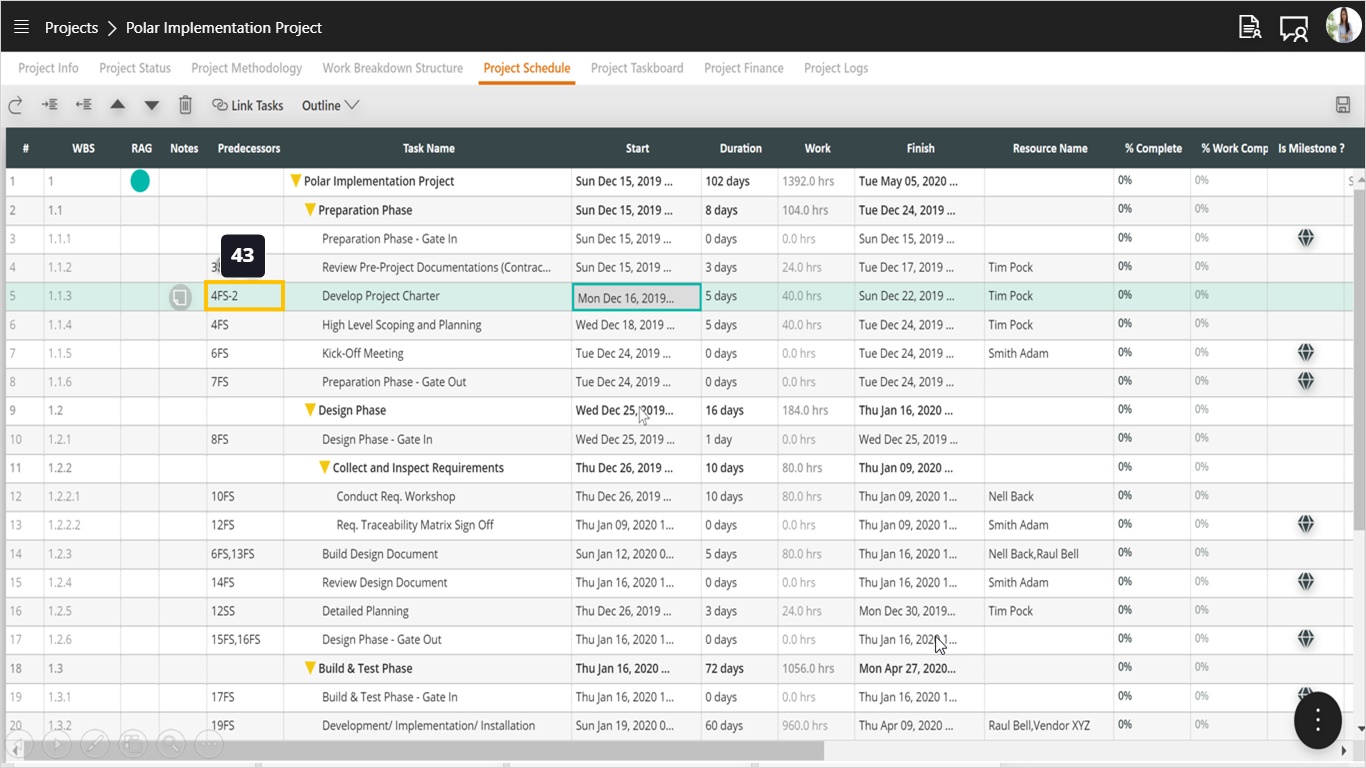
- Change the start date from 19-Dec-2019 to 16-Dec-2019 and notice the current predecessor (FS+1).
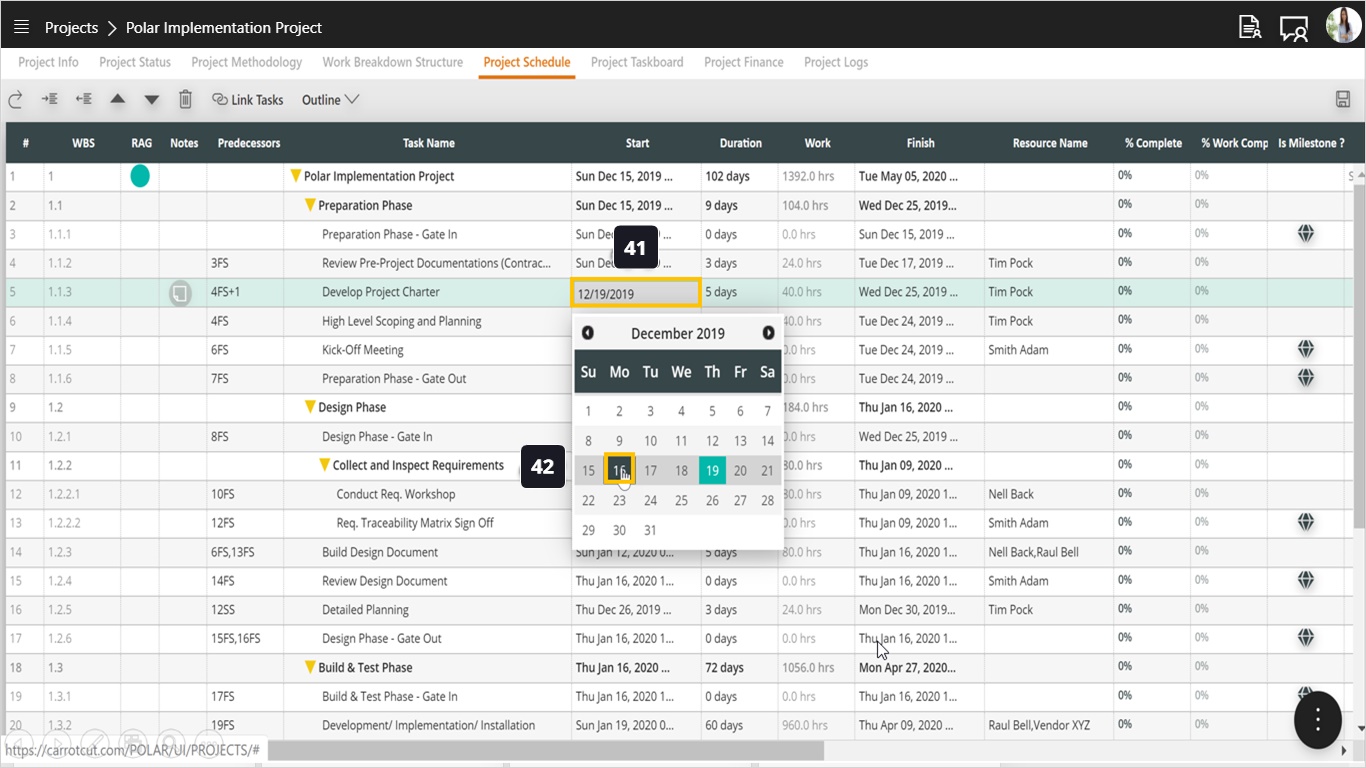
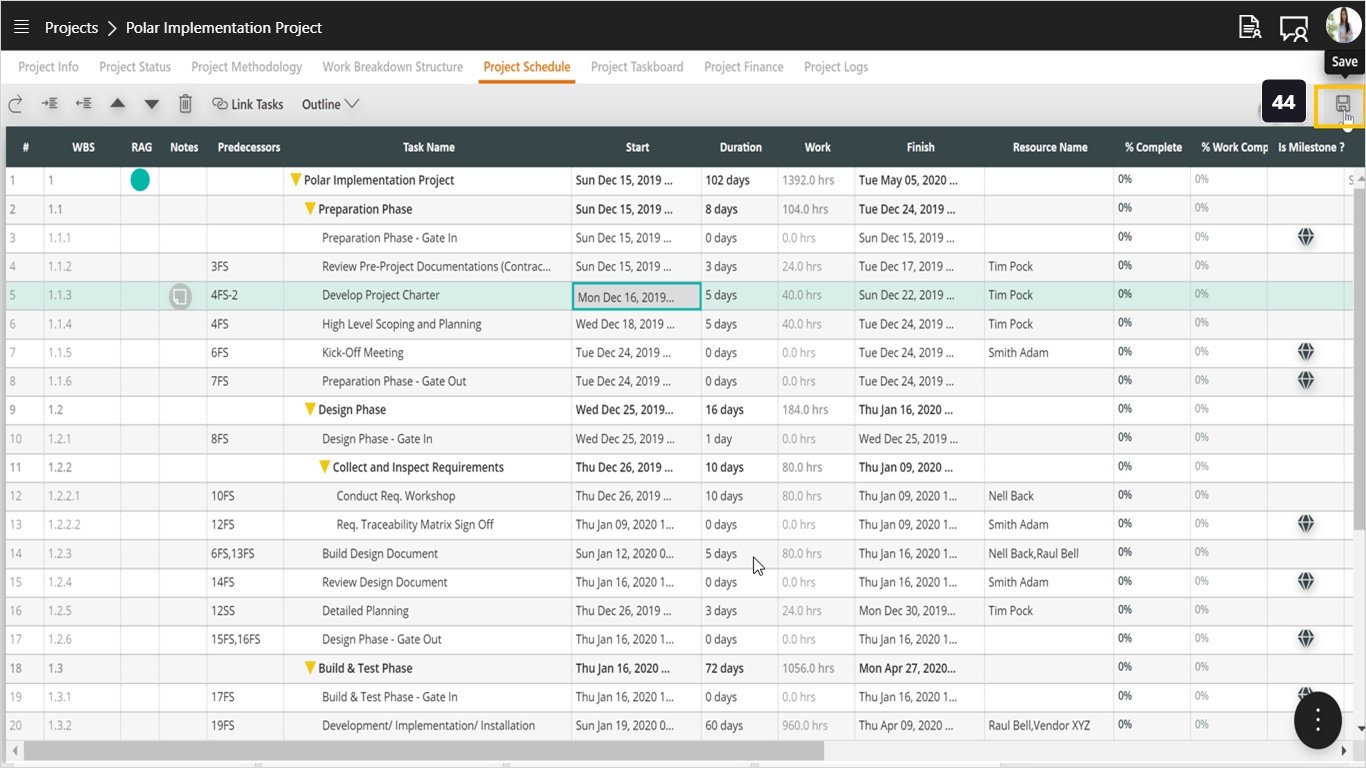
- After selecting the new date notice the new predecessor showing a lead time (FS-2) which indicates 2 days lead time.
- Save your changes.
- Right-click and edit this task.
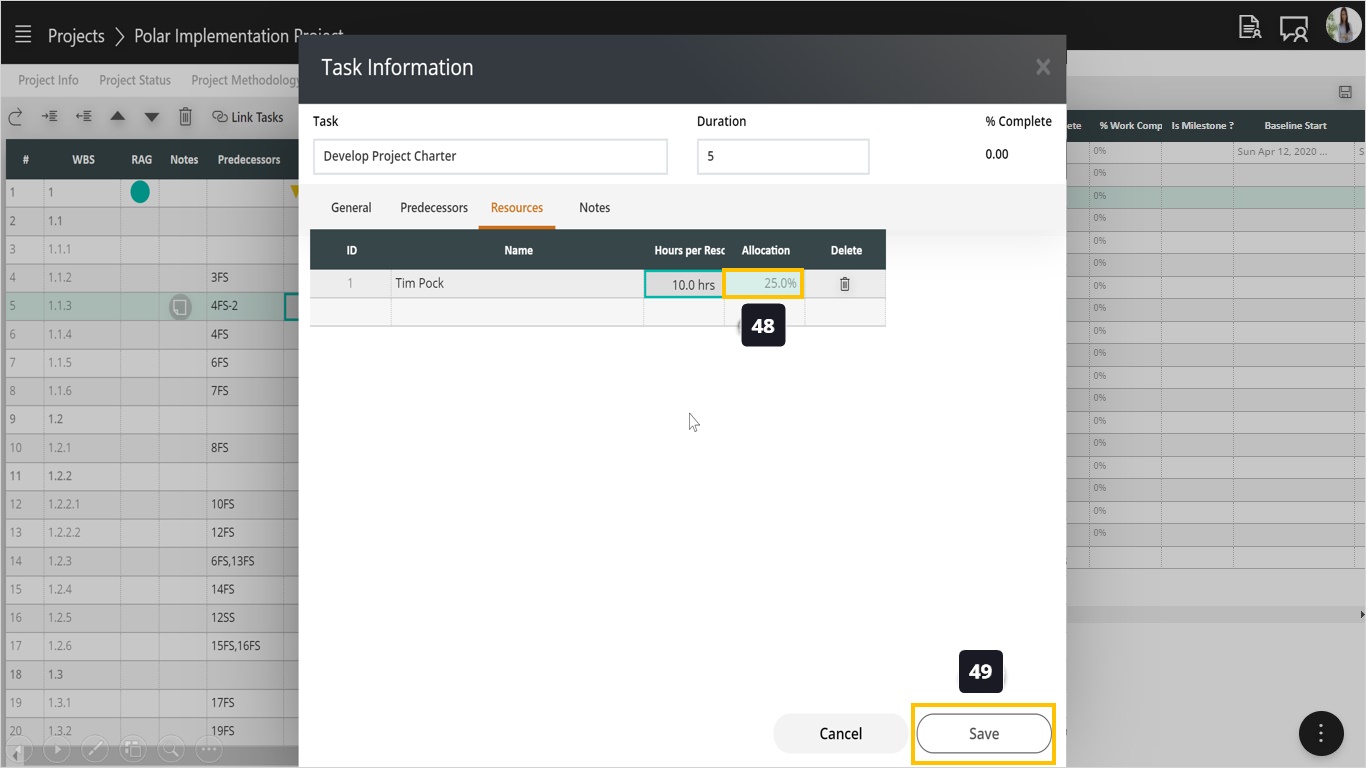
- Open the resources tab.
- Change the hours per resource.
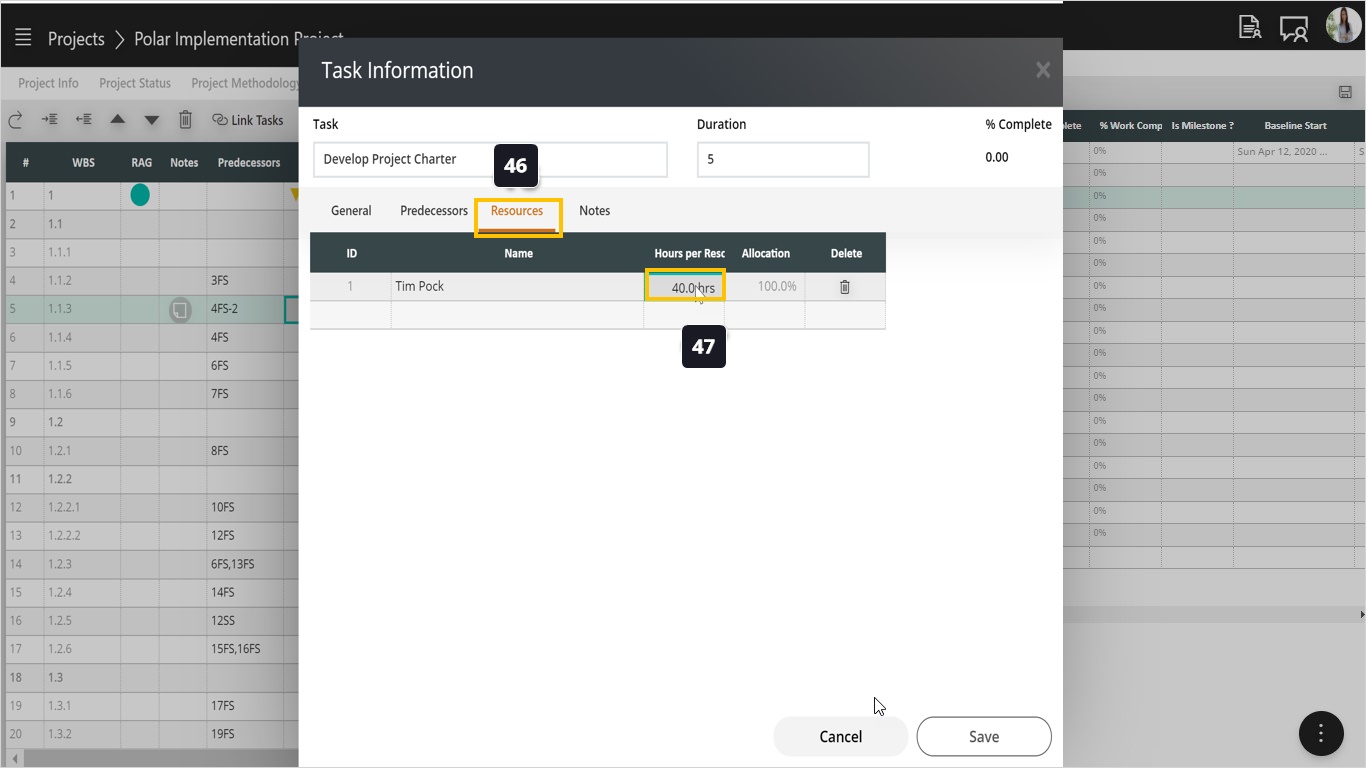
- Notice how the Allocation percentage has changed.
- Save your changes.
- Notice how the allocation percentage was added next to the resource name in square brackets.
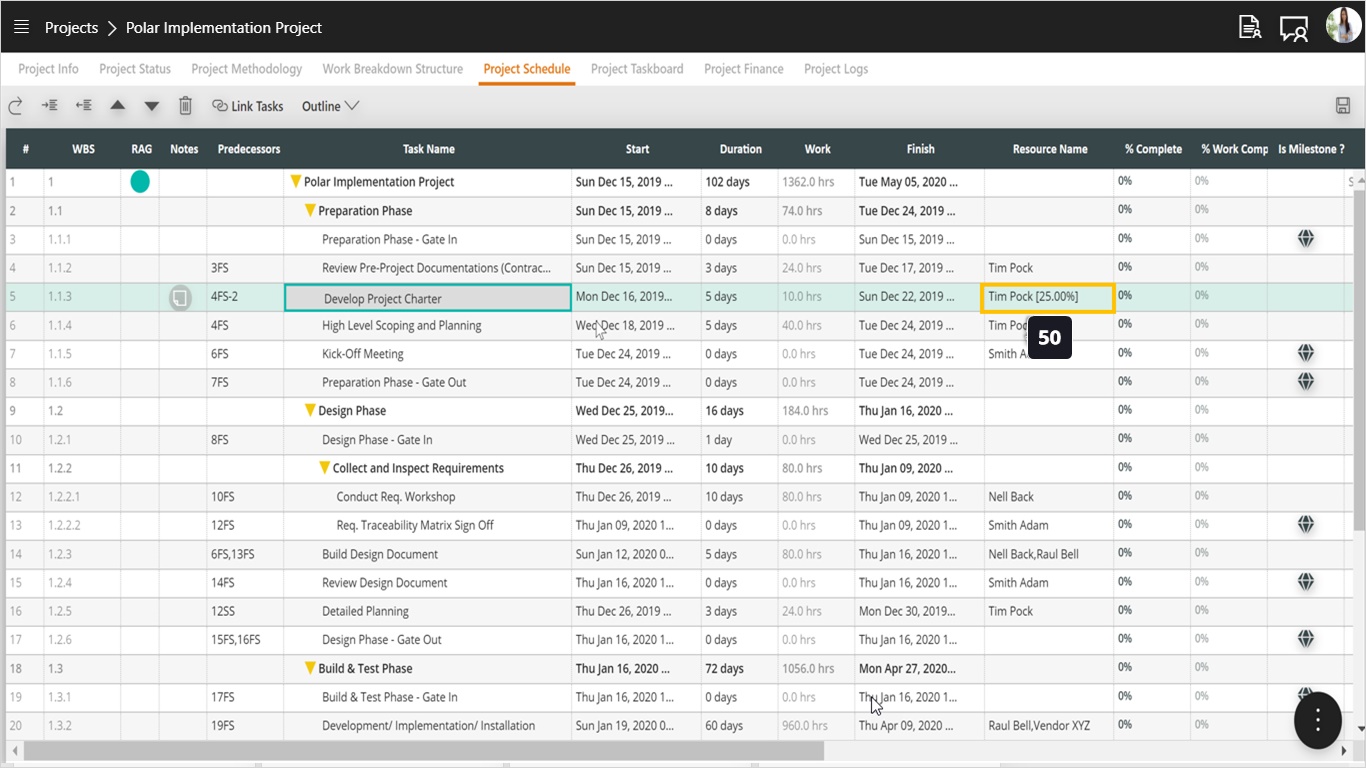
- Set the % Complete of this task to 100%.
- Notice that the whole row is now disabled since this task is considered completed.
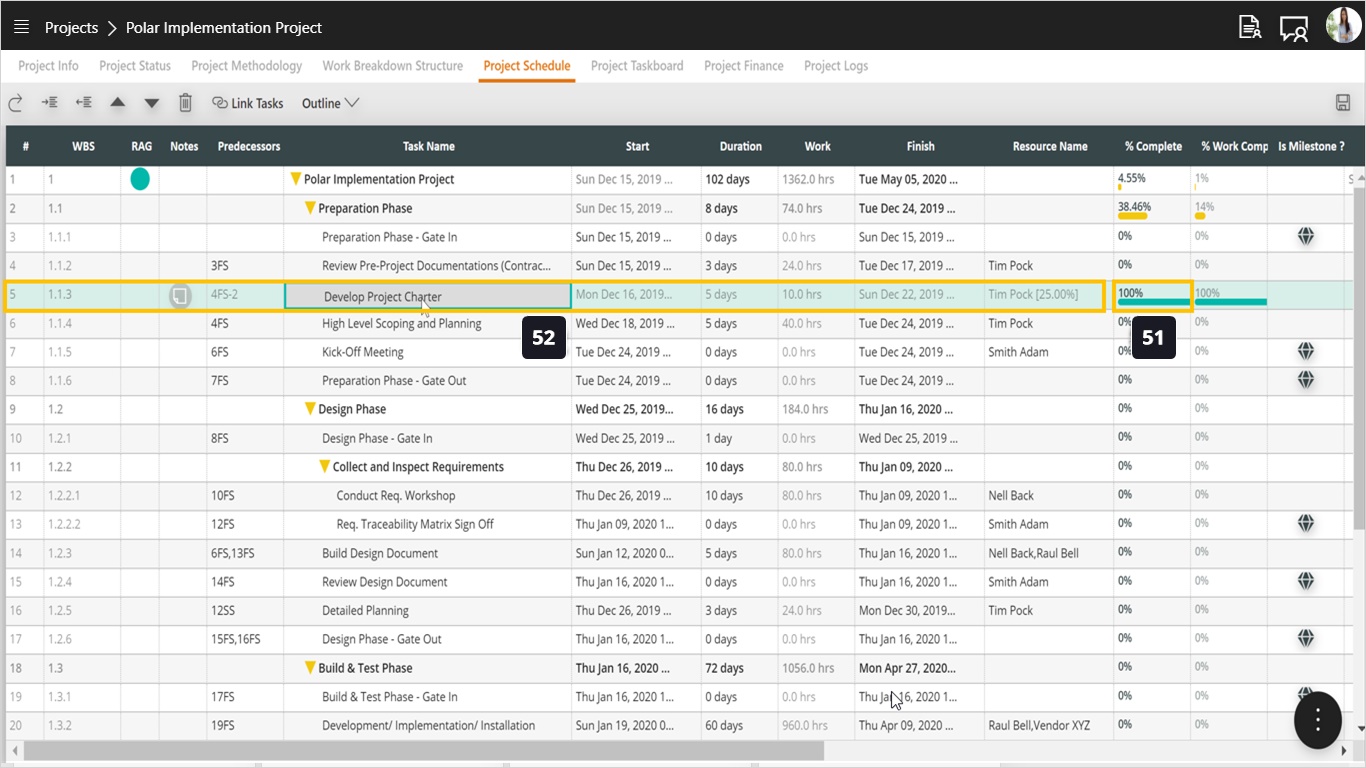
- To copy one or more tasks, highlight the desired tasks and press Control-C.
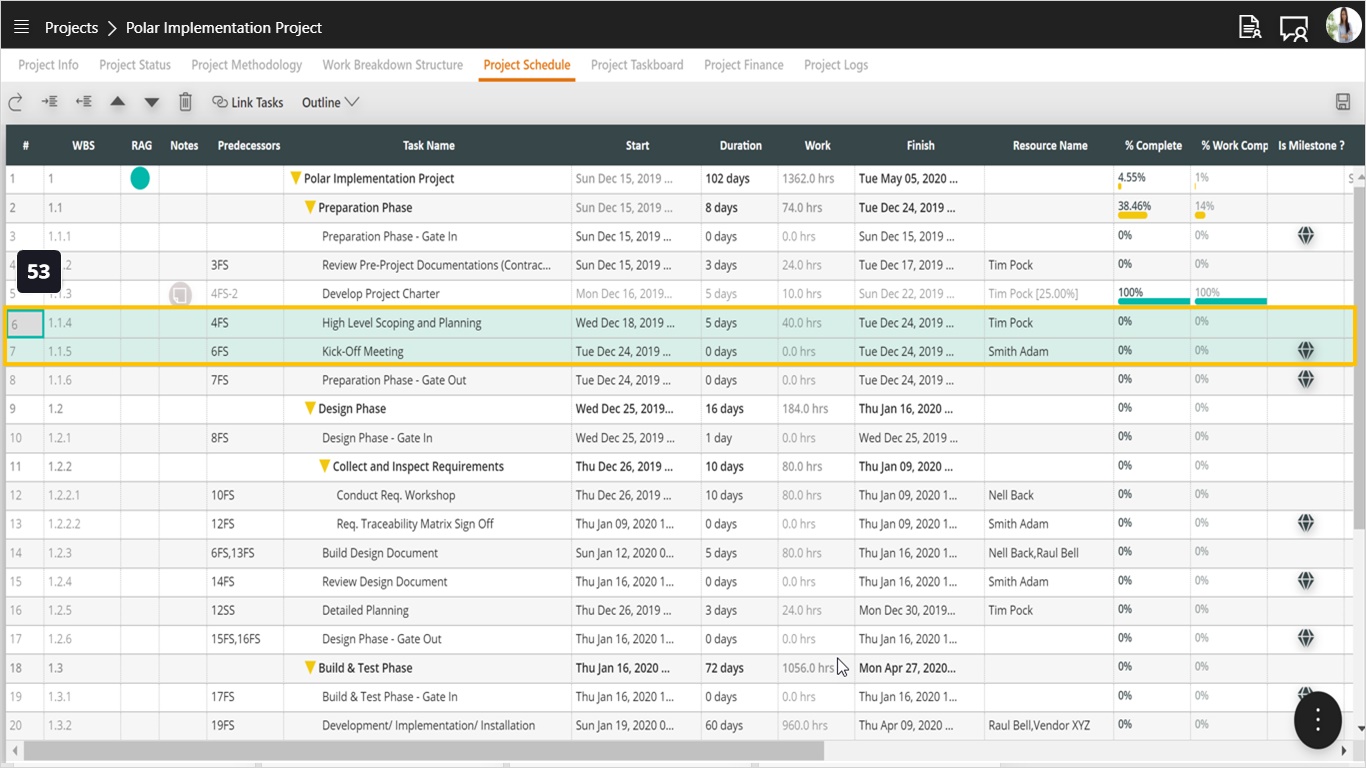
- Highlight the row where you want to paste the copied tasks and press Control-V, notice that tasks will be pasted on top of the selected row.
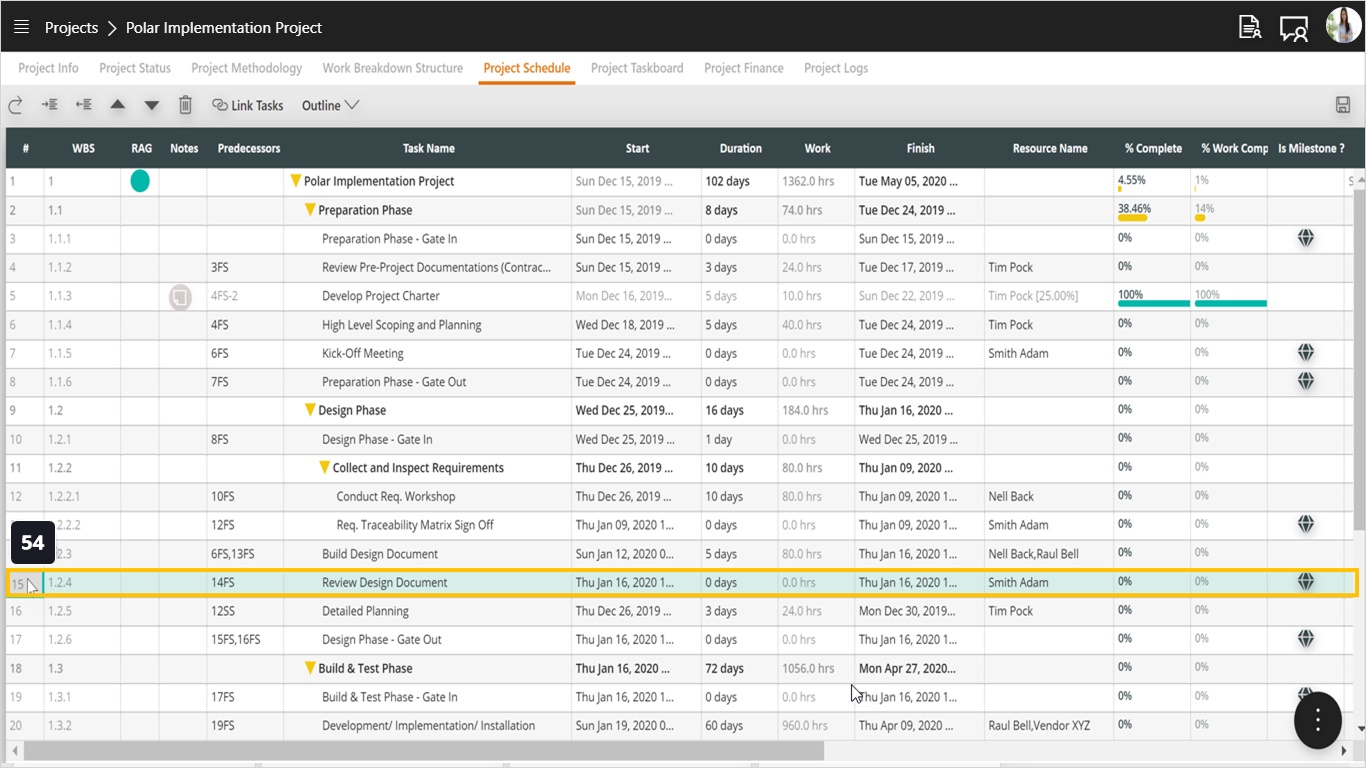
- Notice the pasted rows were inserted.
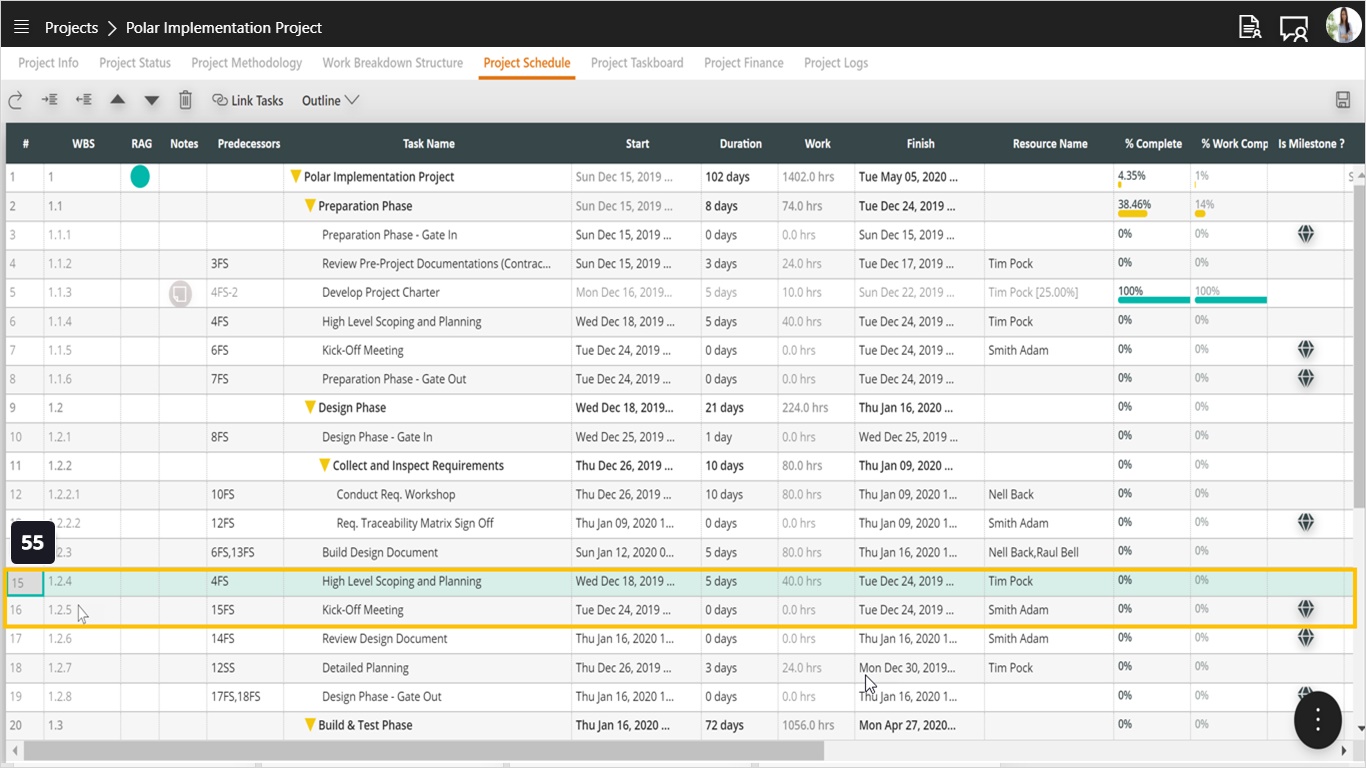
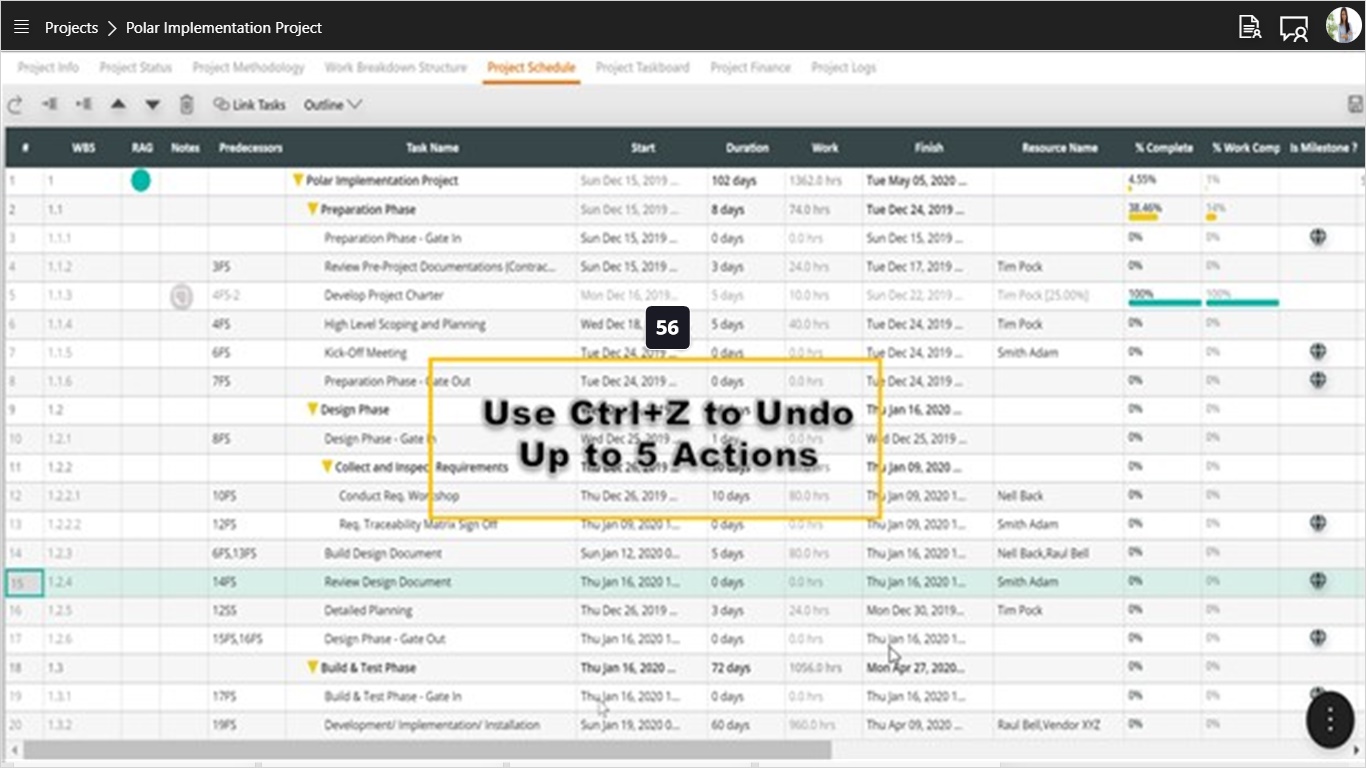
- Use Control-Z to undo your changes. You can undo up to 5 previous changes since your last save.
