Project Schedule - Set Schedule Baseline
Steps:
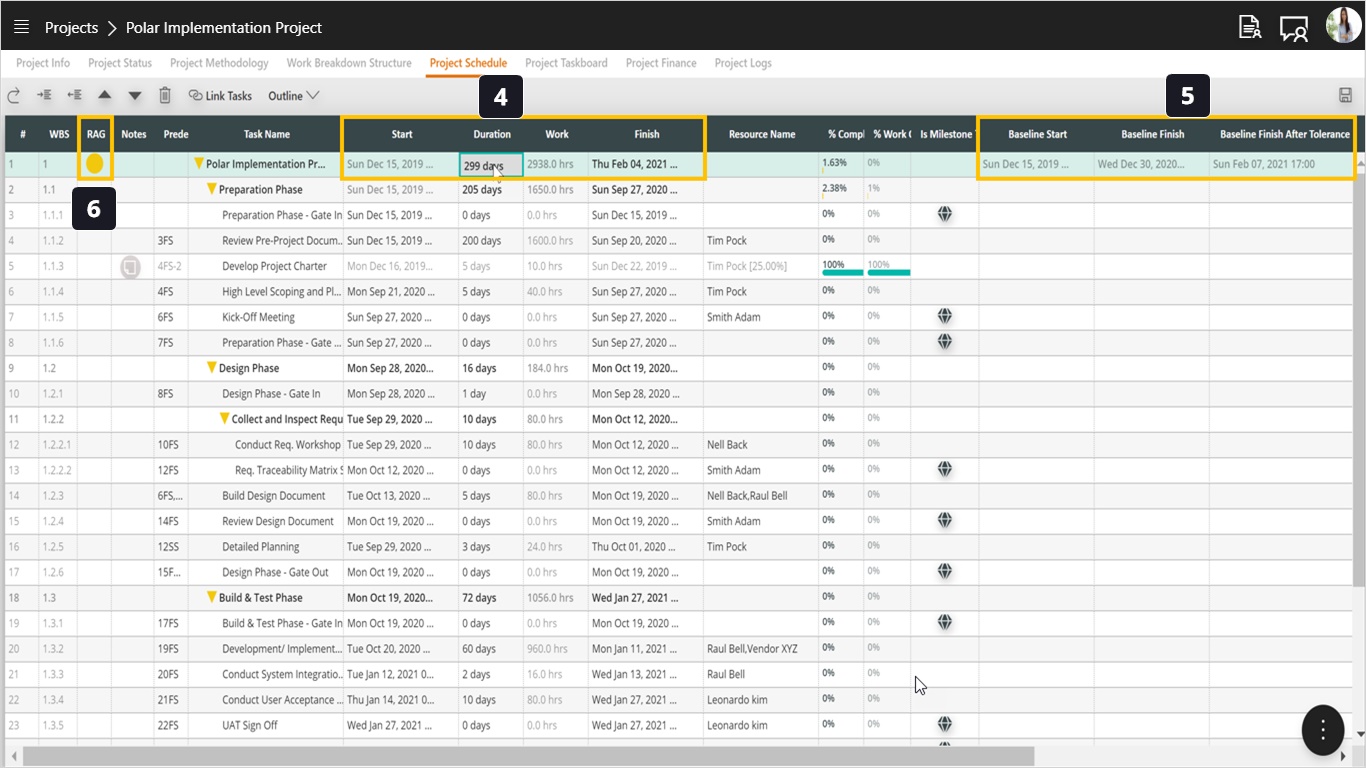
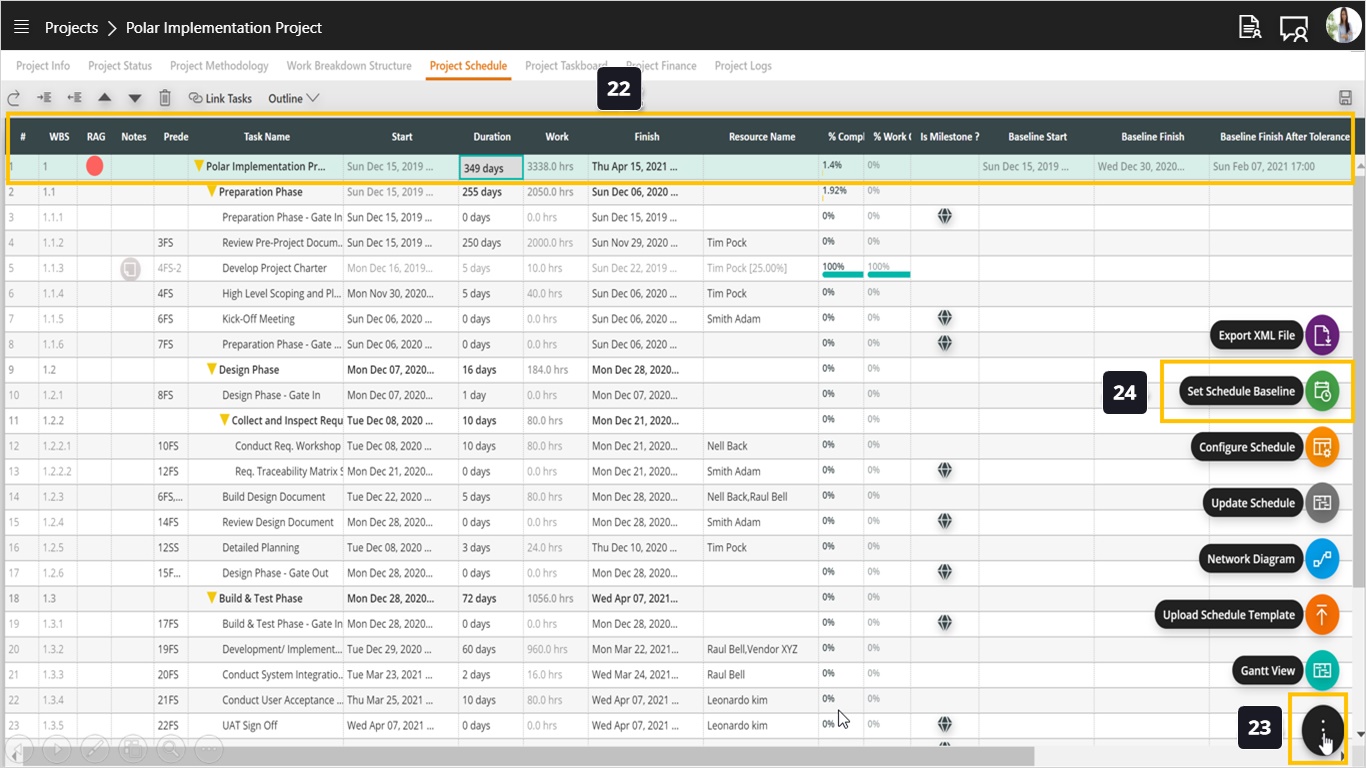
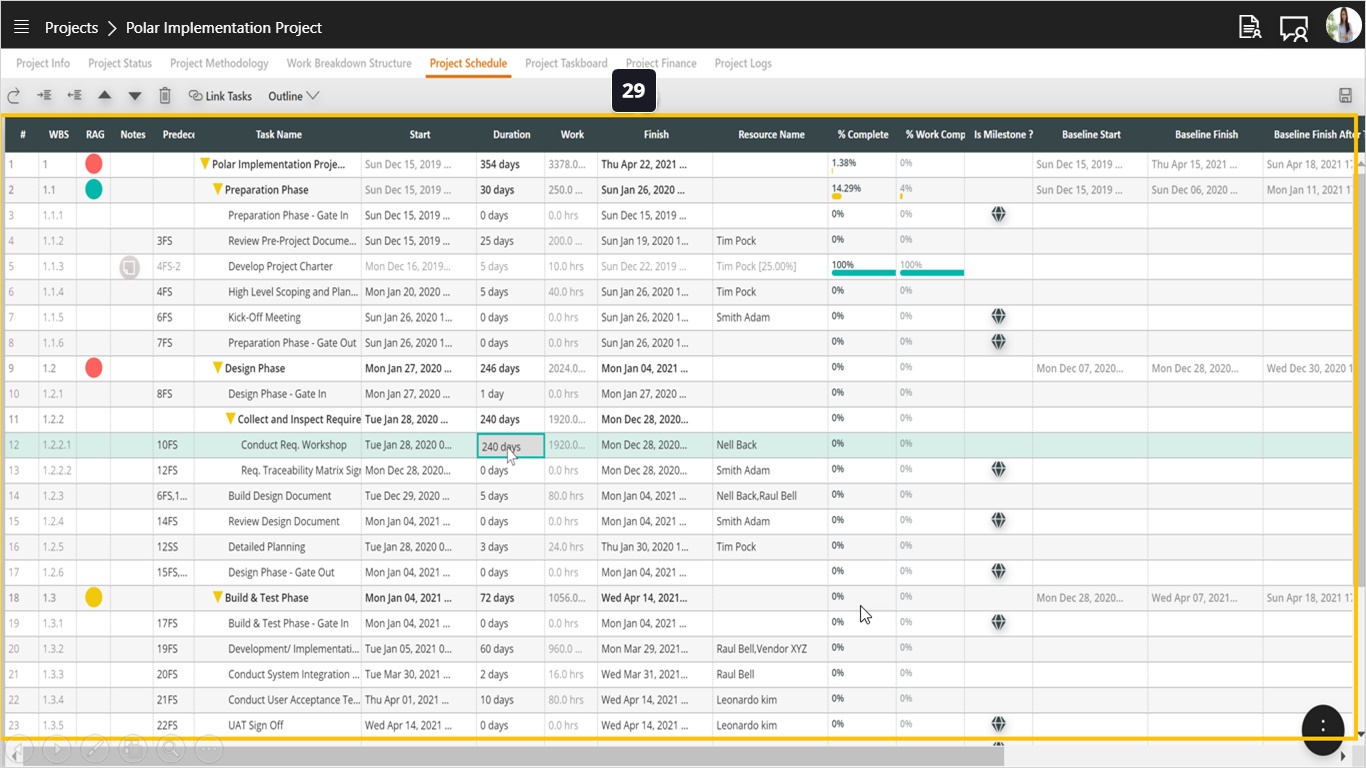
- Observe the Start date, Duration, Work, and Finish Date of your schedule.
- Compare those values to their counterparts in the baseline section (Baseline Start, Baseline Finish, and Baseline Finish After Tolerance).
- Notice that your RAG indicator is Green because your finish date is less than your baseline finish date.

- Now let’s move the project into the Amber state. To do that edit the duration for some tasks and extend them to exceed the original baseline finish date.
- Notice the baseline finish date and baseline finish date after tolerance, notice that your finish date is now within the tolerance period.
- Therefore, observe how your RAG indicator has turned to Amber.
- Now change the duration again to push your schedule finish date beyond the baseline finish after tolerance.
- Observe the baselined dates.
- Notice that your RAG indicator has now moved to Red.

- Save your schedule.
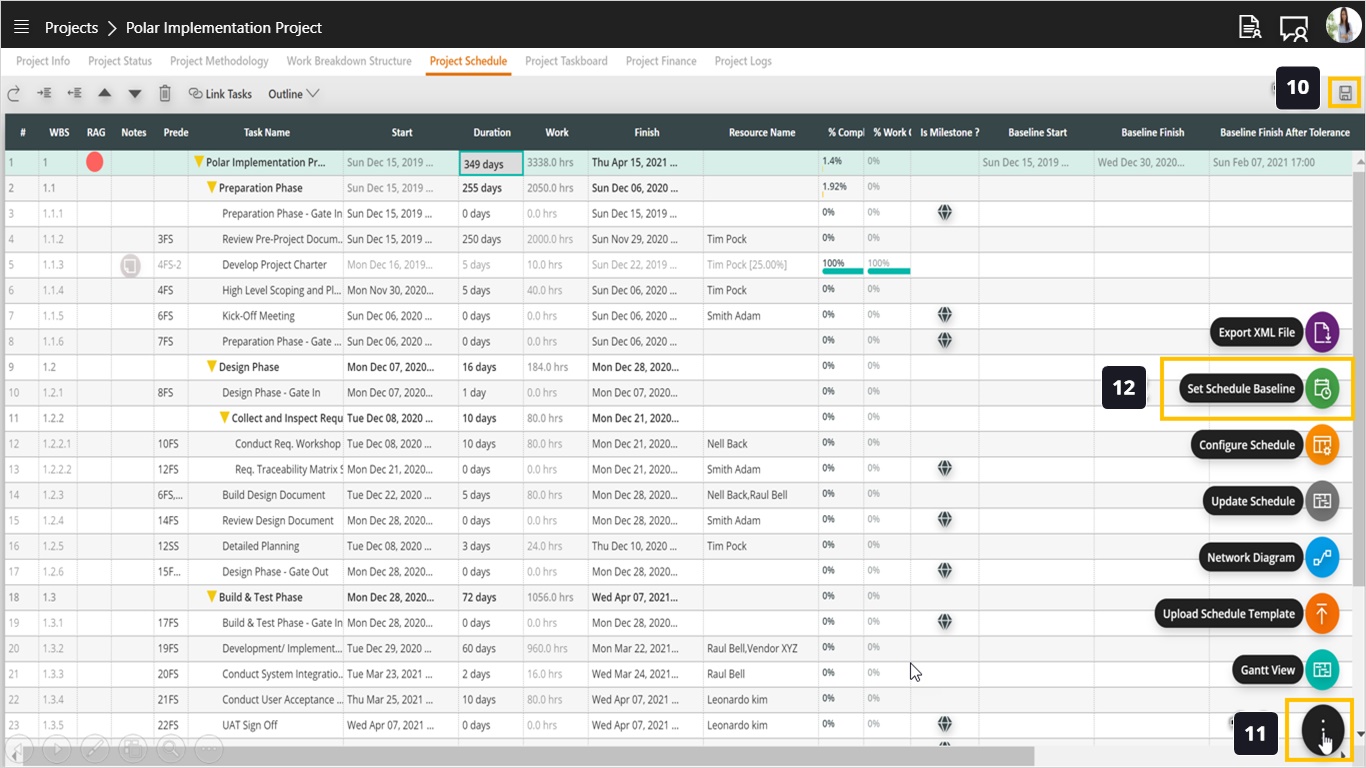
- Now, and since your planning shows that you cannot meet the original baseline, we need to request approval on a new baseline. To do that, click the FAB menu.
- Select Set Schedule Baseline to define a new baseline.
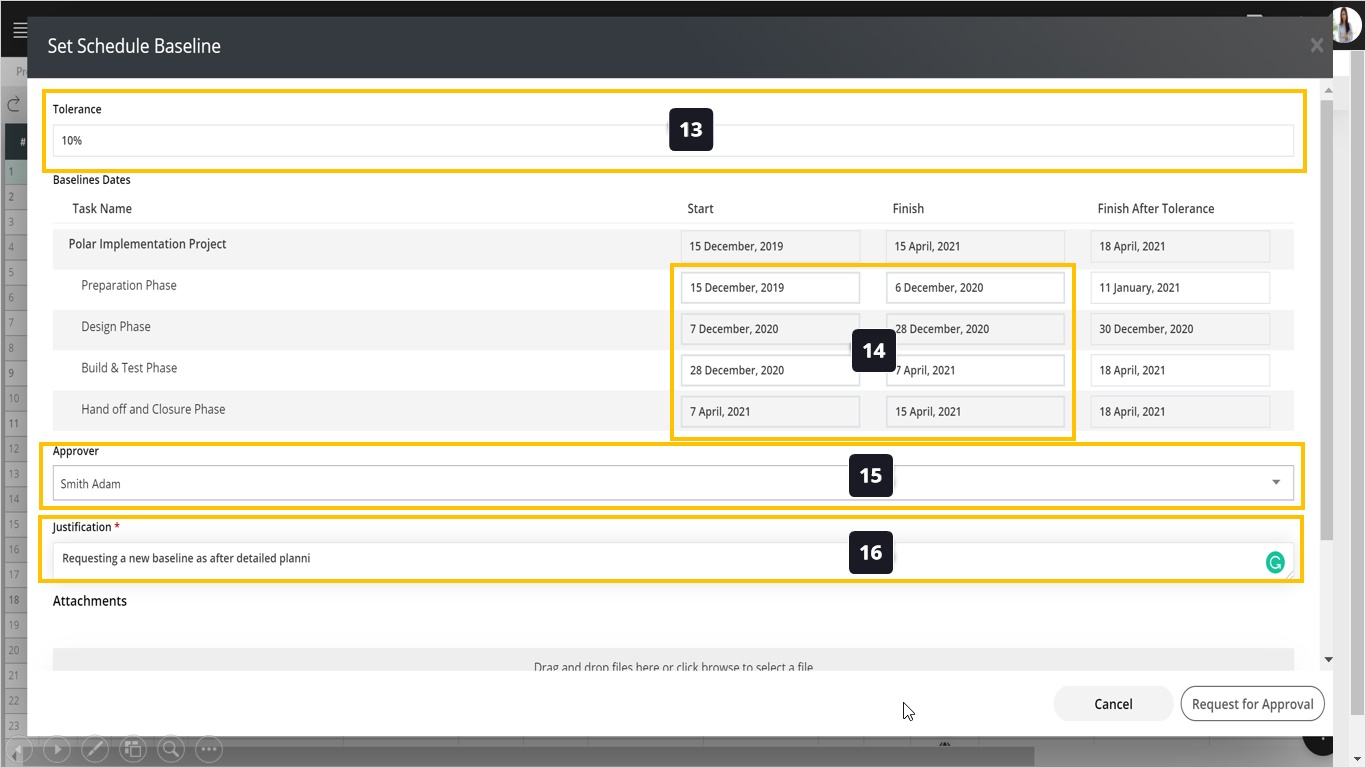
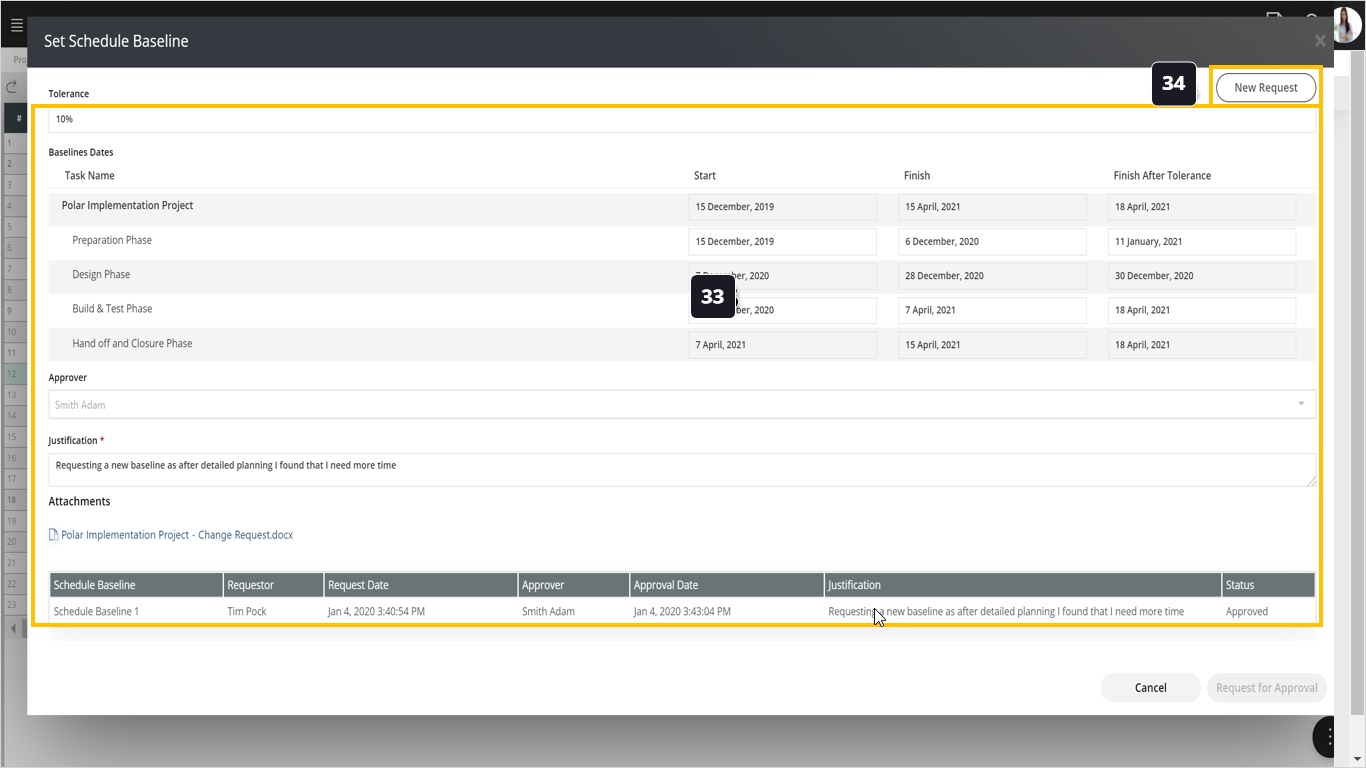
- On top of Schedule Baseline screen, you will see the tolerance already defined previously by the PMO.
- You can define new dates for the phases in your project, notice that by default those dates will be loaded from your schedule.
- Open the drop-down list to choose who will approve the new baseline. By default, this would be the project sponsor.
- Add a justification to explain why you need to extend the project. This is a mandatory field.
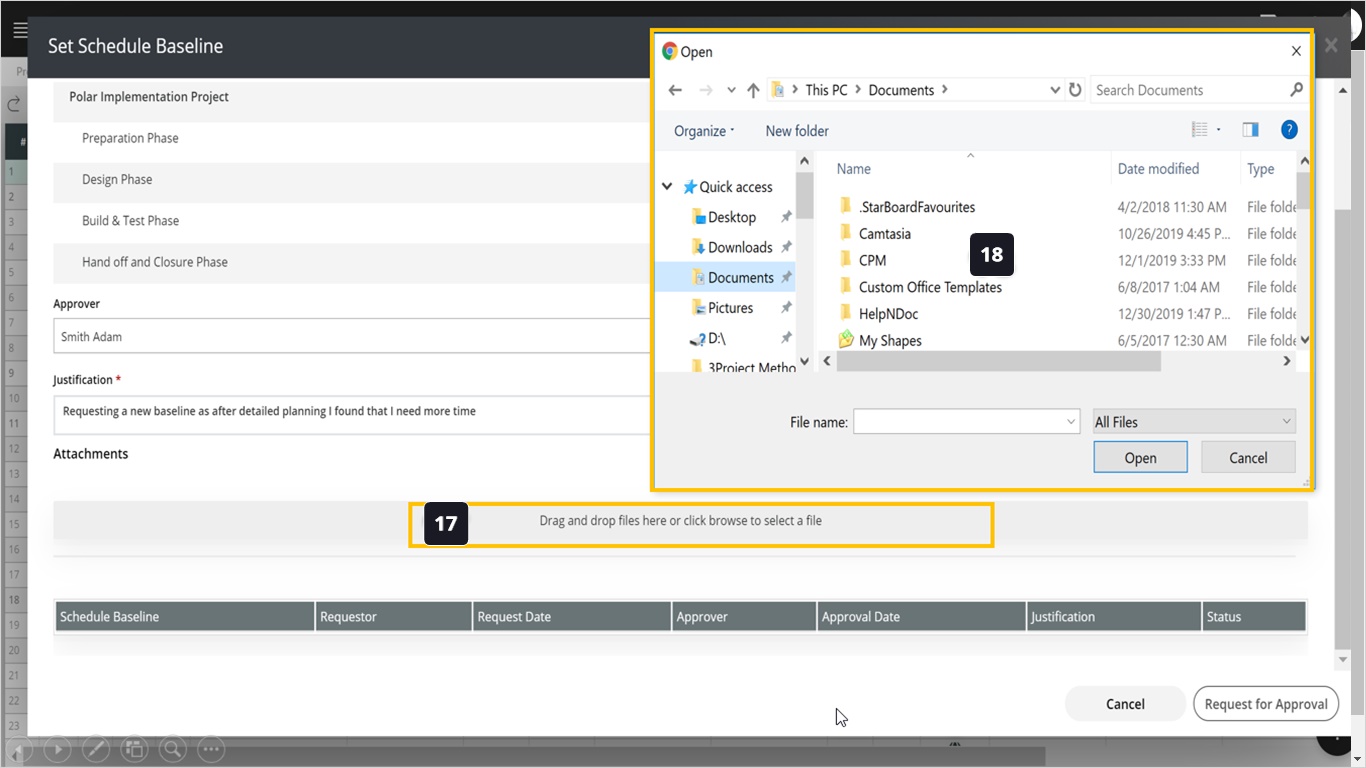
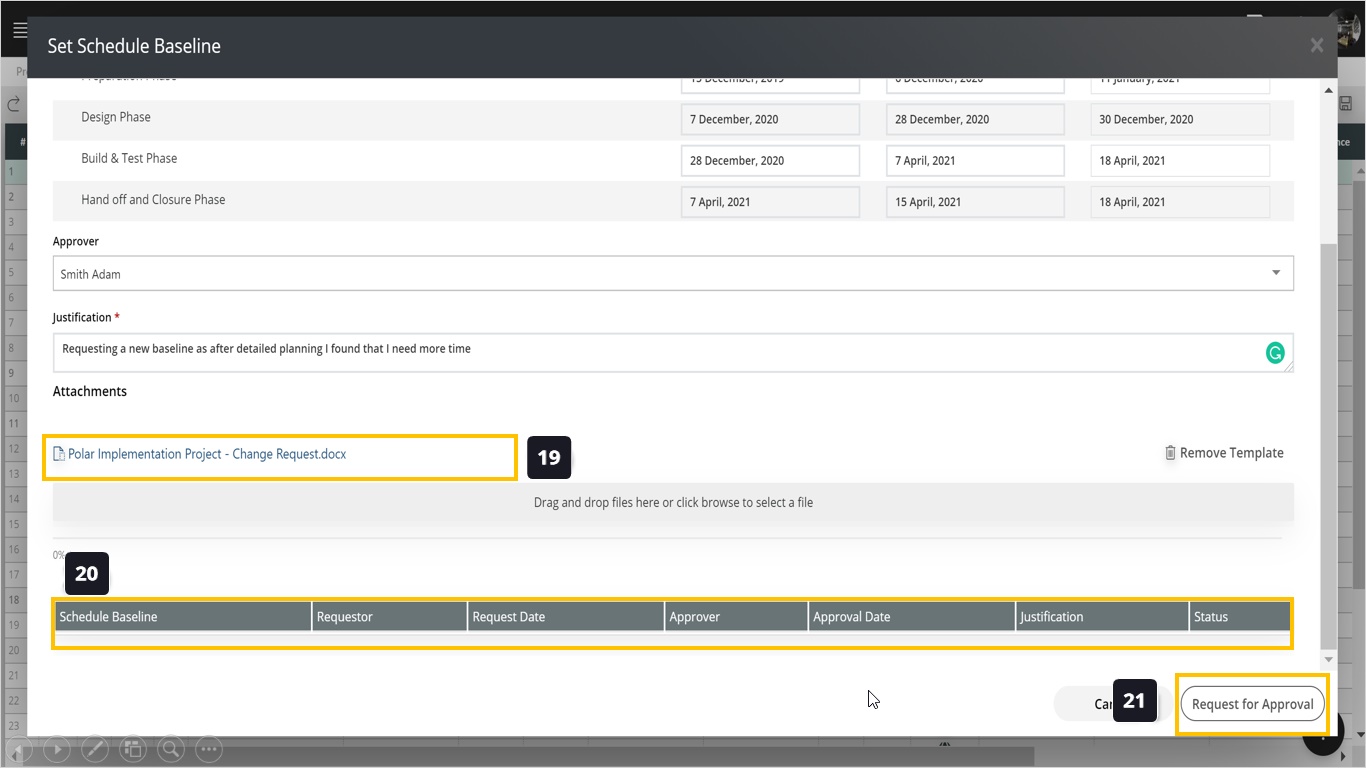
- Click to attach supporting documentation, for example, a change request.
- Select the desired files to upload.
- Notice that your selected file has been uploaded.
- In this table you can see a history for all previous baselines approved, rejected, or pending.
- Click “Request for Approval” to submit this request. This baseline will stay in pending state and you have to wait the approver to take action.
- Notice that while the Request is pending, no changes are made to the schedule baseline.
- To track the status of your baseline request, open the FAB menu.
- Click Set Schedule Baseline
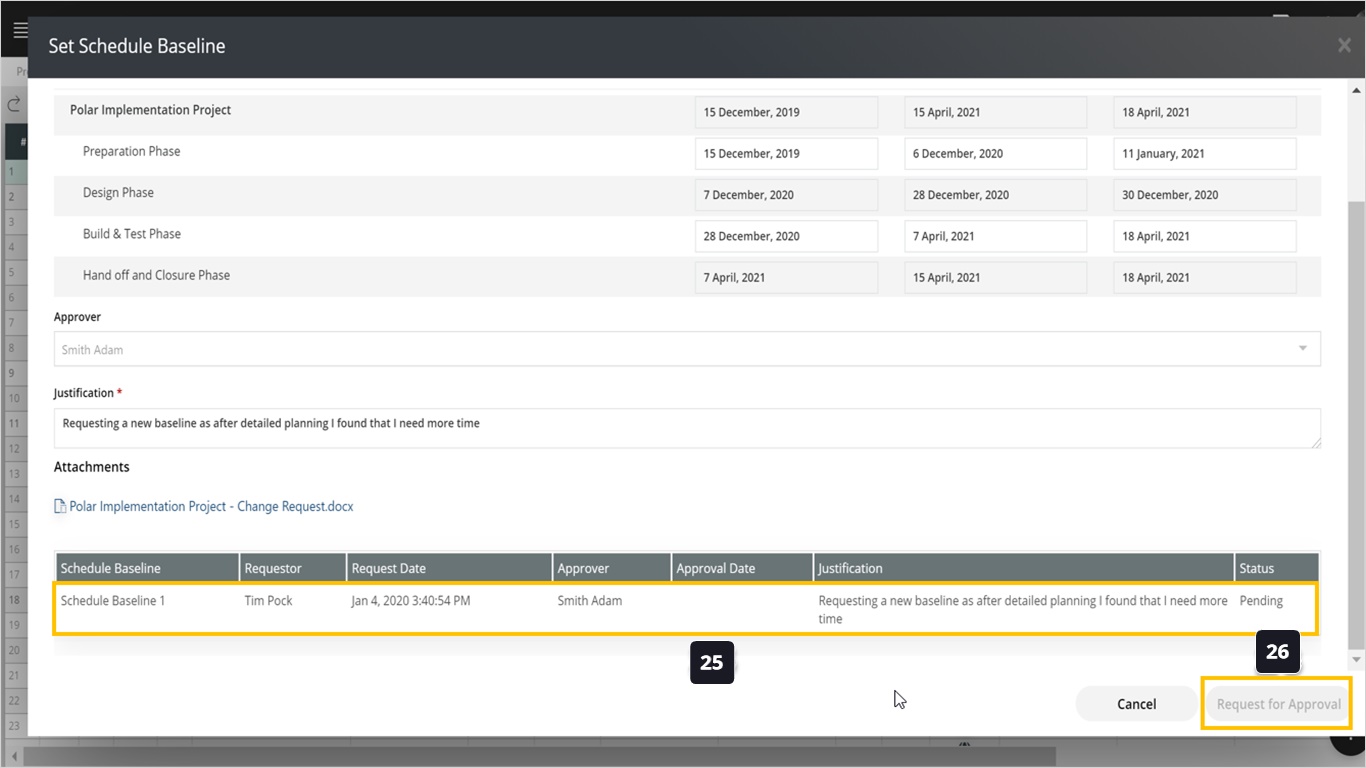
- Notice that your request is still in the pending state.
- Notice that the Request for Approval action is disabled, this means you cannot submit other requests because you still have a pending request.
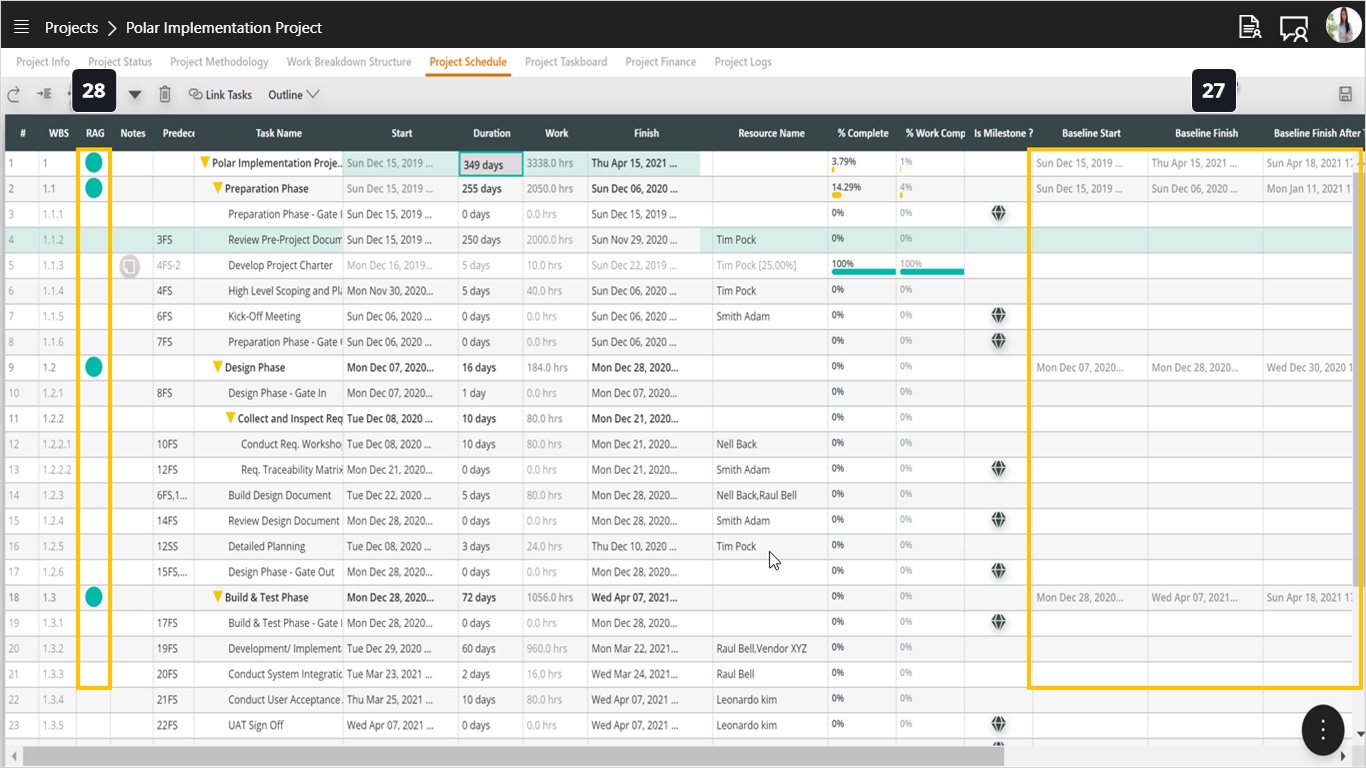
- Once your request has been approved, notice how the baseline fields have been updated as specified in the request. Now you have a new baseline for each stage and for the whole project.
- Now notice how your RAG indicator has changed to Green.
- Now let’s make more changes and push our schedule to make it late again. Now notice that your RAG indicator has turned into Red.
- Save your schedule.
- To request yet another new baseline, open the FAB menu.
- Select the Set Schedule Baseline action.

- In this screen we show the latest baseline you have requested before.
- To define a new request you need to click “New Request” as shown below.
- Repeat defining a new request as we explained before.
- Click Request for Approval to do the whole cycle again.

- Assume you got another approval for your request, your schedule will turn into Green again!

- To see the history of all baseline changes made to this project, go to the Project Info tab.
- Click the Schedule Baselines action and observe the table showing the approved baselines only.
- This table shows the history of all requests made before together with their statuses (Approved, Rejected or Pending).
