Add/ Delete/ Edit Users and Permissions
To convert a resource to an active user we follow the below steps:
Steps:
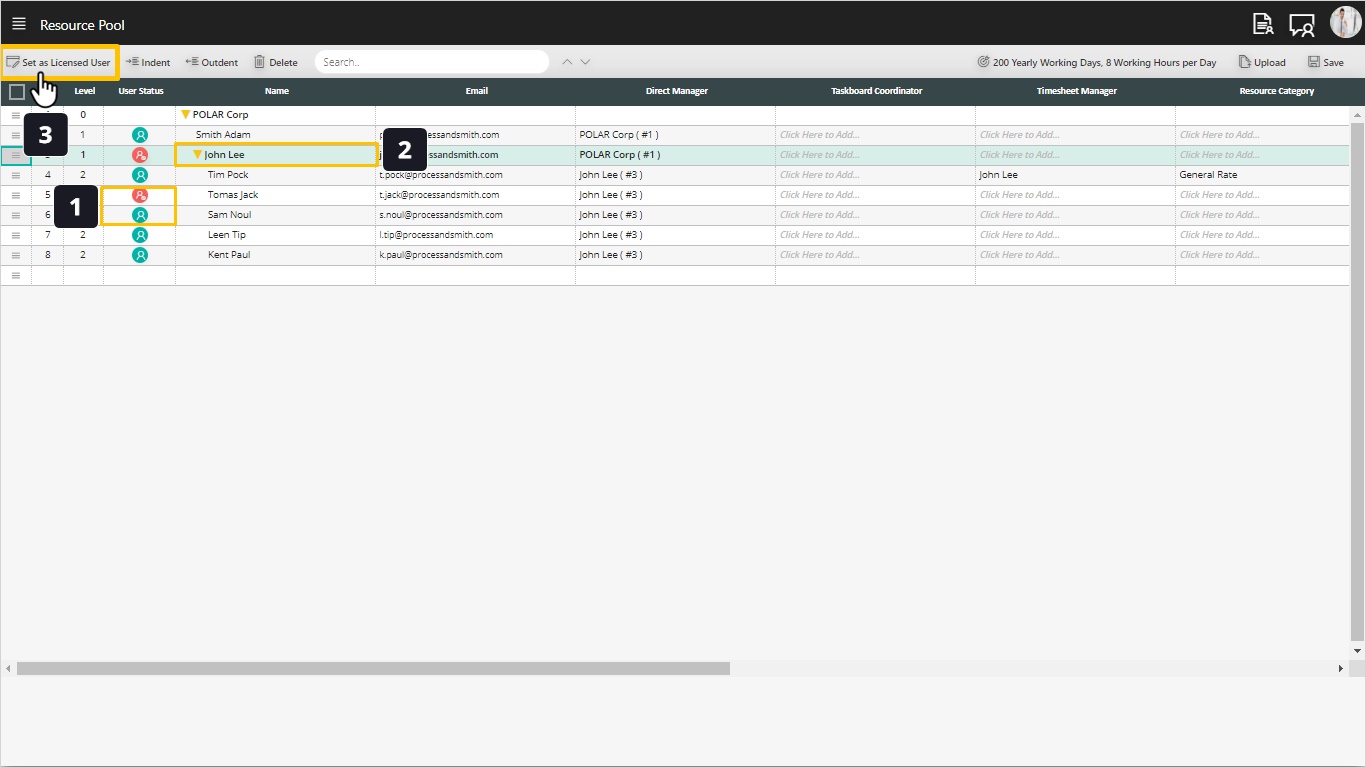
- You have to know the difference between the red icon and the green icon:
- Red Icon: Resource but not a System User so he will NOT have access to the system (Web and Mobile) and he will not be counted in the purchased licenses.
- Green Icon: Resource and System User, so he will have access on the system (Web and Mobile) and he will be counted in the purchased licenses.
- To convert a resource to be a system user as well, select the resource by clicking on his name.
- Click Set as Licensed User. Once we do that, we will see a popup screen to define user information.
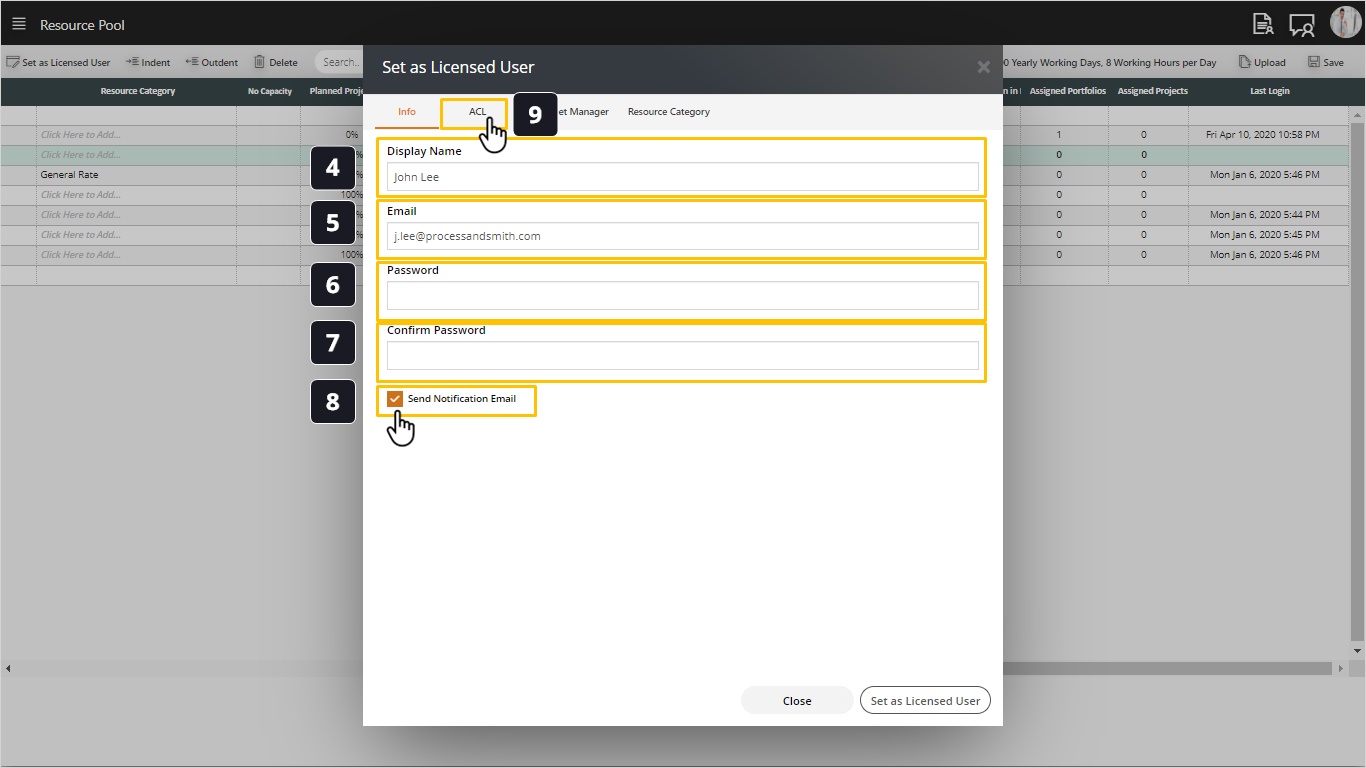
- Fill the display name.
- Fill the email address noting that you will NOT be able to change it later.
- The Password fields allow us to define a password for users and they can change it later when they sign in to the system.
- Confirm the password.
- Finally, there is a checkbox to decide if any email notification should be sent to the user about their registration.
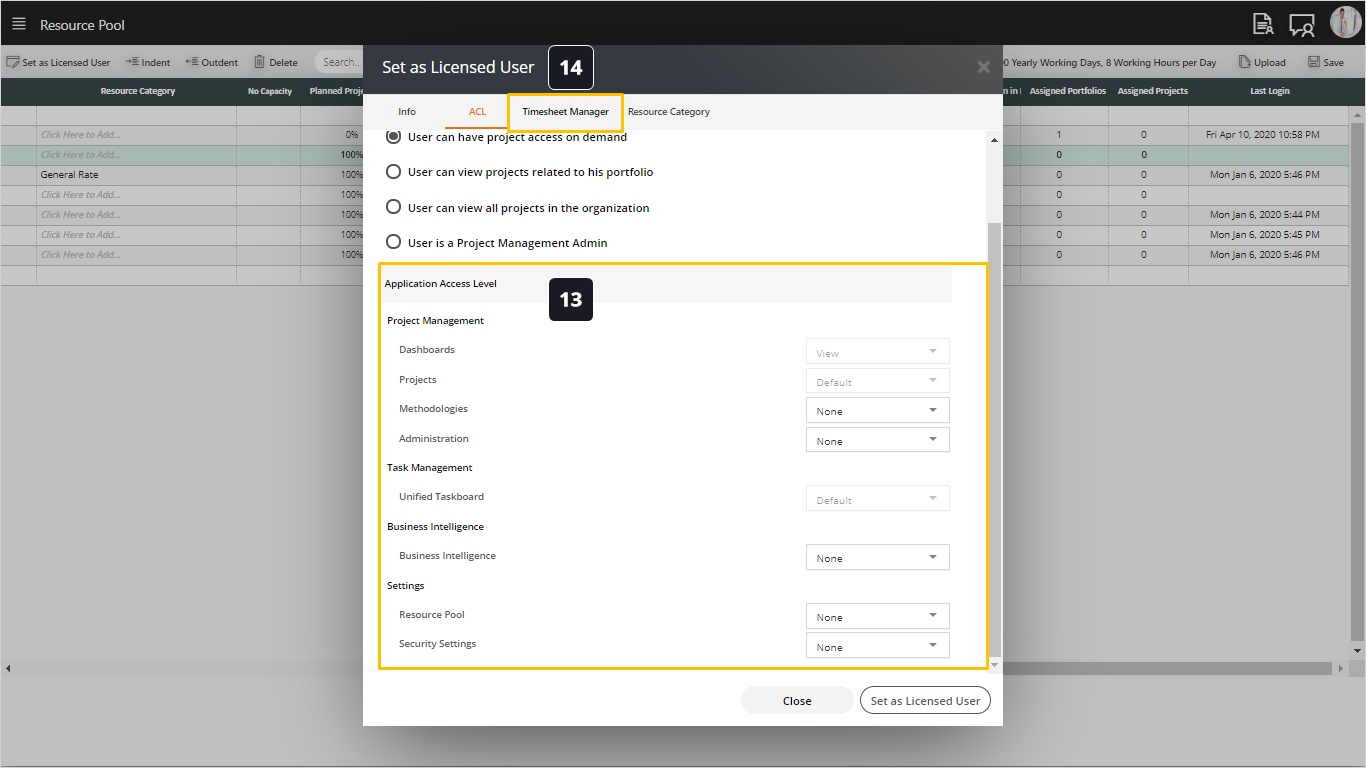
- Click on ACL (Access Control List) to proceed.
The second tab is the ACL or the Access Control List, where we can define the access level for this user on CarrotCut, and here we have the following choices:
- There is a checkbox to decide if this user will have a permission to create project by his own, or to uncheck it and keep this permission to the PMO Administrator.
- Select one of these options:
- User can have project access on demand, we usually assign this access level to project managers and team members. This access will give the least required access, for example, project managers can only see projects they are managing, and resources with this level of access can only see tasks they are assigned to.
- User can view projects related to his portfolio, this will be selected only for portfolio managers which gives them access to all projects under their portfolios
- User can view all projects in the organization, which is usually given to executive management team to view all projects in the organization but without having access to create new projects or modify existing data
- User is a project management admin, and this user has ultimate access to modify configuration and administration data in addition to creating new projects.
- Then, we have a screen by screen access control. For a PMO Administrator user all screens will be automatically available, however for other roles we can customize their access level. Tip: Choosing one of the options above will affect and disable some of permissions below. As this is the common permission of these roles.
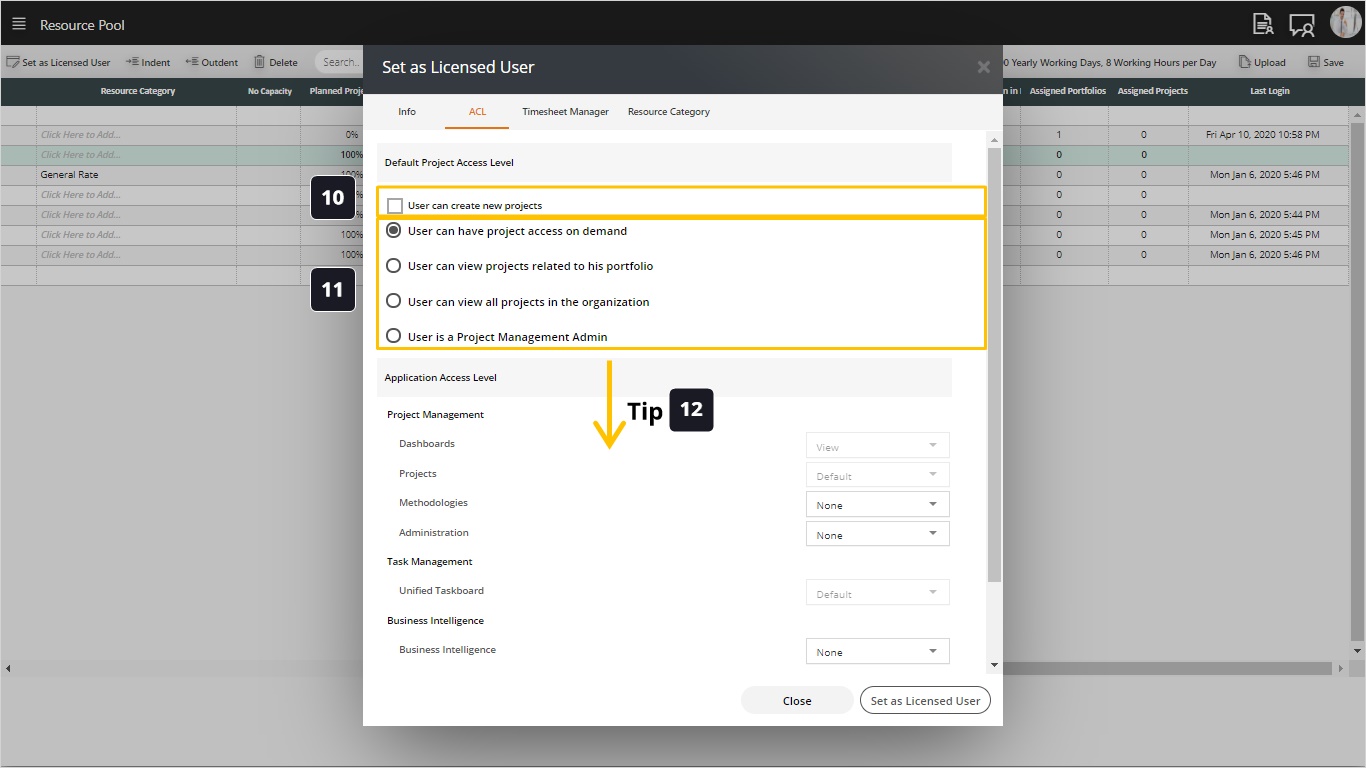
- These are the screens and modules which we can customize their access level. If you select:
- None: No access
- View: View only with no edit or modifying ability
- Edit: User can edit and modify
- Share: It is for the Business Intelligence only, means that the user has the permission to share any dashboard built by him to whoever he wants.
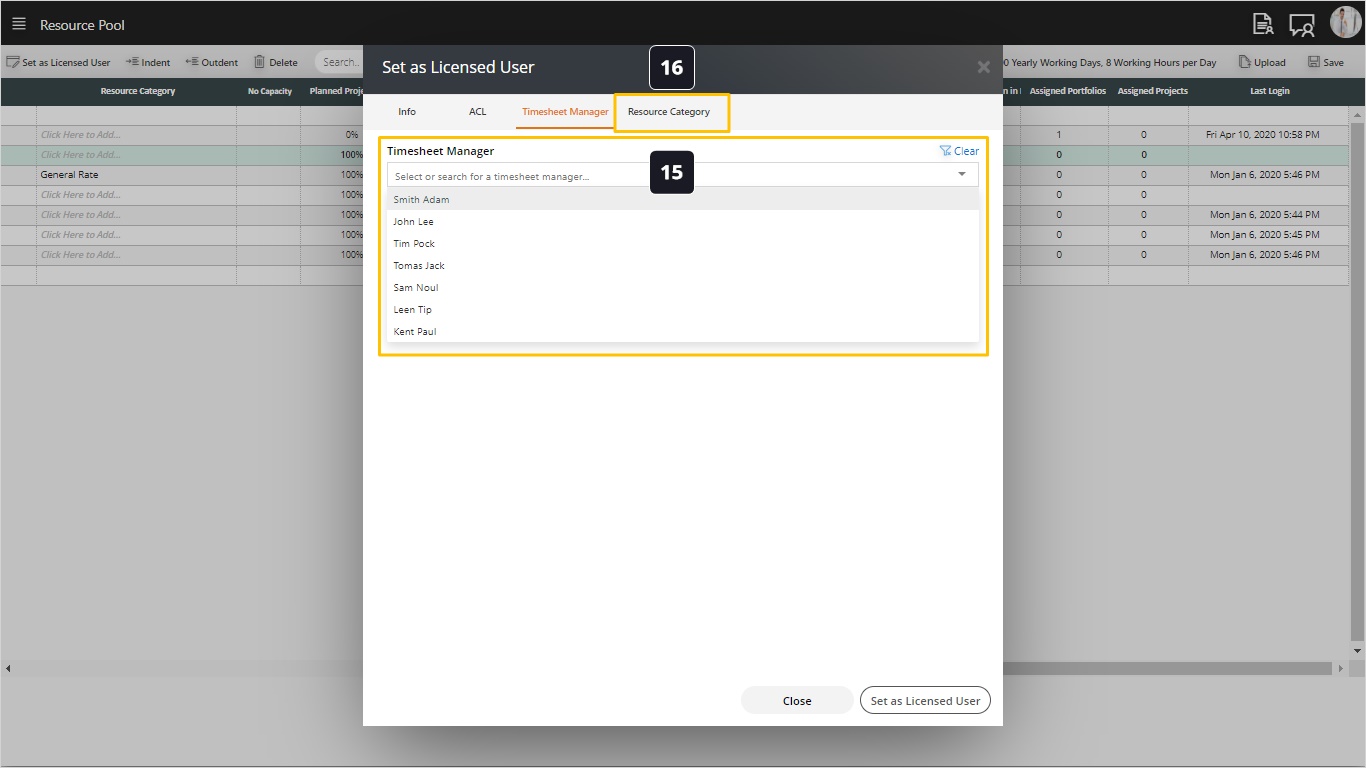
- Click on Timesheet Manager.
- Fill the Timesheet Manager for this user to approve or reject his/her none-project tasks in time sheets submitted weekly.
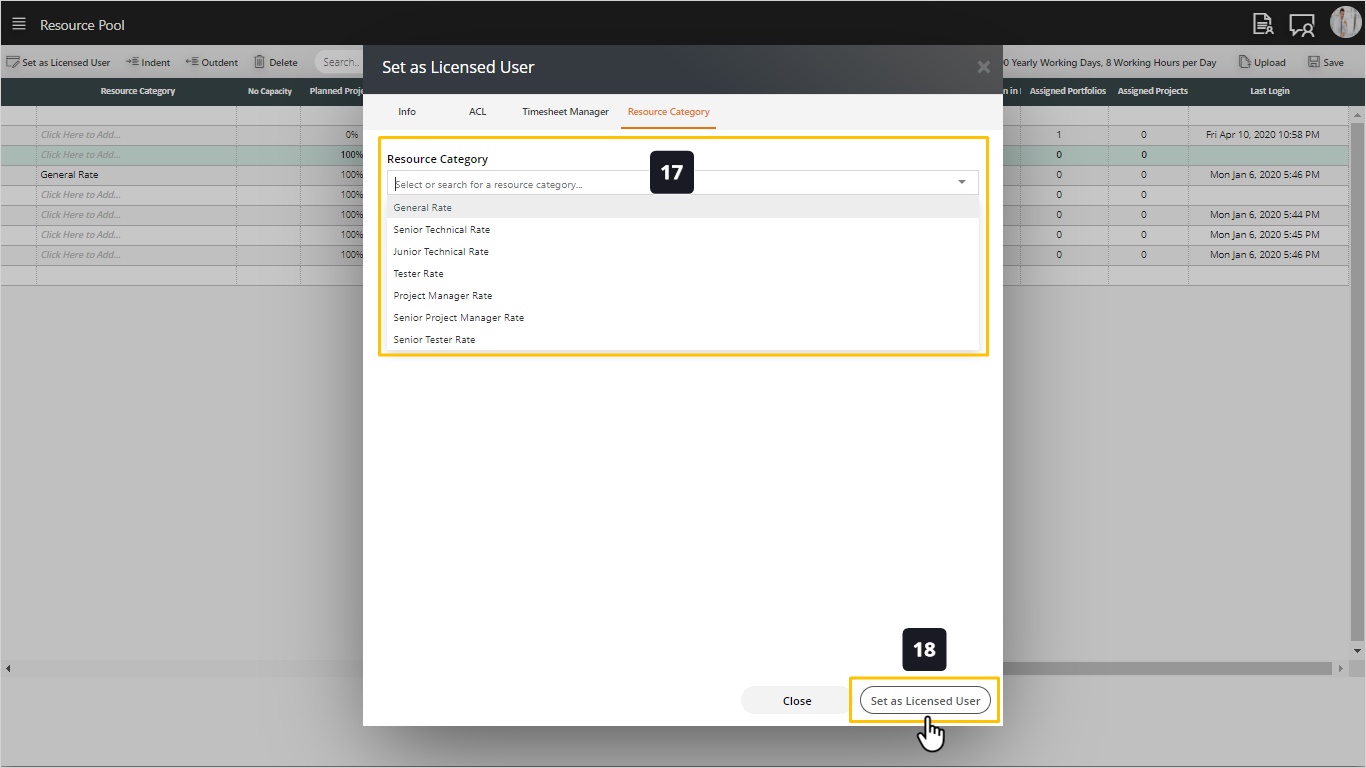
- Click Resource Category.
- Fill the Resource Category you defined earlier in Administration Data. The resource category allows us to link this user to a resource category, this will allow project managers to calculate the cost of internal labor for this resource when assigned to projects.
- Click Set as Licensed User.
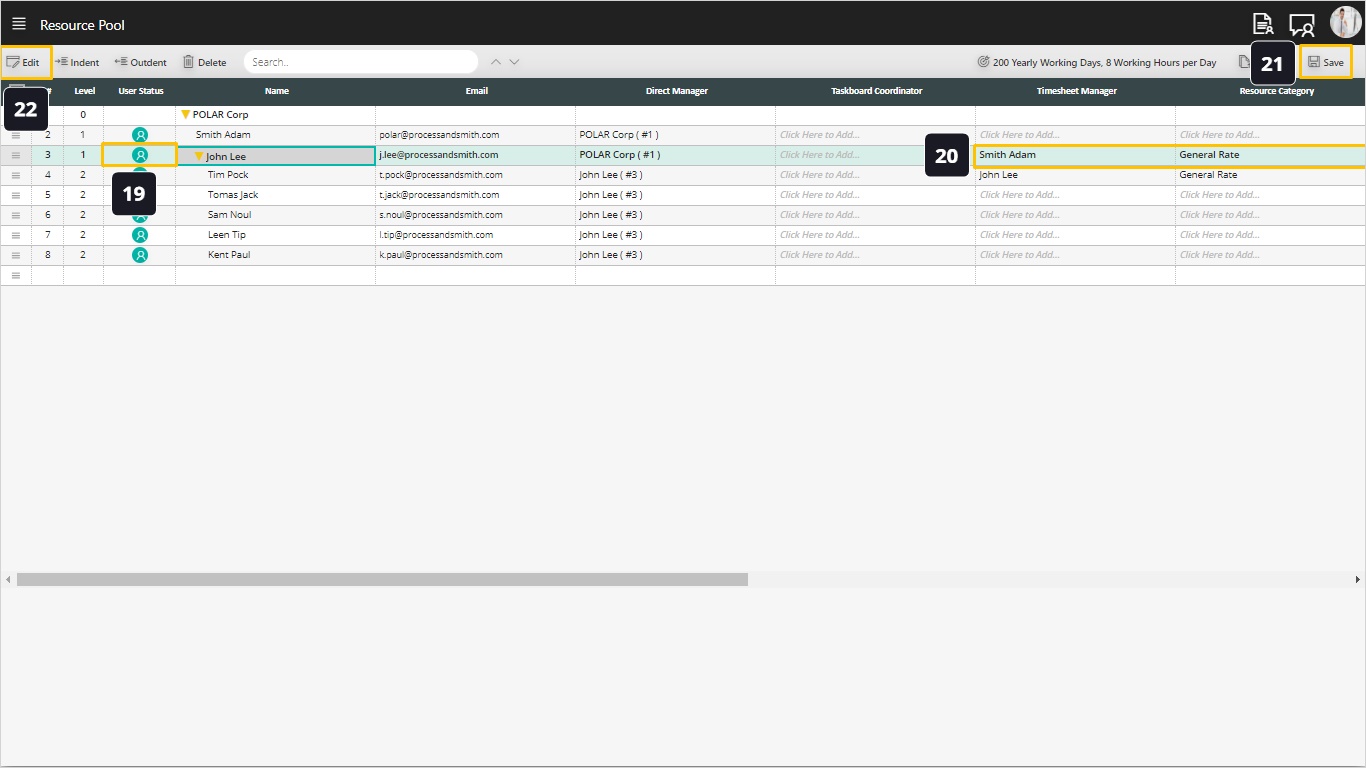
- See the icon! It was in red and now became green, it means that he/she was just a resource with no access but now is a resource and a user with access on CarrotCut.
- See the data you defined!
- Click Save.
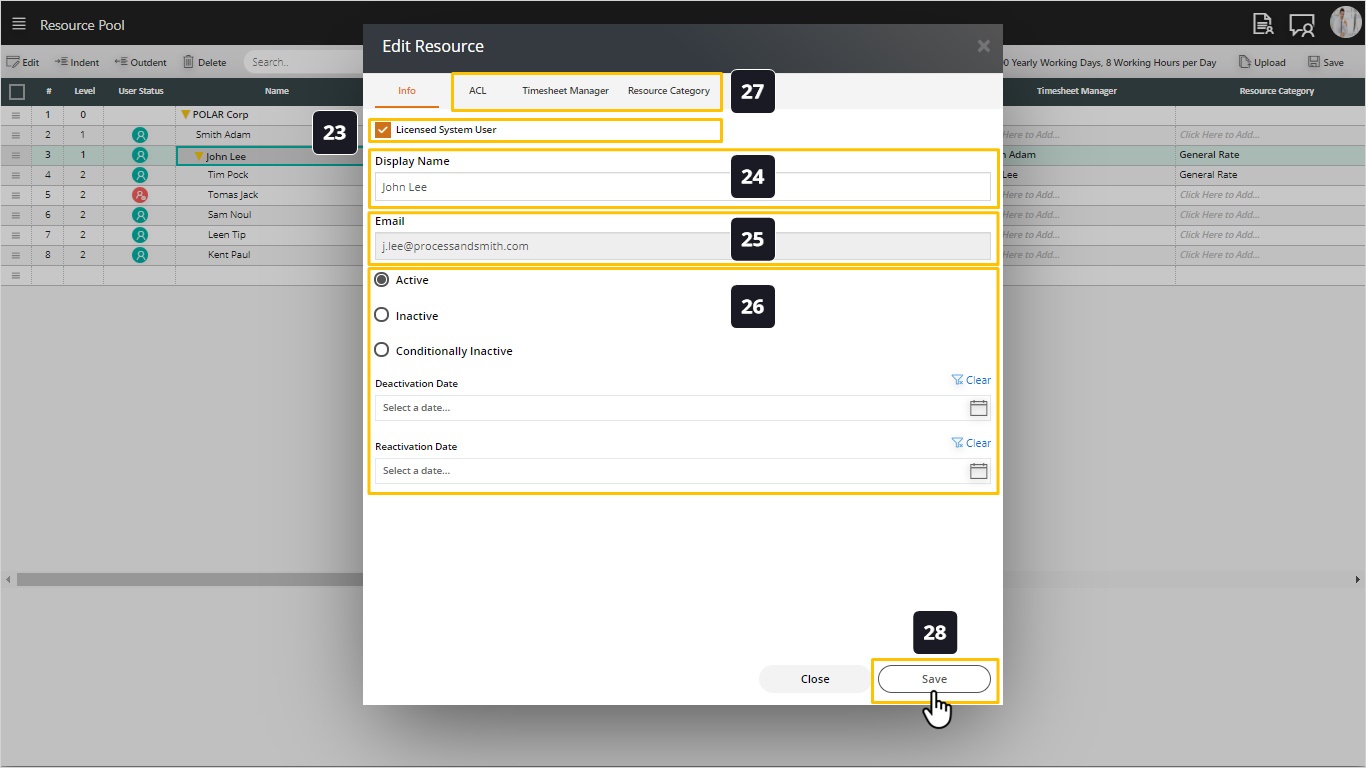
- If you want to edit this user data, just select his line and click on edit icon (this function will appear only for user icon).
- Uncheck this option to get the user back to resource only status, so he/she will not have access to the system anymore.
- Change the display name as needed.
- We cannot change the email address.
- Edit User Status:
- Active: User is active on the system.
- Inactive: User cannot access the system until changing this status.
- Conditionally Inactive: User will be inactive from date to date and then he/she will automatically back to active mode.
- Explained earlier in this page.
- Click Save button to save your changes.