Add/ Delete/ Edit Resources, Resource Information, and Capacity & Allocation
Steps:
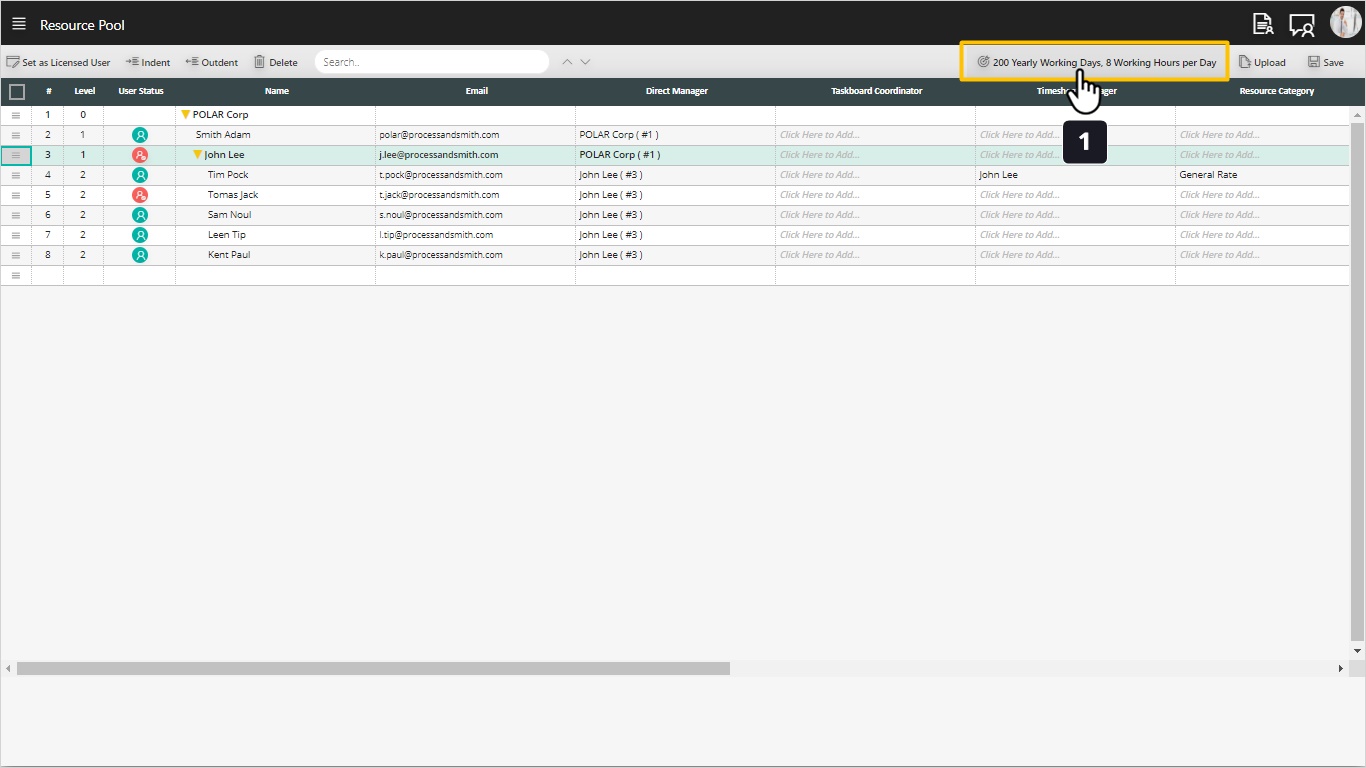
- First step you must click on (1) to setup the resource capacity (how many working days a year and how many working hours per day).
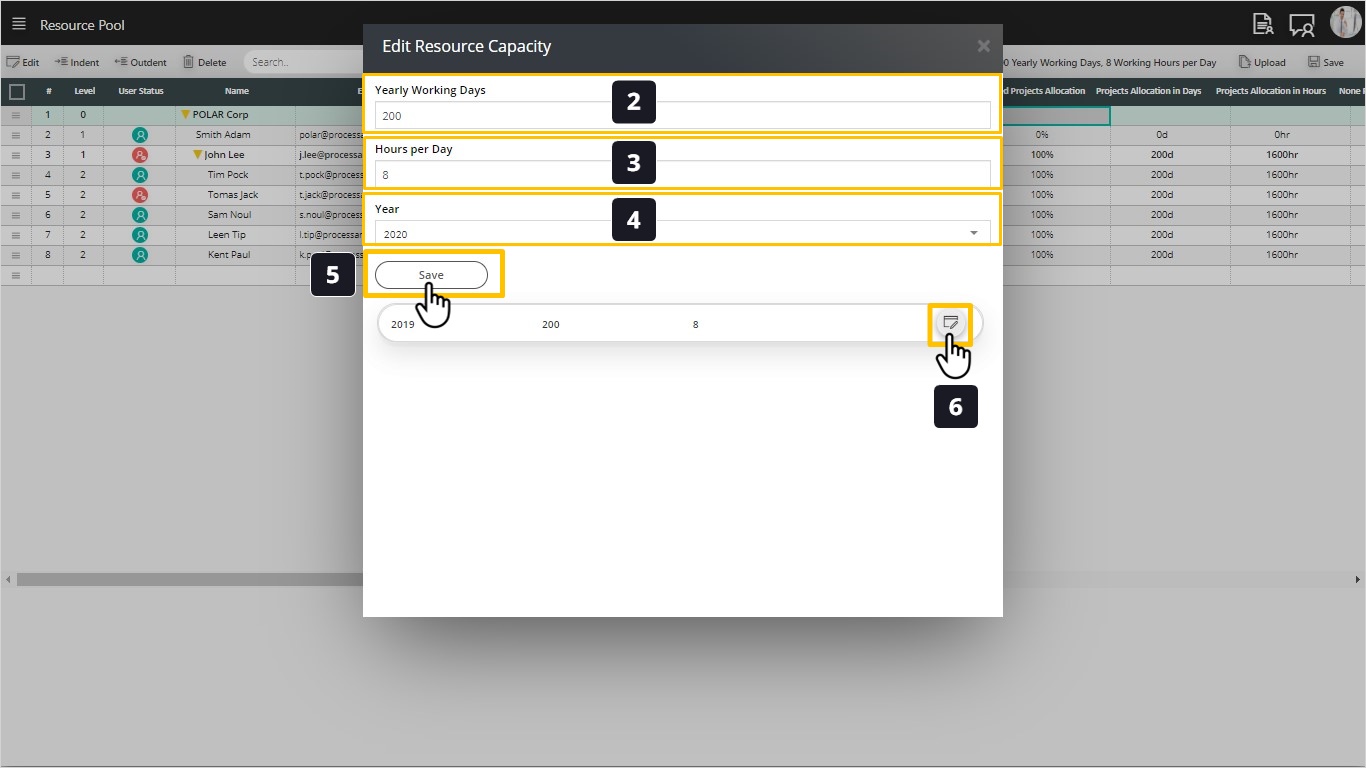
- Fill yearly working days
- Tip: Average working days a year is commonly (220 – 240) working days calculated by:
365 days a year – 120 days (Weekends, Public Holidays, Vacation)
- Fill working hours per day.
- Select the year and you can insert multiple years.
- Click save.
- If you want to edit the inserted data, click on edit icon.
Now, we will land on the resource pool screen.
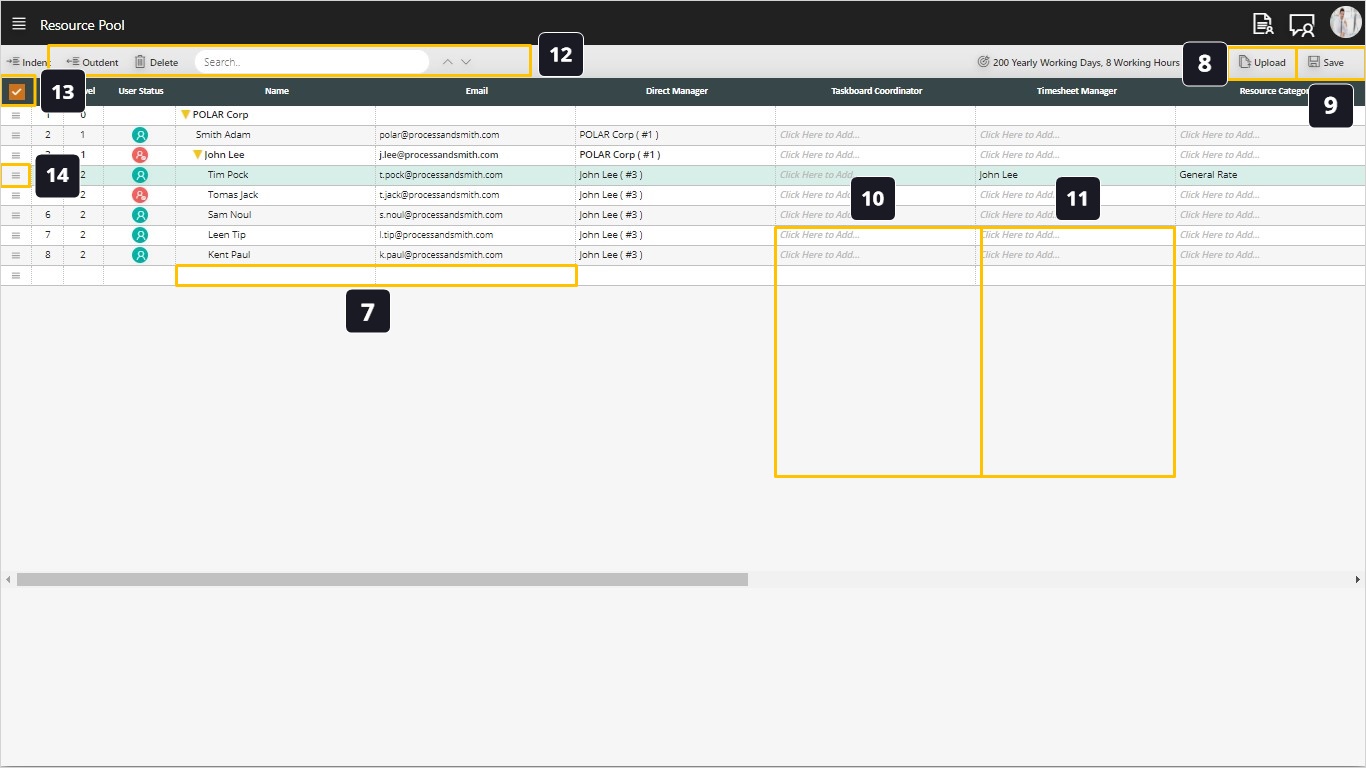
- You can add more resources manually by scrolling to the end of the sheet and typing in more usernames and their emails. Any new user we add will be a resource but not a system user yet.
- If you have Active Directory users list, click to upload it and you will find all the resources available here, but they are all marked with a red sign, meaning that they are not yet system users.
- Click save button to save your work.
- Optional: Click to select a Taskboard coordinator for this resource, it means that you want the coordinator to have full permission (see, edit, and delete tasks) on the selected resource task board. This would typically be used as an extra user with permissions similar to the direct manager of this resource.
- Click to select the Time Sheet Manager of this resource. Time Sheet Manager can approve and reject resource non-project tasks, as the project tasks will be approved and rejected by the project manager
- Notice the indent/outdent arrow by which you can create the resources hierarchy by making subordinates of a resource underneath that resource in the hierarchy. Delete function allows us to delete a specific resource. Search function allows us to search for a resource and you can use the arrows beside the field to go next or previous in your search.
- Notice the Edit Checkbox to enable the dragging function.
- Click to drag and drop to reorder resources in the resource pool to reflect the actual organizational structure.
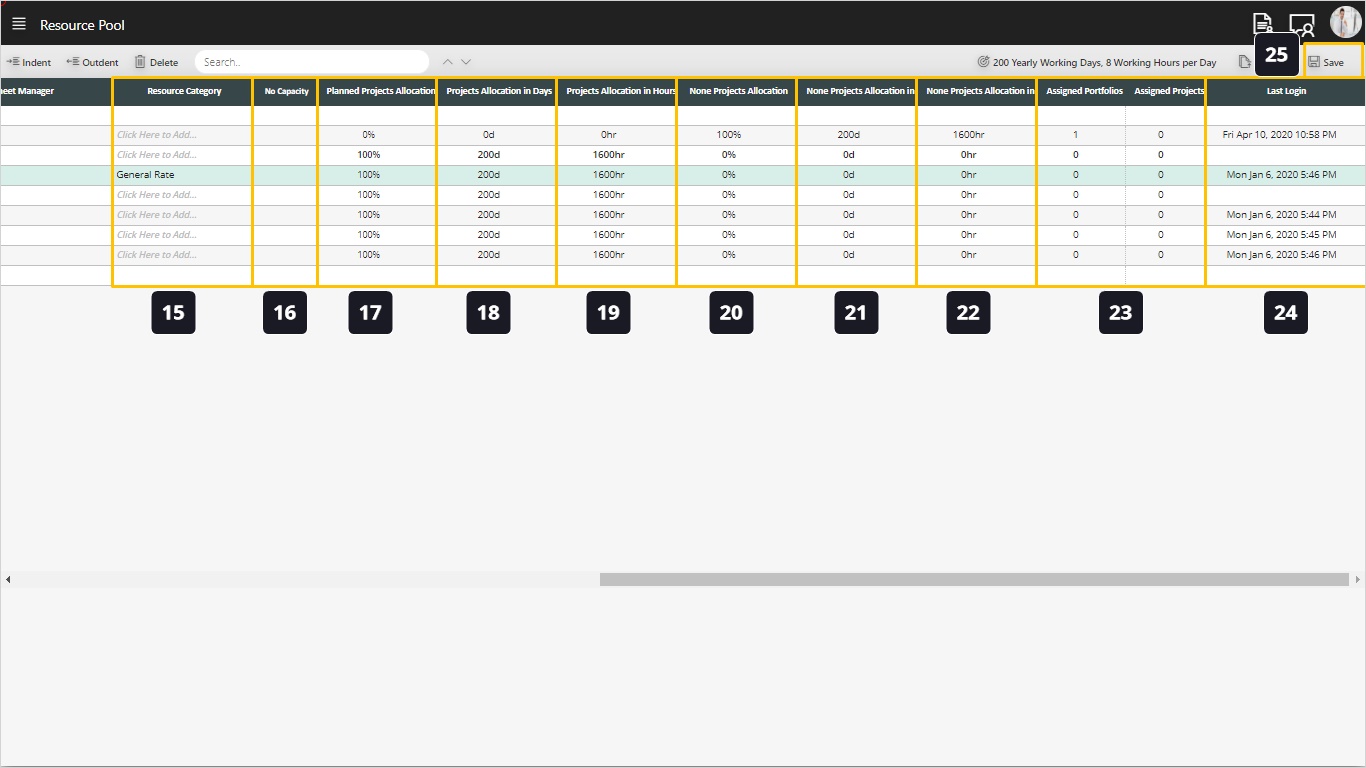
- Select the resource category you defined earlier in the administration screen. It will affect the budget when choose a resource to work on your project.
- Optional, if you want any resource to be excluded from the capacity and allocation calculation, just click to enable No Capacity function.
Tip: This function usually used for top management resources as their capacity is not calculated within the organization capacity.
- Click to fill average planned project allocation percentage for a specific resource for this year.
- System by default will calculate project allocation in days
- System by default will calculate project allocation in hours
- System by default will calculate non project allocation percentage
- System by default will calculate non project allocation in days
- System by default will calculate non project allocation in hours
- These two columns to show the number of assigned portfolios and projects to this resource.
Tip: You will not be able to delete a resource if there is a project or portfolio assigned to him.
- A last login stamp is available for each resource.
- Click Save