Project Methodology
Introduction
Each project is linked to a methodology. A methodology defines the project life cycle, which is made up of the stages that make up the life cycle. Each stage shows the activities and steps required to plan and execute the project.
This tab is a reflection of the project methodology defined by the PMO and is a guide for the project manager throughout his/her project.
Each activity is also a holder of the documentation relevant to this activity, for example, you would upload your project charter document in the Define Charter activity. You can also download the templates for those documents in their relevant activities.
In summary, this is the project management governance defined by the PMO and should be followed in this project.
Steps:
- Open the Project Methodology tab.
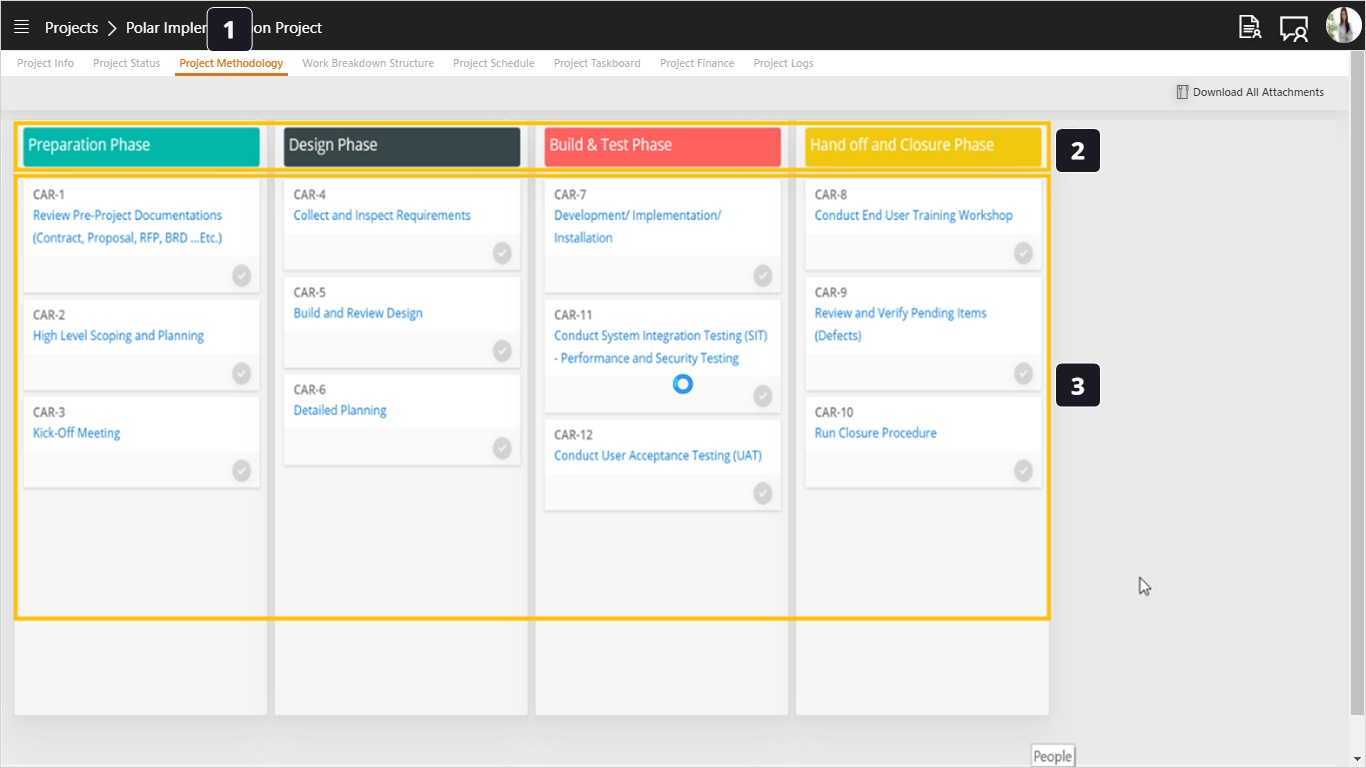
- Observe the phases or stages of the project life cycle.
- Observe the project management and technical activities defined under each stage.
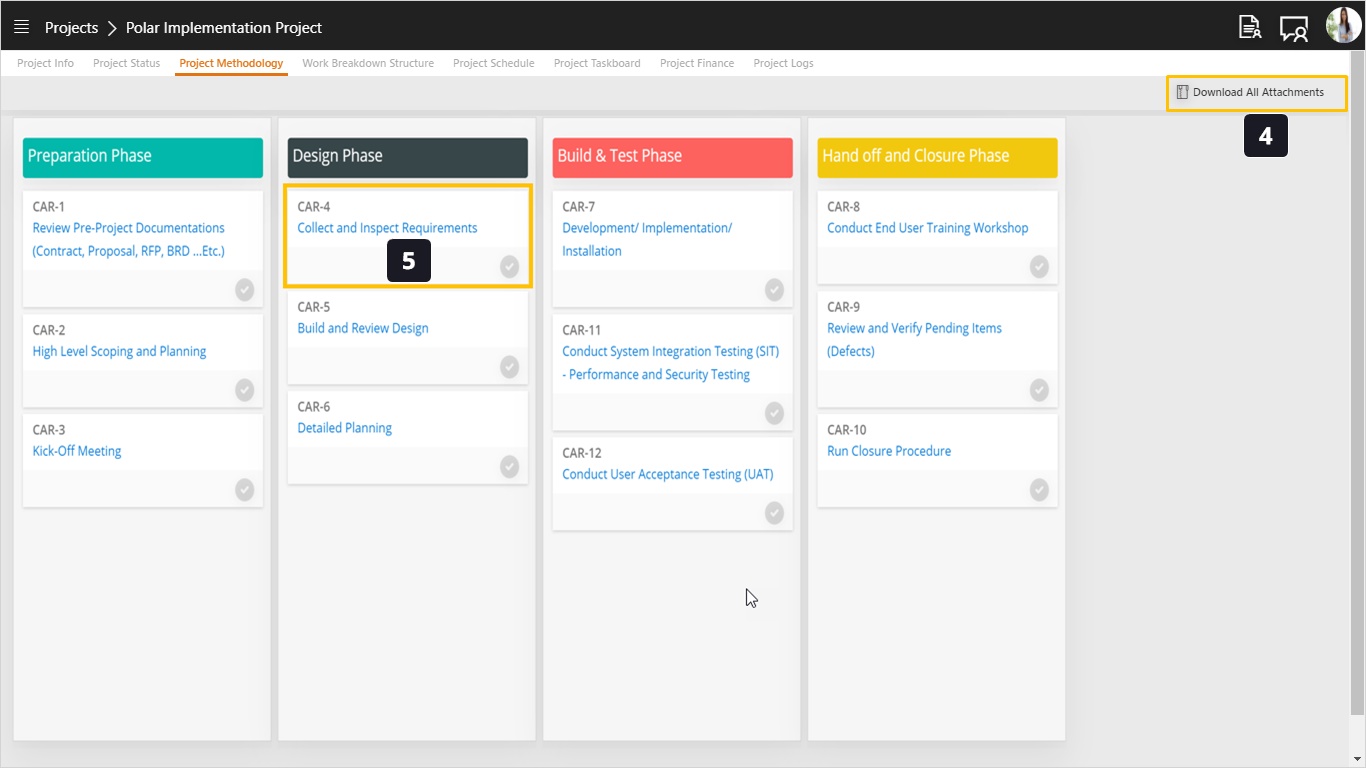
- This button allows users to export files attached to the project life cycle as a zip file, the folder structure will match the structure of the project methodology, showing the phases/stages as parent folders, and then the activity names as sub-folders. Each revision of the files will be exported if the same file has multiple revisions.
- Each card represents an activity as defined by the PMO as something that should be done typically in this type of project. Click the card name to open it.
Tip: Notice that this screen is auto-save.
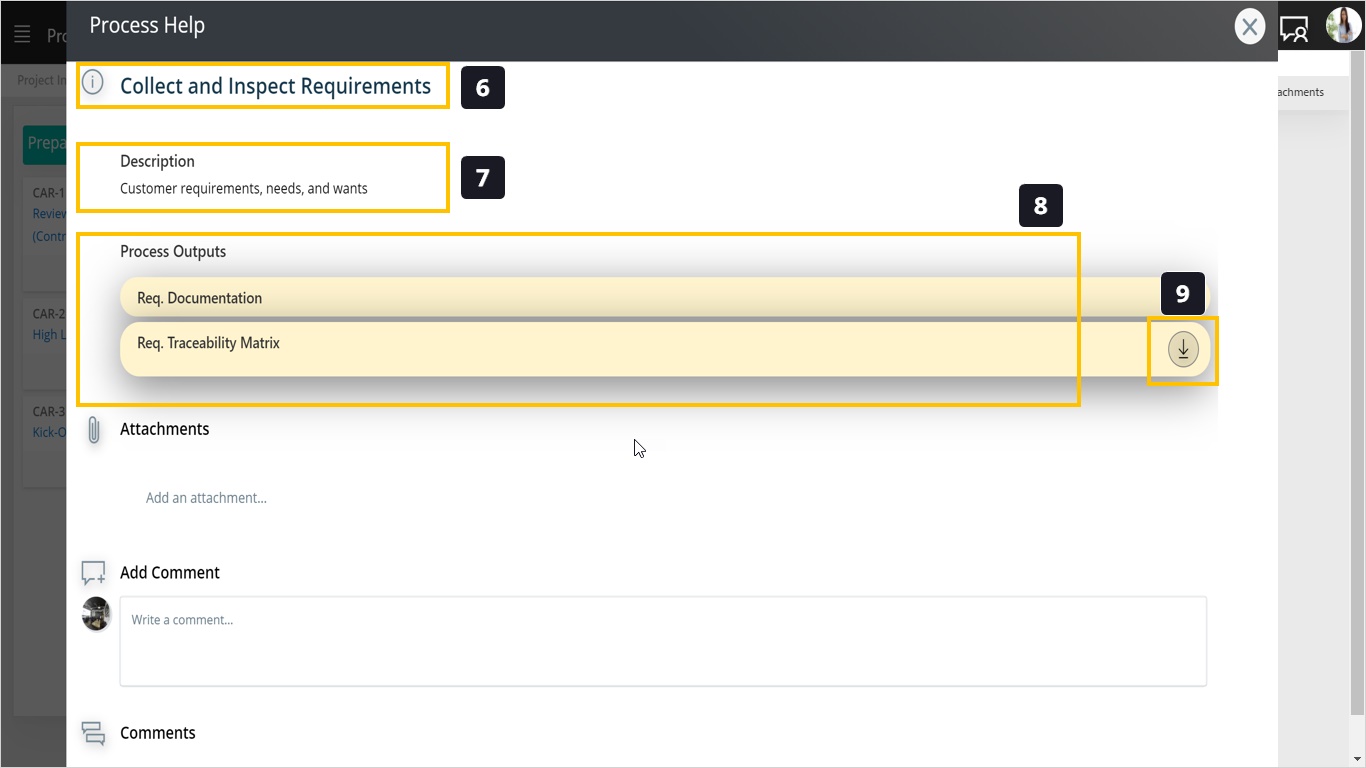
- First you will notice the activity/process name.
- The process description tells you a brief on this process and how to handle it.
- In this part you will see the process outputs as defined by the PMO. Outputs are the things that you need to create or deliver as a result of conducting this process.
- If this output has a template to comply with, you can download it from this download icon.
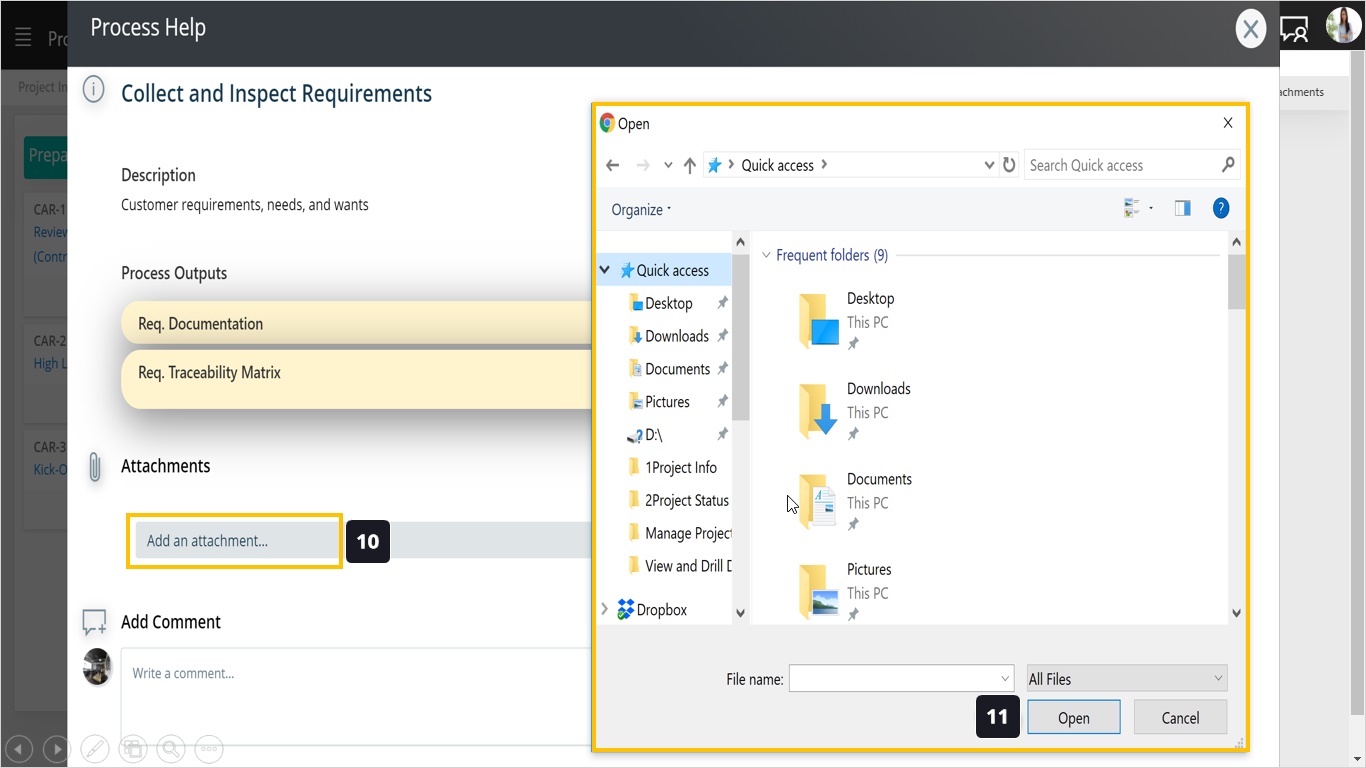
- For any template you downloaded and edited, you can click here to upload it to CarrotCut. You can also upload any supporting documentation, for example, system specifications provided by a vendor.
- Choose the desired file and click Open.
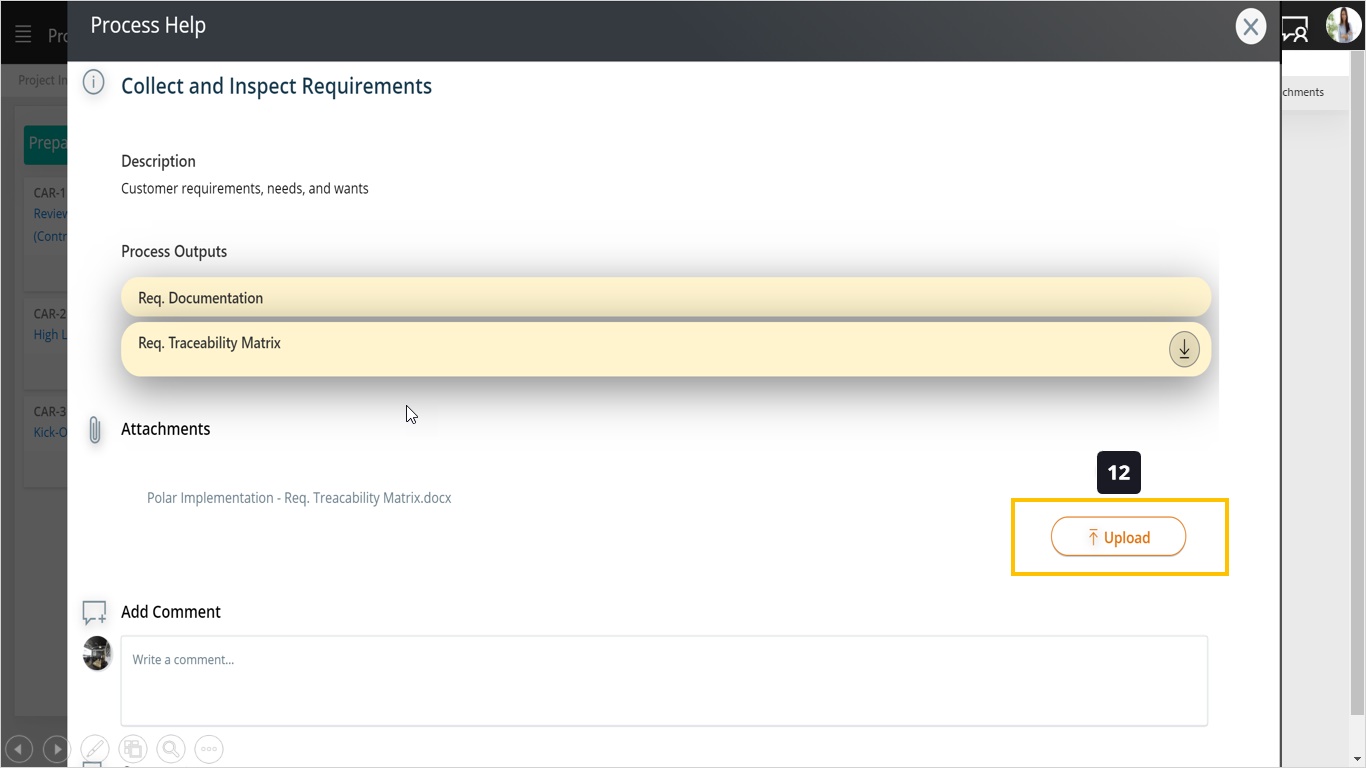
- Click Upload.
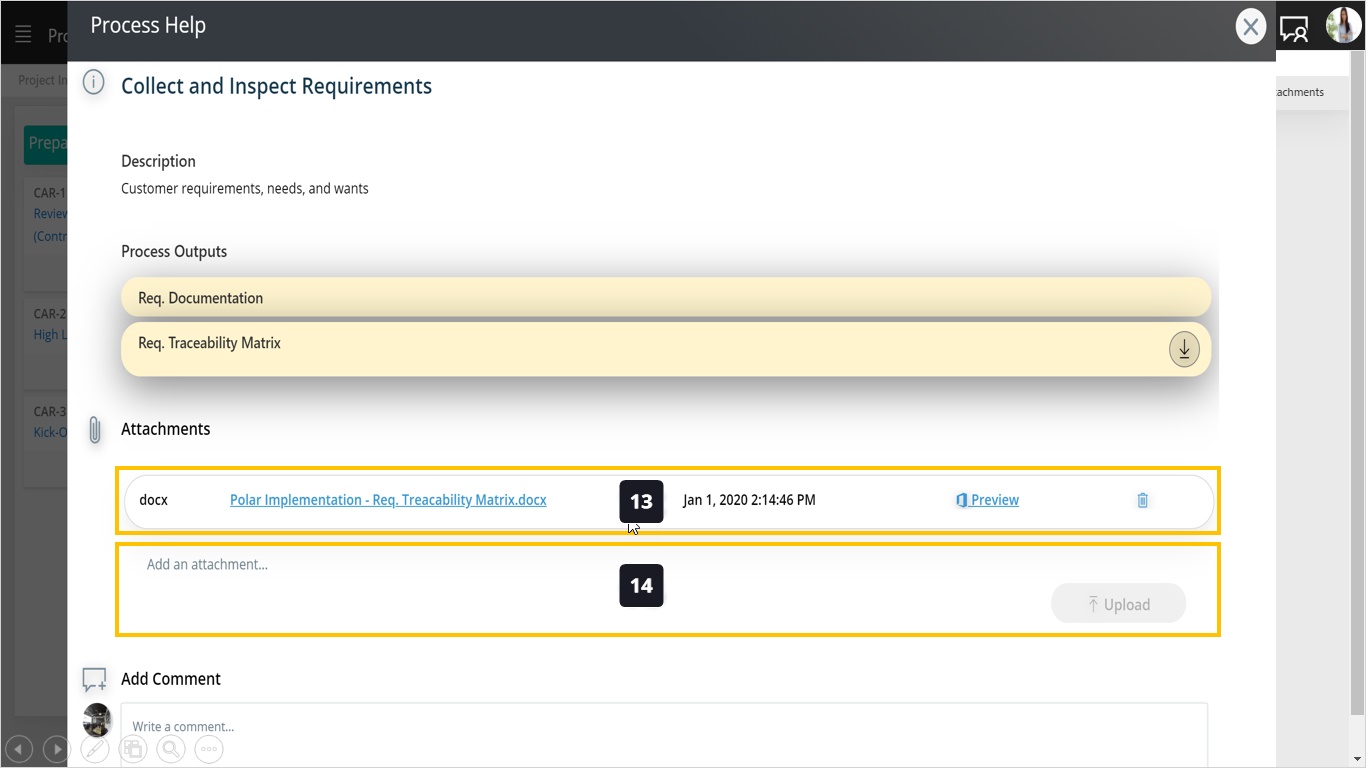
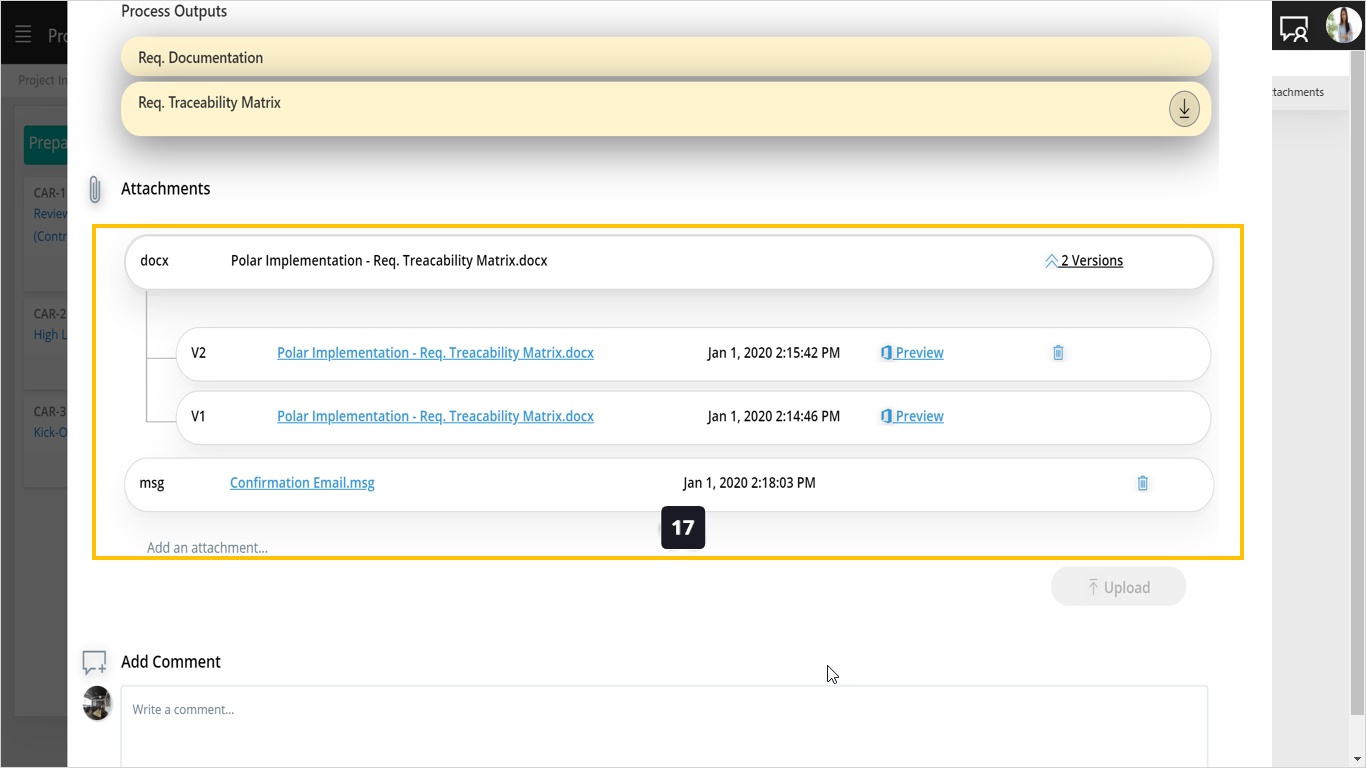
- Notice that the file is attached. You can use the Preview to view the file contents in browser. You can also use the Trash icon to remove the file.
- If you made updates to the file and wish to upload a newer version, click Add an attachment again. Make sure to maintain the same file name if you want the system to treat it as a version of the same file.
- Once a file with the same name is uploaded, it will be managed as another version and displayed under the same file name.
- You can attach another file. One good use of this tool is to upload important emails such as approval emails for requirements, changes, or test results. Those emails can be attached here for reference.
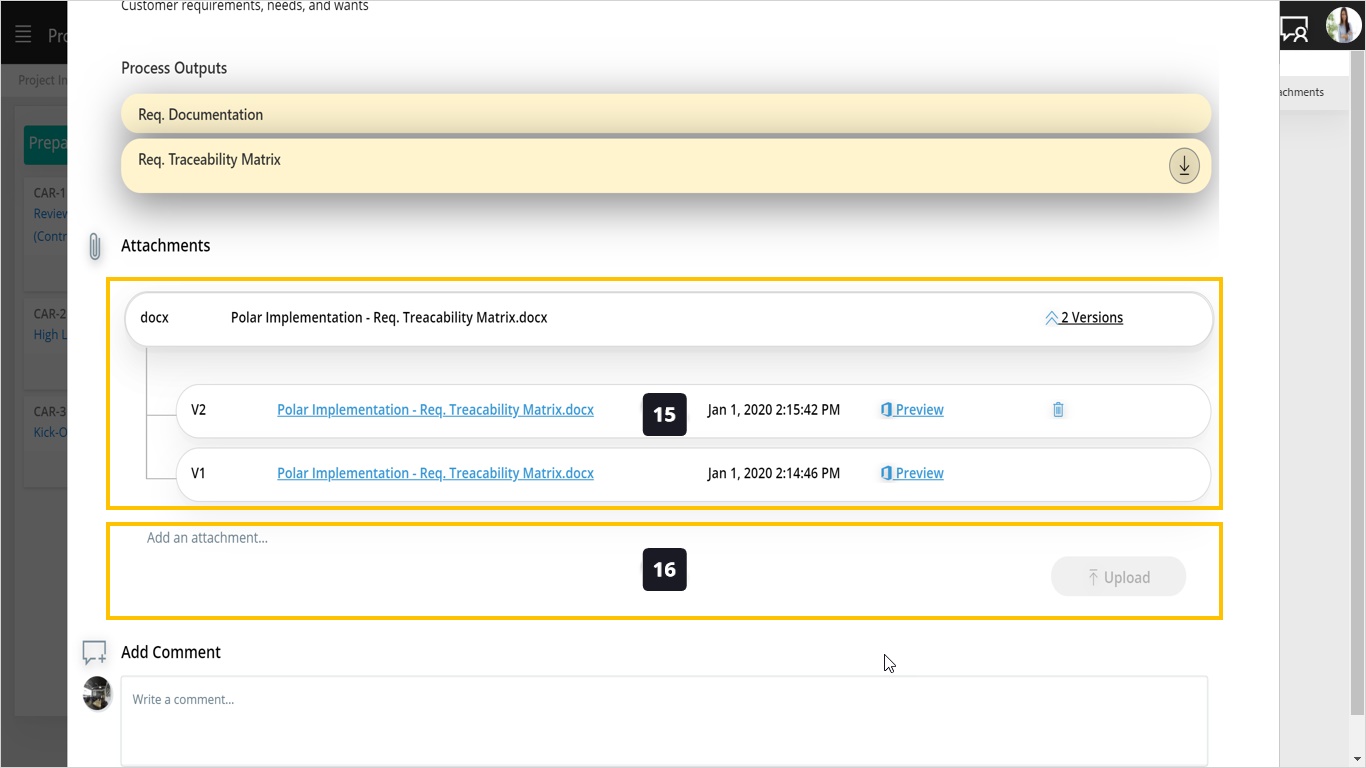
- Notice how you have file groups, each different file with its own versions will be displayed as a group of revisions.
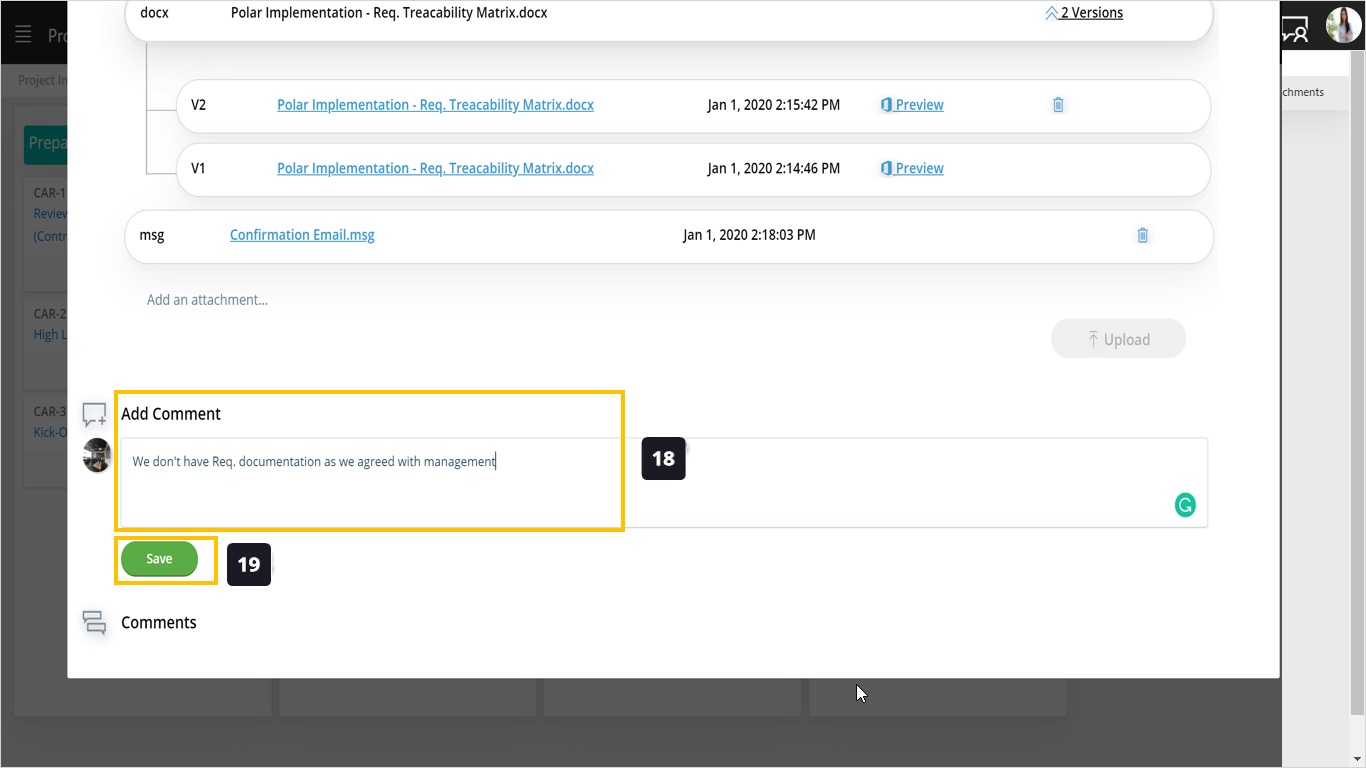
- Here you can add your comments about the process, for example, if you want to skip certain deliverables or the whole process you can add your justification which could help you in project management audit.
- Save your comments.
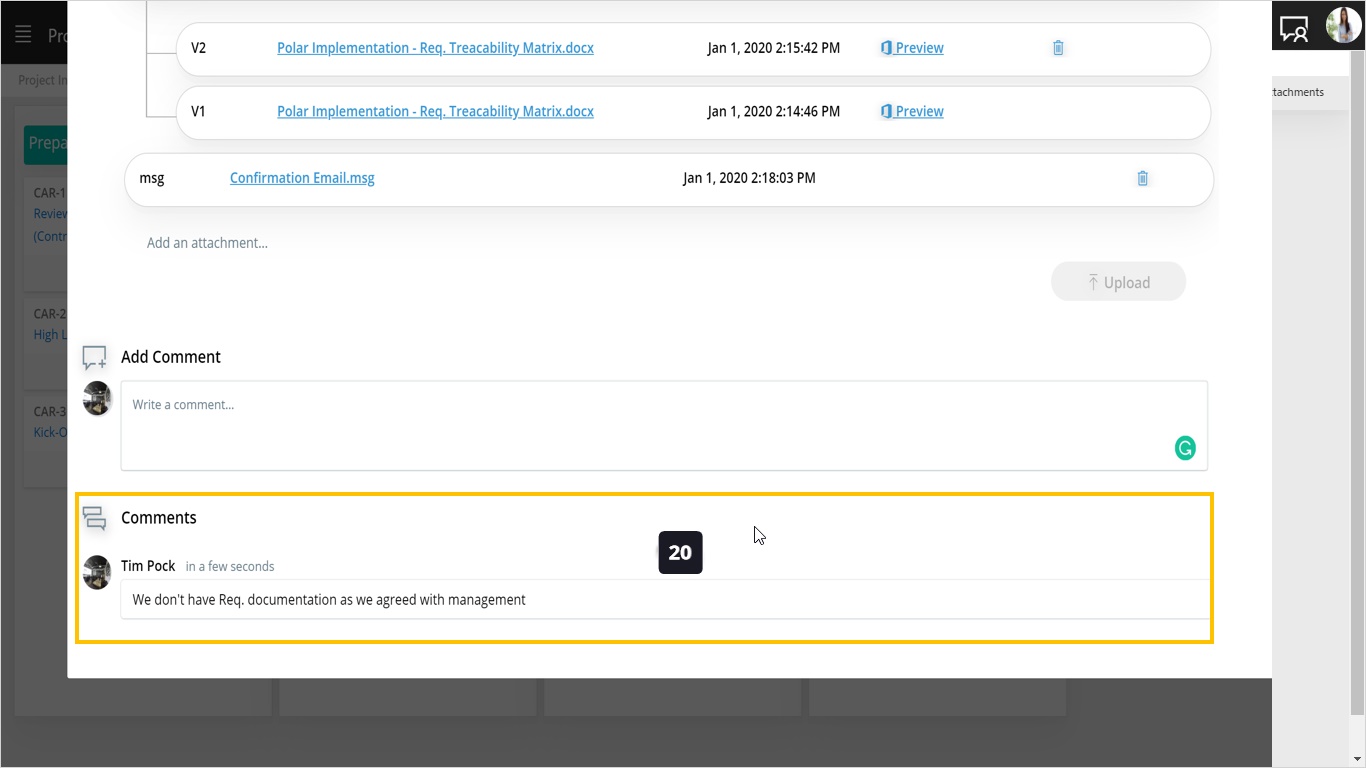
- Notice that comments history is accumulated in read only mode.
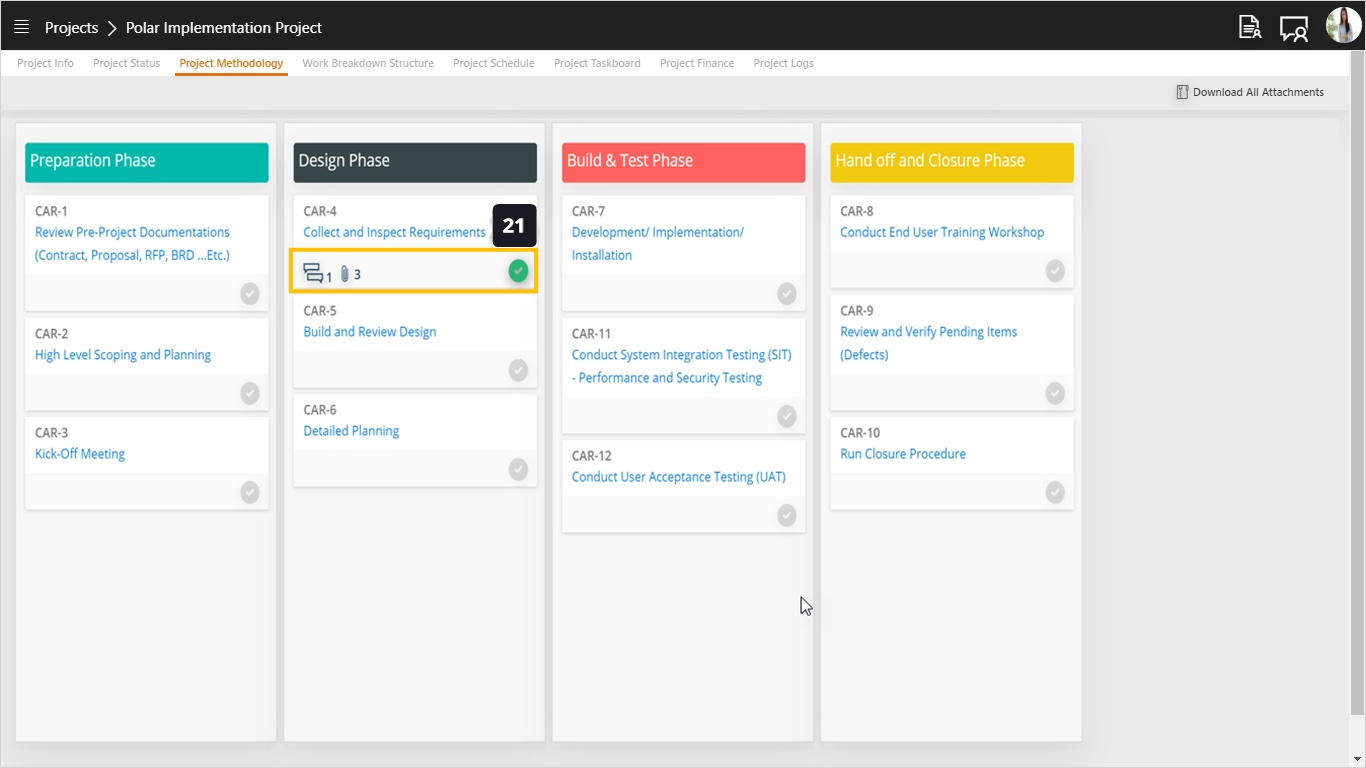
- Once you close your card, notice how each card shows indicators for attachments and comments inside this card.
