Add/ Publish/ Delete New Methodology
Build New Methodology
Steps:
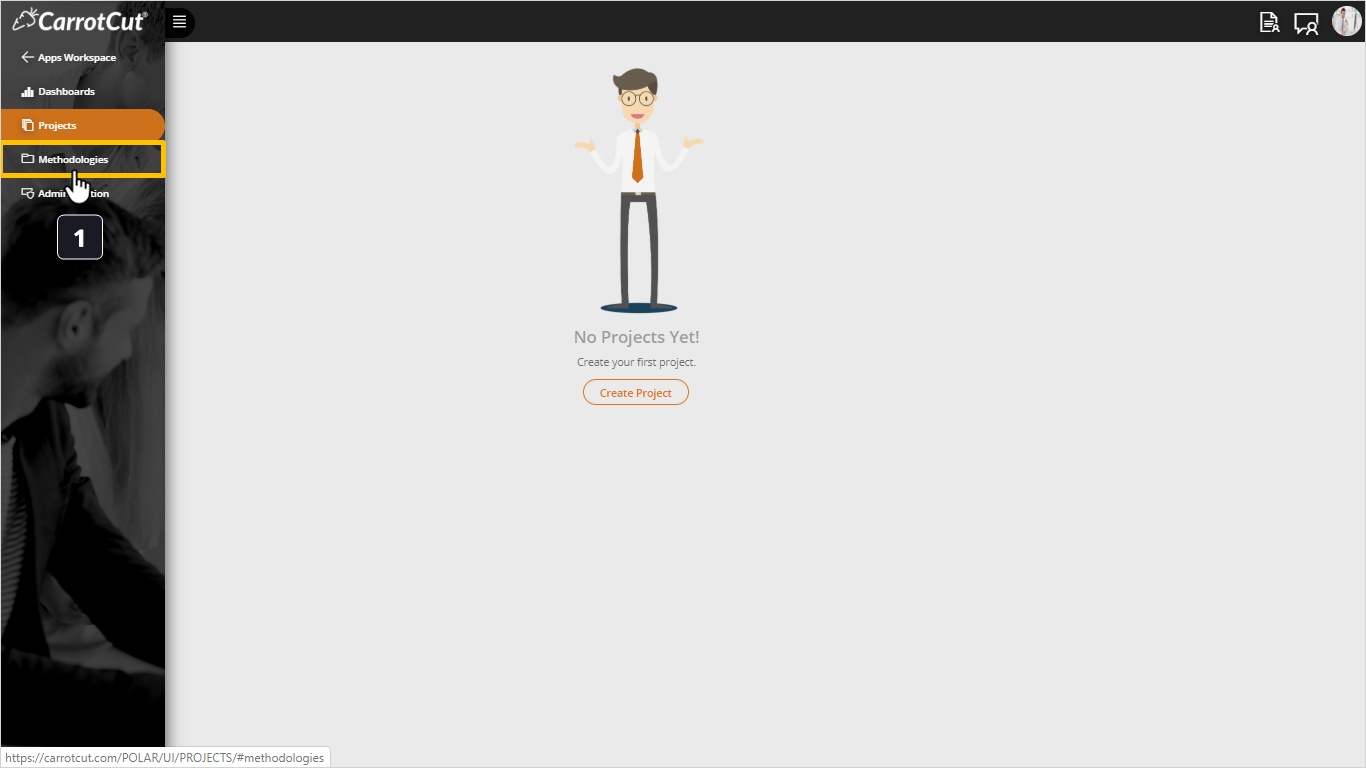
- Go to Project Management Module, click (Hamburger Menu) – Click on Methodologies
In CarrotCut we can create a new methodology based on an existing one instead of starting from scratch.
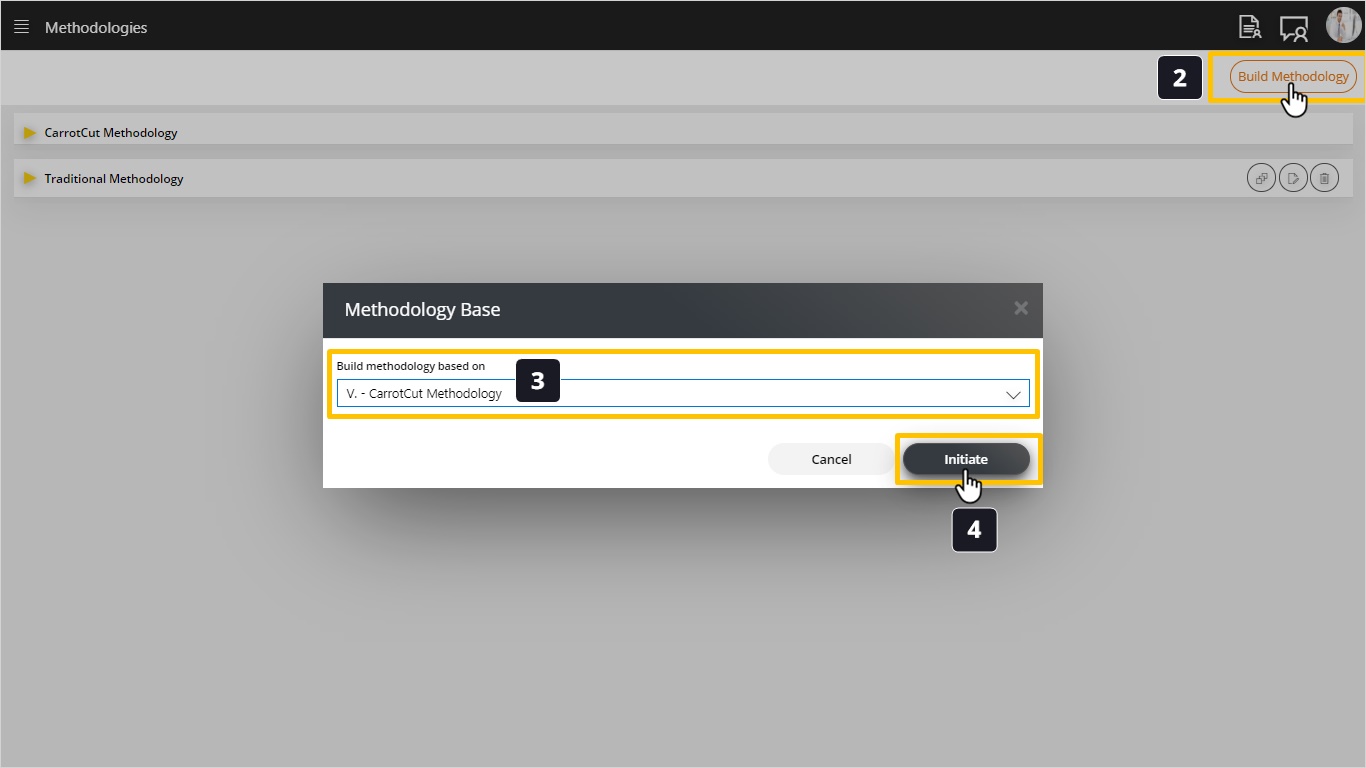
- Click on Build Methodology.
- Select the methodology based on which we want to build the new methodology.
- Click on Initiate.
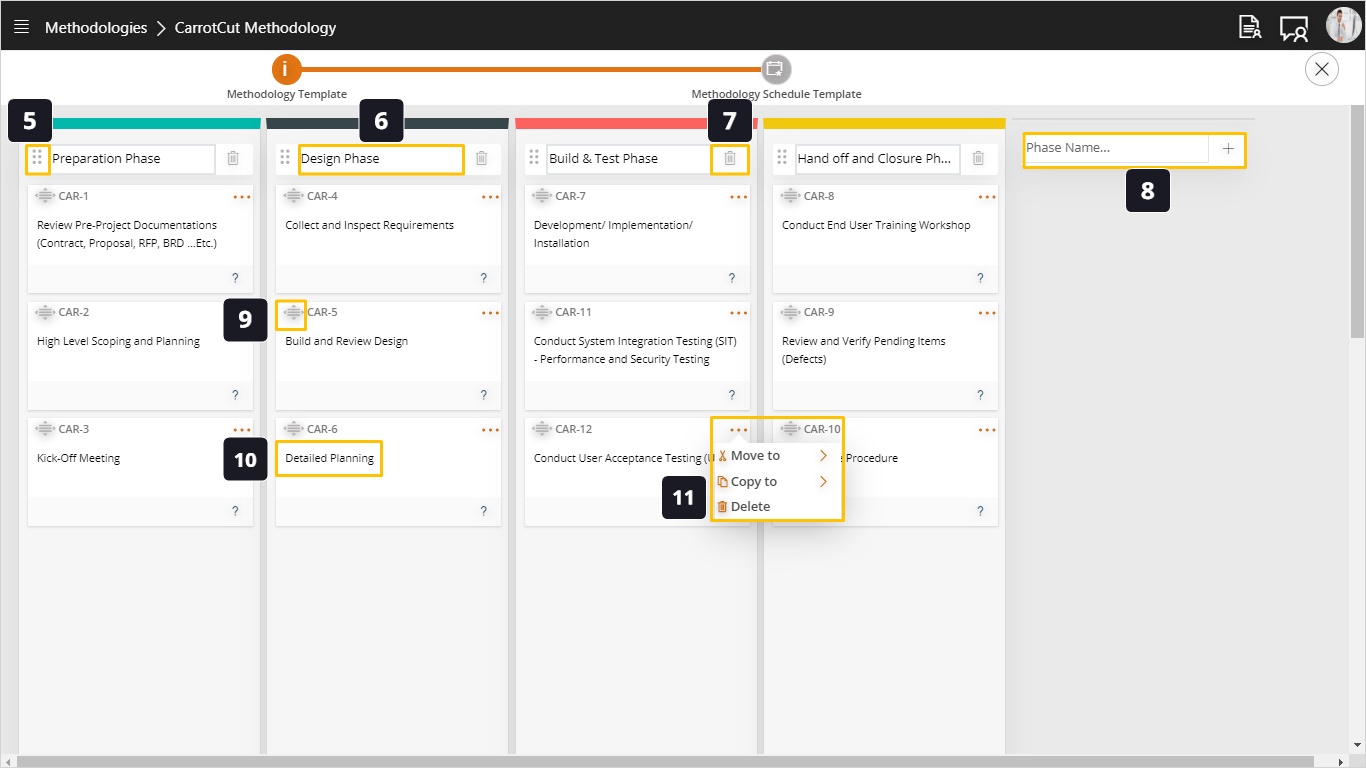
At this point we see our new methodology (which is a copy of the methodology selected previously) and now we can start composing our methodology. There are several things we can do while in the methodology builder:
- You can drag-drop the phases (columns).
- You can rename any phase.
- You can delete any phase, but to delete it, it must not have any processes within, so you may need to move the processes to other phases (columns) before attempting to delete the phase.
- Add New Phase.
- Move the process around by dragging them from phase to phase or re-arrange them within the same phase.
- Rename the Process.
- On any card in the methodology we can see an action menu (with three vertical dots). Once we select this menu the following options will unfold:
- Move to, which allows moving this card from this phase to any other phase.
- Copy to, which allows you to create a copy of this card to another phase. This would be useful when you need to do the same activity again in a different phase. This applies to cases like risk management which you could do several times over the project life cycle.
- Delete which simply removes this card from the methodology.
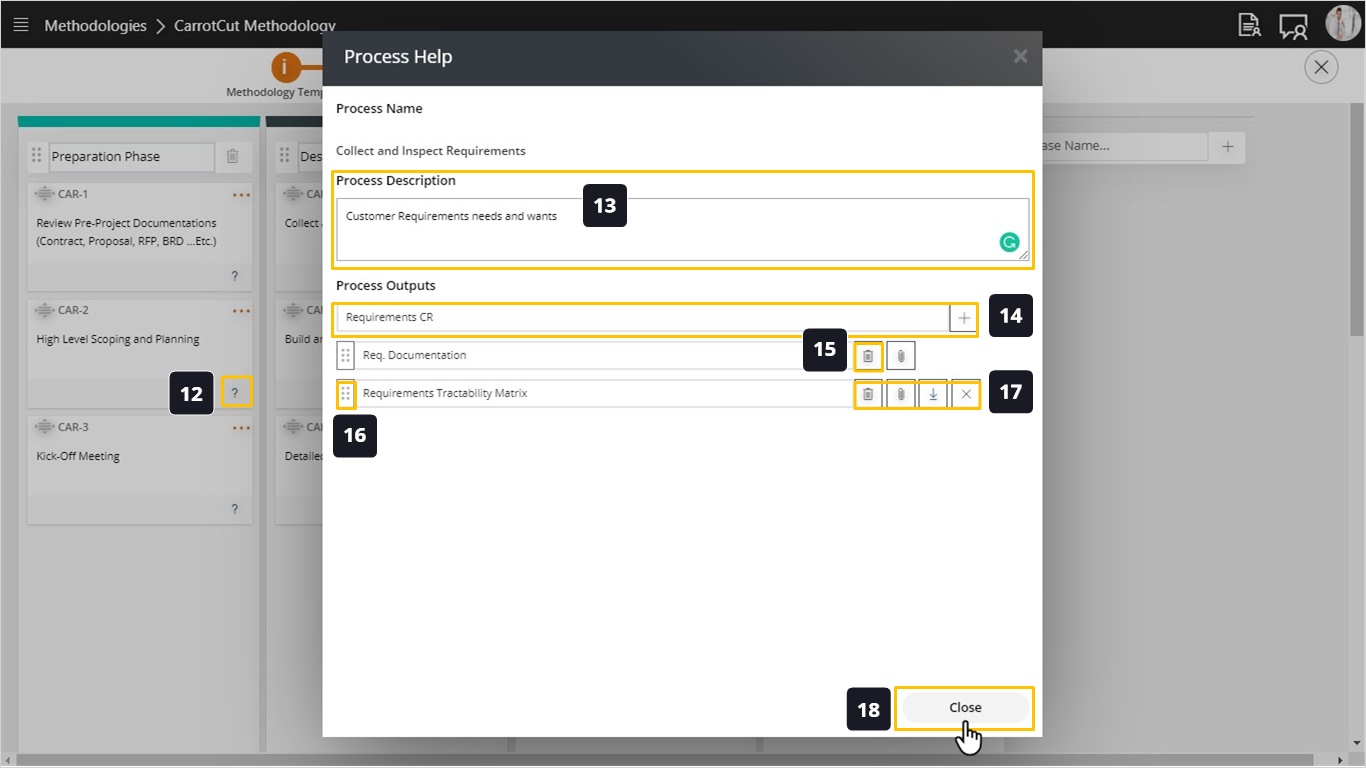
- If you open a process card by clicking on the question mark in the button, you can define the details of this process or activity.
- Process Description, where you can define a detailed description and guidance for the project managers who will use and implement this methodology.
- Process Output, where you can specify the outputs that will result from executing this process. For example, for Collect Requirements, a typical output would be “Requirements Specifications”.
- If you want to delete output, click on delete function.
- You can move the outputs up and down.
- As you can see, for each output you can attach/ download/ remove template (Attachment).
- All changes will be auto saved, click on Close.
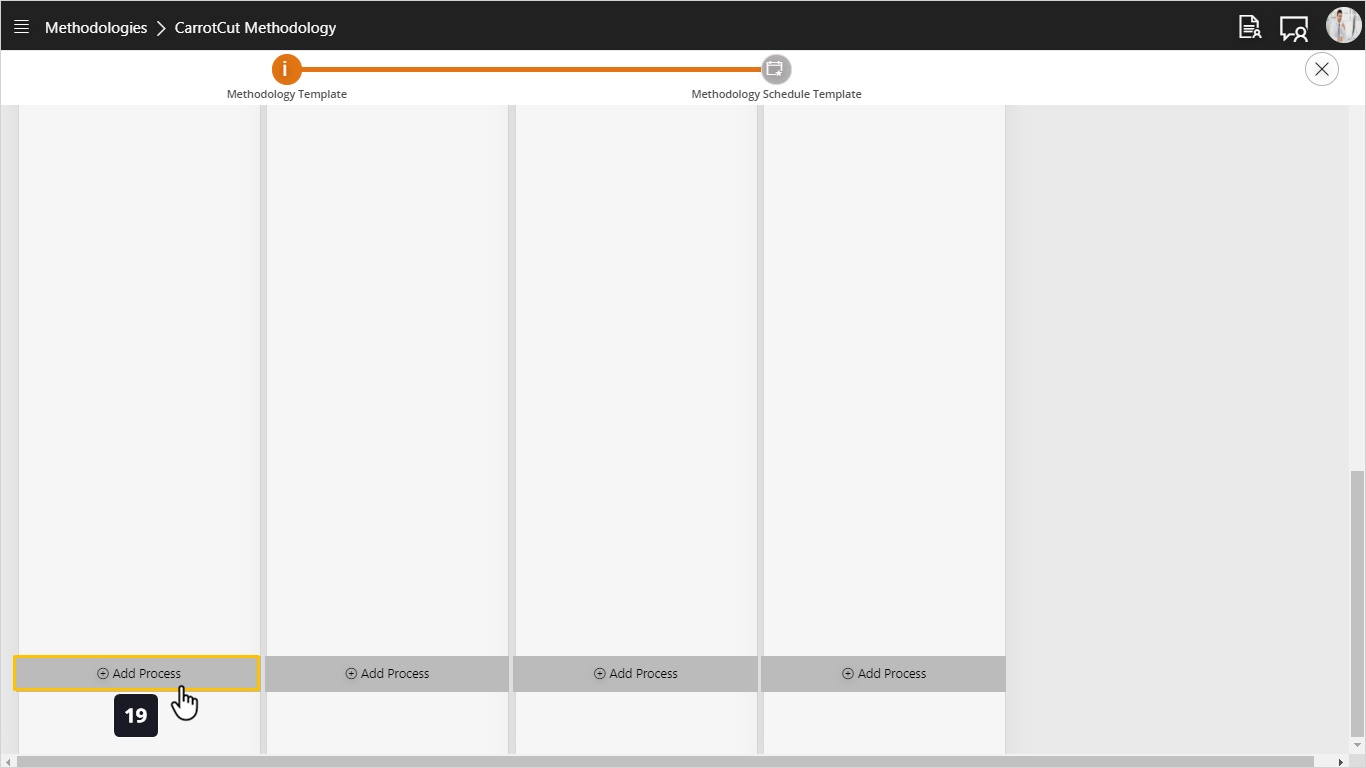
- If you scroll all the way down to the bottom of the phase column you can find an action to add new process card.
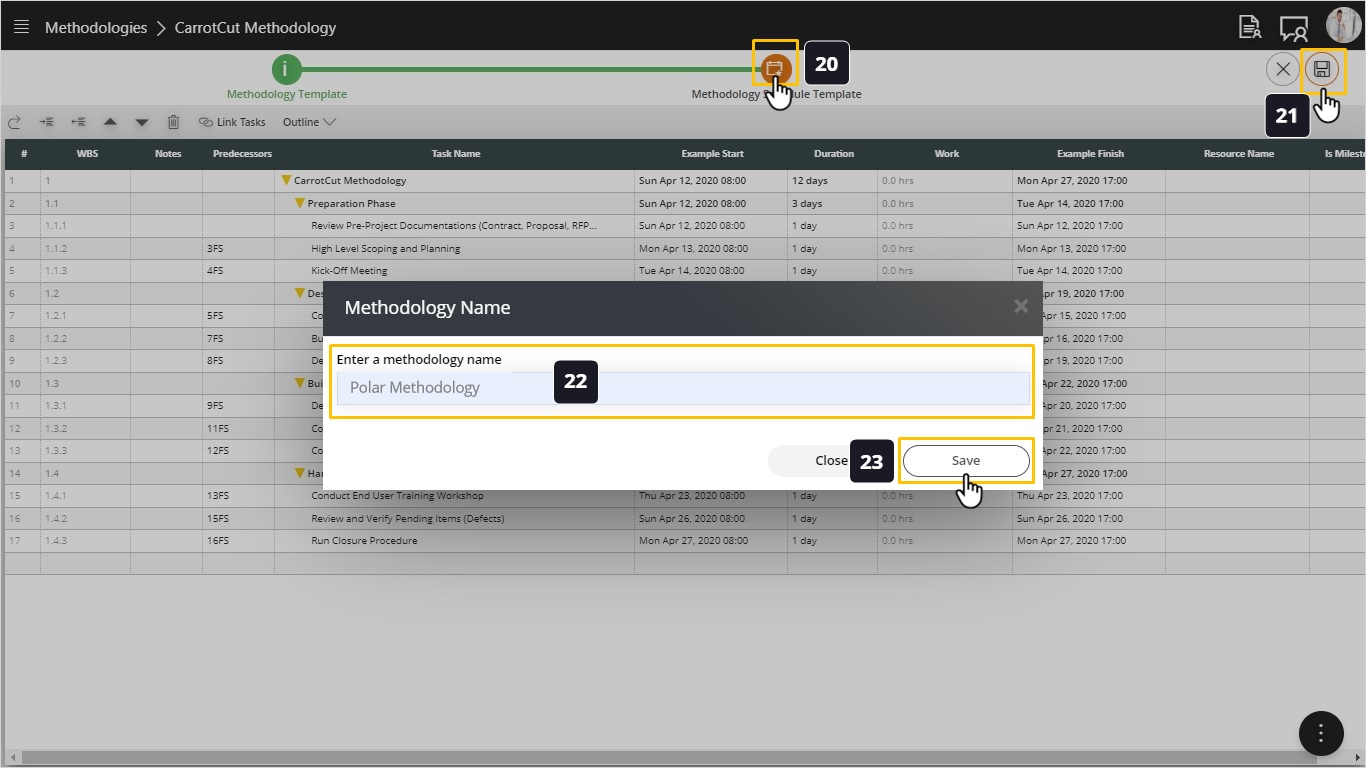
- Click on Methodology Schedule Template.
- Click on Save to save your work.
- Enter your methodology name.
- Click on Save.
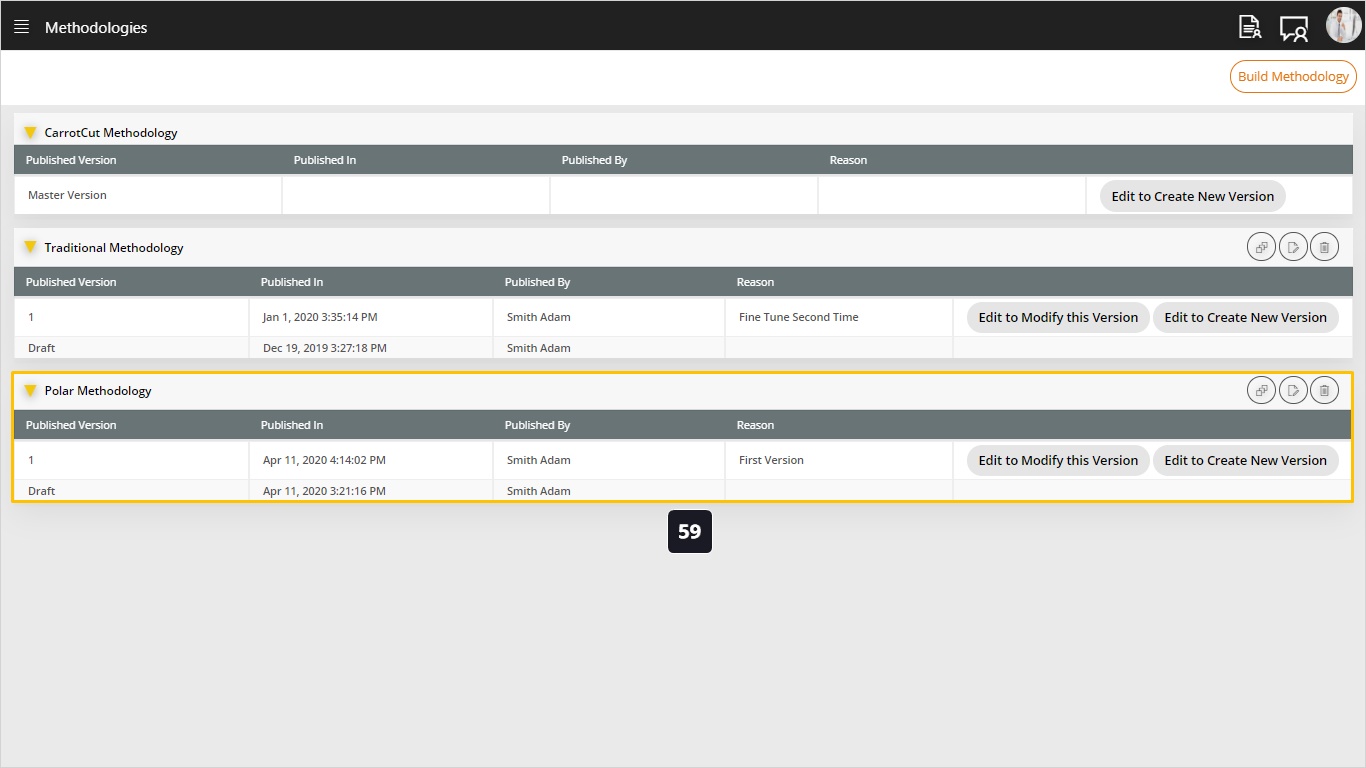
- View the History of Methodology Versions.
- Rename Methodology.
- Delete Methodology. Tip: This function will be disabled if you have a project linked to this methodology.
- To proceed in building your methodology, click on Edit to Create New Version.

Now let’s learn how to define a schedule template for our methodology. The value of this is to capture the experience with similar projects and define the typical dependencies, duration, and roles assigned to the tasks.
Tip: Please note that the default schedule will work based on the default calendar you defined in the administration data early.
Tip: While creating your schedule, it is recommended, at the beginning of each phase to have a task named (Phase Gate In) with duration zero and at the end of the same phase task named (Phase Gate Out) with same duration. This will help you link the whole tasks to have a well connected and linked Network Diagram. As a standard practice in scheduling, you should be aware that the project Network Diagram linked from the beginning to the end with no tasks unlinked and with one task as starting and one task as finish.
Click on Methodology Schedule Template, and let’s take a quick tour on screen functionalities.
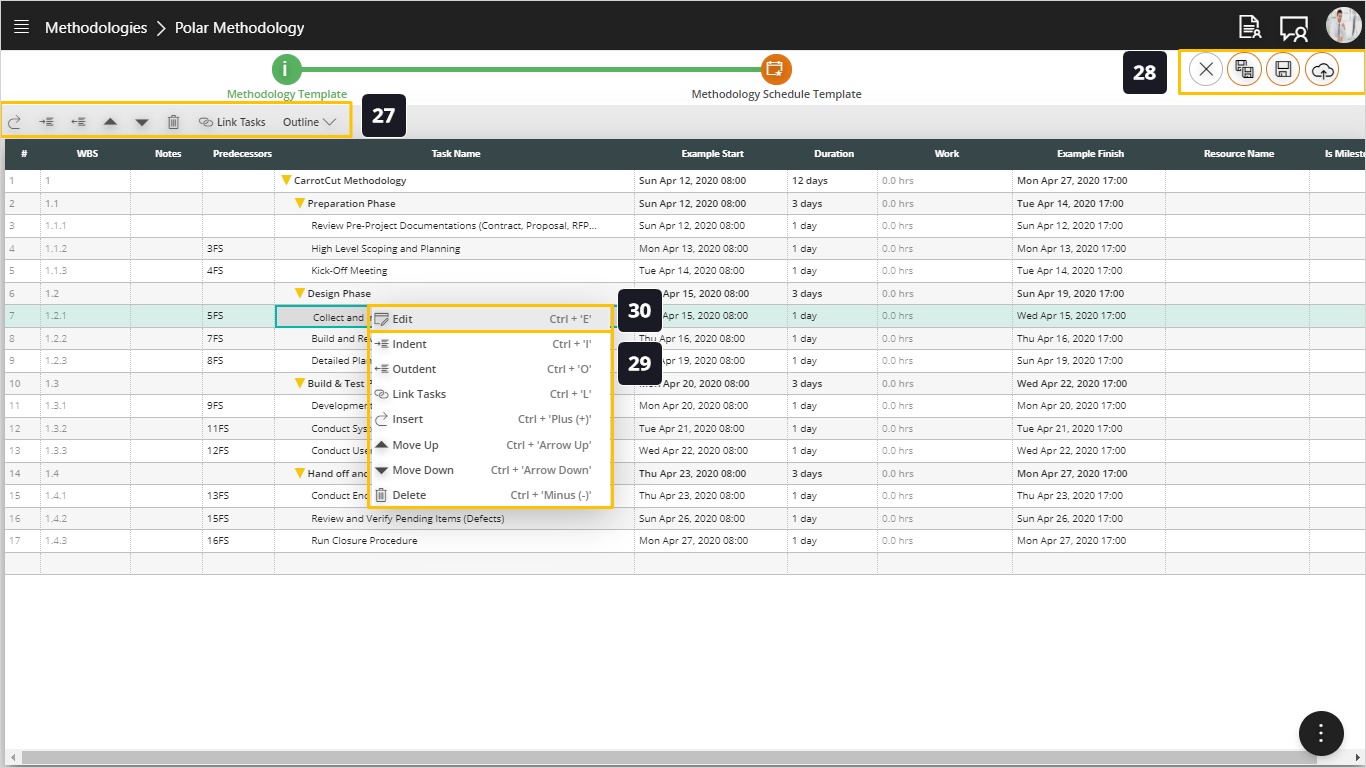
- There is a set of functions to be used while you are dealing with Schedule Template Screen, to include:
- Insert which allows us to add new tasks to the schedule.
- Indent and Outdent which changes the level of indentation of a task in the schedule.
- Move up and Move down which allows you to re-order the tasks in the schedule by moving them up or down while preserving all of their other attributes.
- Delete which allows us to delete any task in the project.
- Link Tasks which helps us to automatically set the dependency for a set of tasks in a sequential order (Finish to Start or "FS") which is the most common way to sequence project activities.
- Outline which will help you show a specific level of indentation automatically.
- Another set of functions to be used, to include:
- Close the methodology.
- Duplicate the methodology if you want to build a new methodology similar to this one. It is a Save as function.
- Reset the whole schedule template and back to default data.
- Save any changes.
- Publish the methodology to be available officially for all projects and it will take new version number.
- Right click, you will see all shortcuts that are available for you to be used when you are dealing with this screen. Noting that you can use (Ctrl+Z) shortcut to undo up to 5 actions before saving.
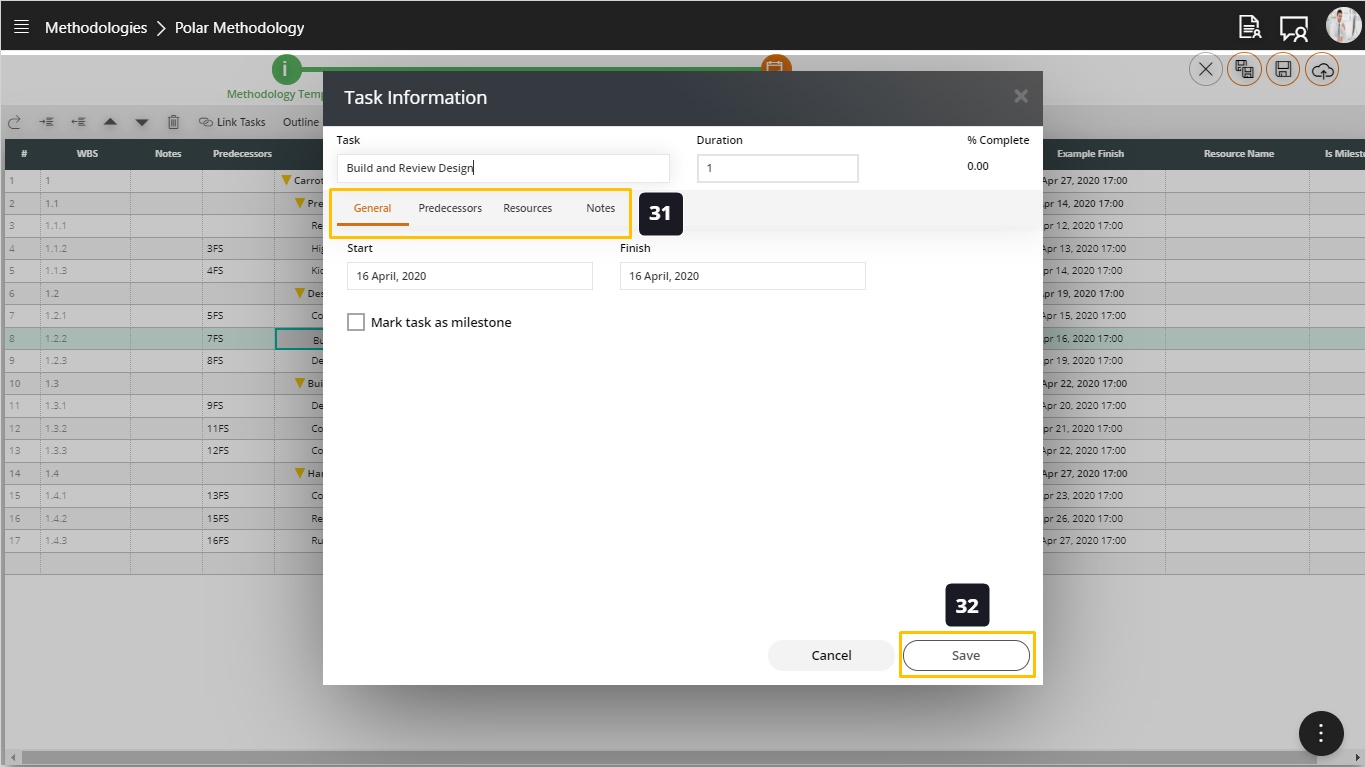
- To Edit a Task, select a task from the schedule - Right Click - Click on Edit or Press (Ctrl+E)
- A task popup dialog will open to include the following details about the task:
- General tab and here you will see general information about the task such as Task Name, Start and Finish Dates, duration, and % of completion. You can also see if this task was set as a milestone.
- Predecessors tab which is also the dependency and that’s how we establish sequence between the different tasks.
- Resources tab which allows us to define resources that will work on this task together with their working hours, so the allocation percentage on this task will be calculated automatically. Notice that allocation can be only specified from inside the Edit Task window.
- Notes tab, and here you can add special comments related to this task.
- Click on Save
- Click on FAB menu.
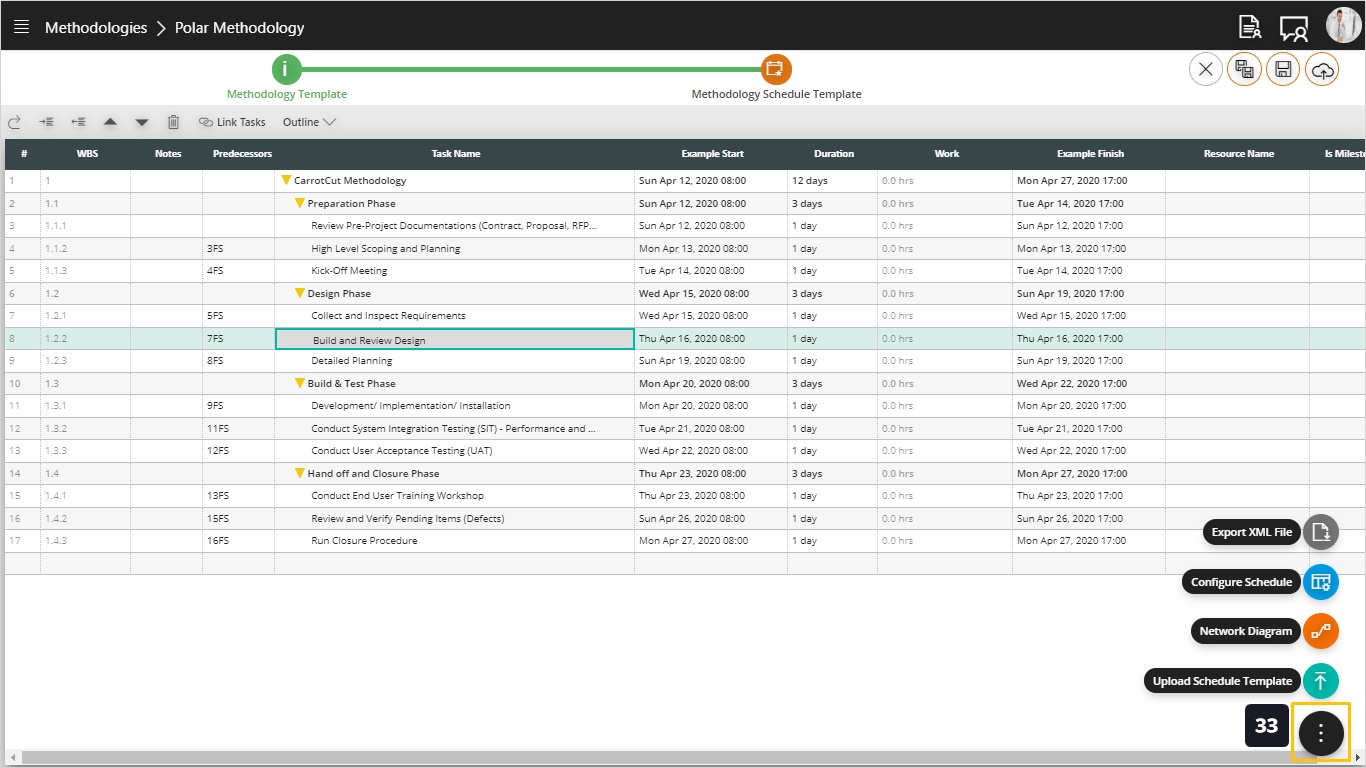
- If you do not want to use the schedule already created by default, and you have a standard template on MS-Project 2016 or you want to copy from a project schedule you believe it is perfect to be template, Click on Upload Schedule Template.
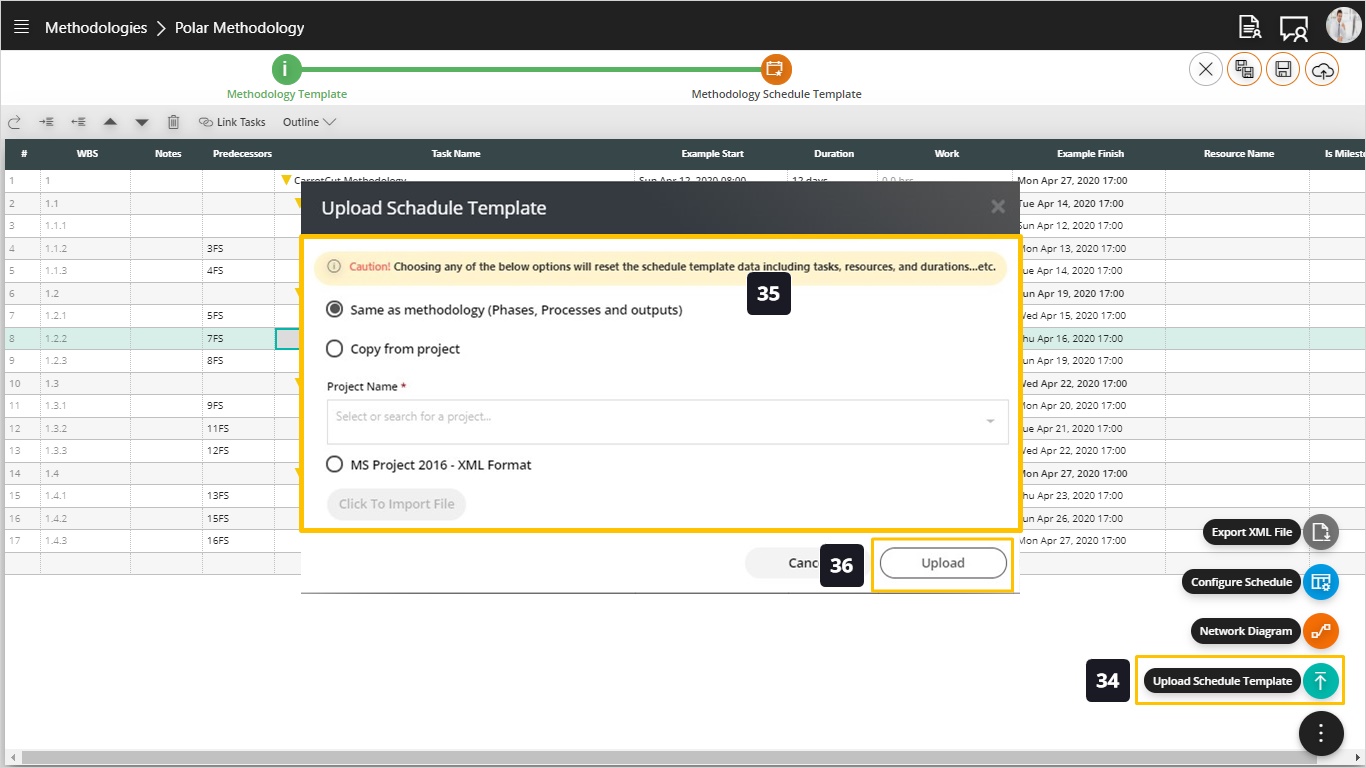
- Click to select one of the following options:
- Same as Methodology (Phases, Processes and Outputs), which is reflected from the Methodology. This is the default one.
- Copy from Project, which allows you to copy the schedule of an existing project. This is very useful if your organization runs a similar type of projects where the schedules look almost the same.
- MS Project 2016 – XML Format, which allows importing the schedule from an external MS Project file. Just make sure this is an XML file exported from MS Project 2016, not earlier versions.
- Click on Upload, and do not forget to save from upper shortcuts.
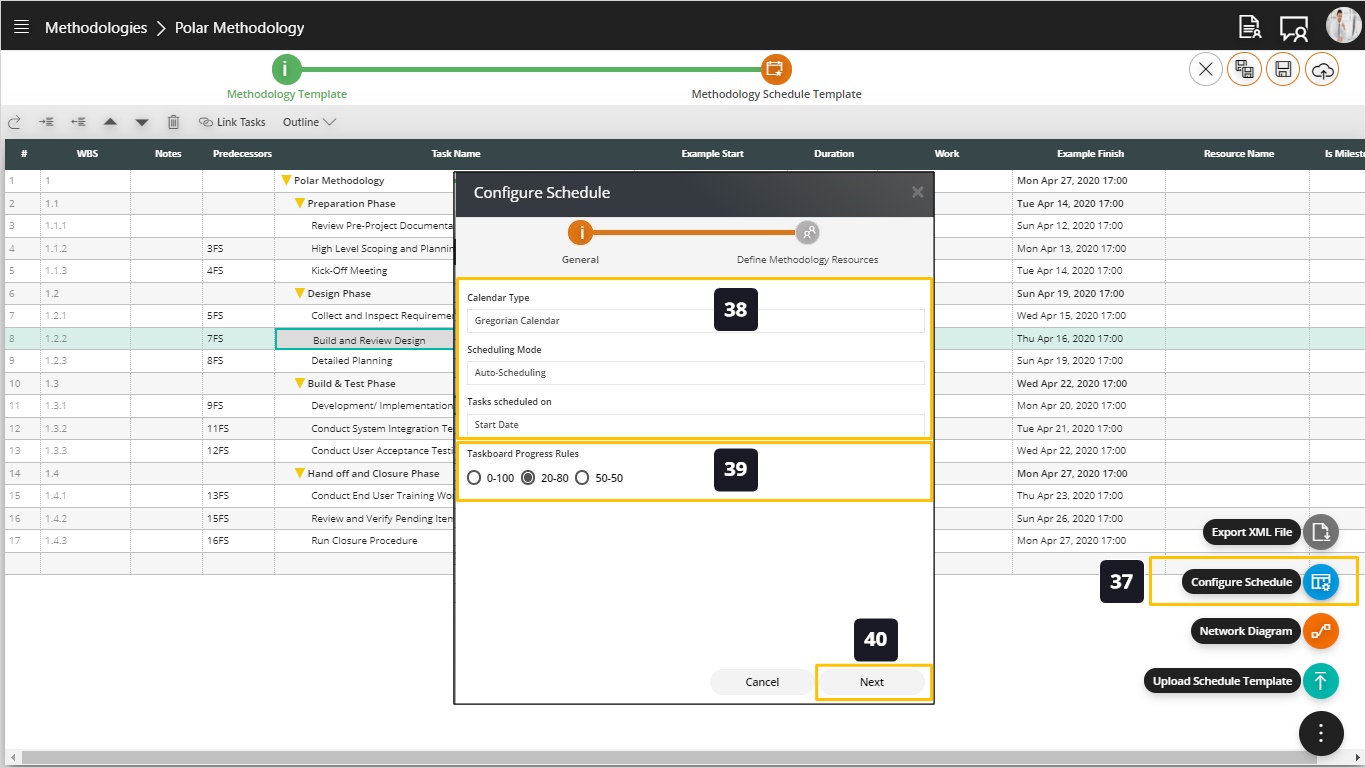
- You have uploaded your schedule template. If you want to add resource roles to your template, Click on Configure Schedule.
- All these data are default and disabled, so you cannot change.
- Click to select the taskboard progress rule to be applicable to the projects that will be linked to this methodology. The Progress Rules field dictates how the progress of a task will be calculated when it is moved on the task board from backlog/to-do, doing, or done. Here we have three choices:
- 0-100 which is pessimistic and keeps the task progress at zero until it is completed.
- 20-80 which is the most common approach, which sets the started tasks (doing) to 20% and then sets it to 100% when it moved to completed.
- 50-50 which is the optimistic approach, it sets the progress of a task to 50% as soon as it is started.
- Click Next
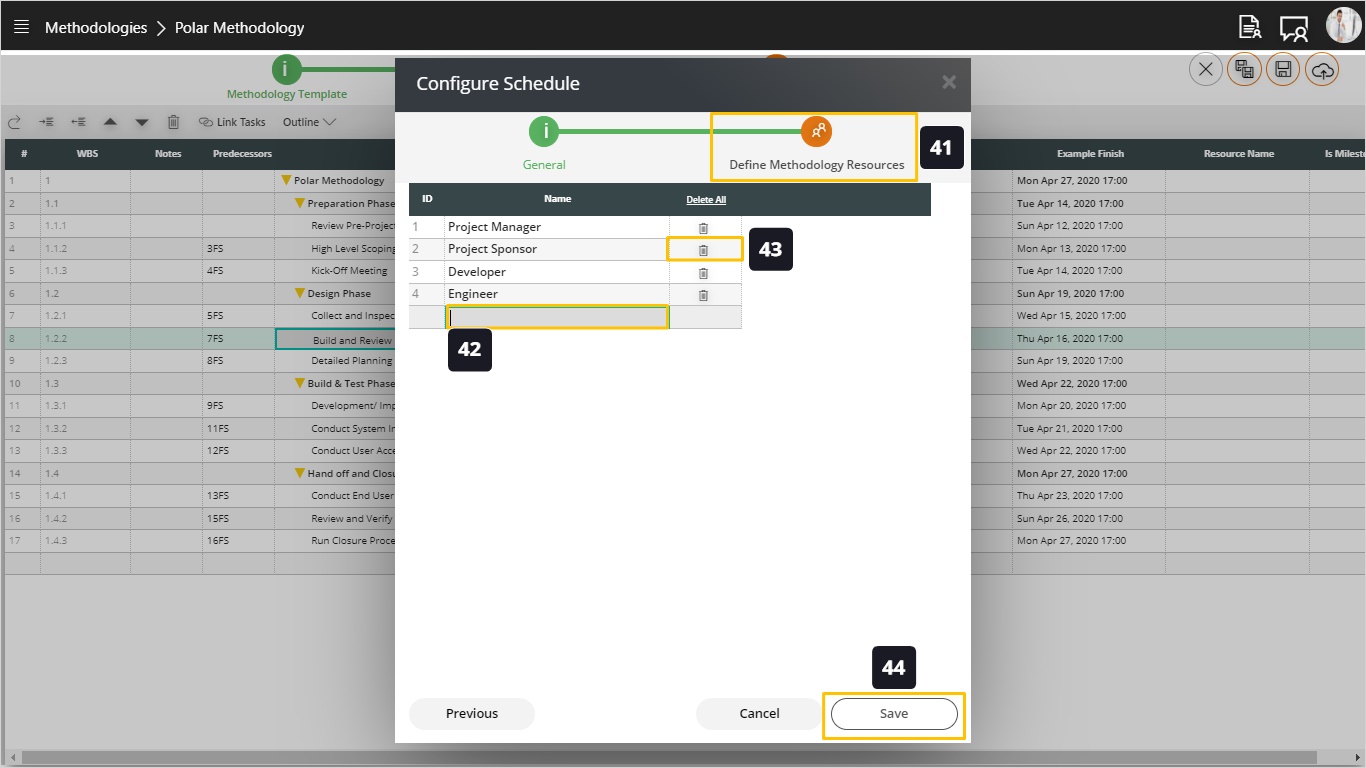
- Click on Define Methodology Resources.
- Add the standard roles (project manager, project sponsor, developer, tester, engineer …etc.) on this type of projects, or choose from the existing resources defined in the resource pool if you want to assign them by names.
- If you want to delete, Click on Delete function.
- Then Click Save.
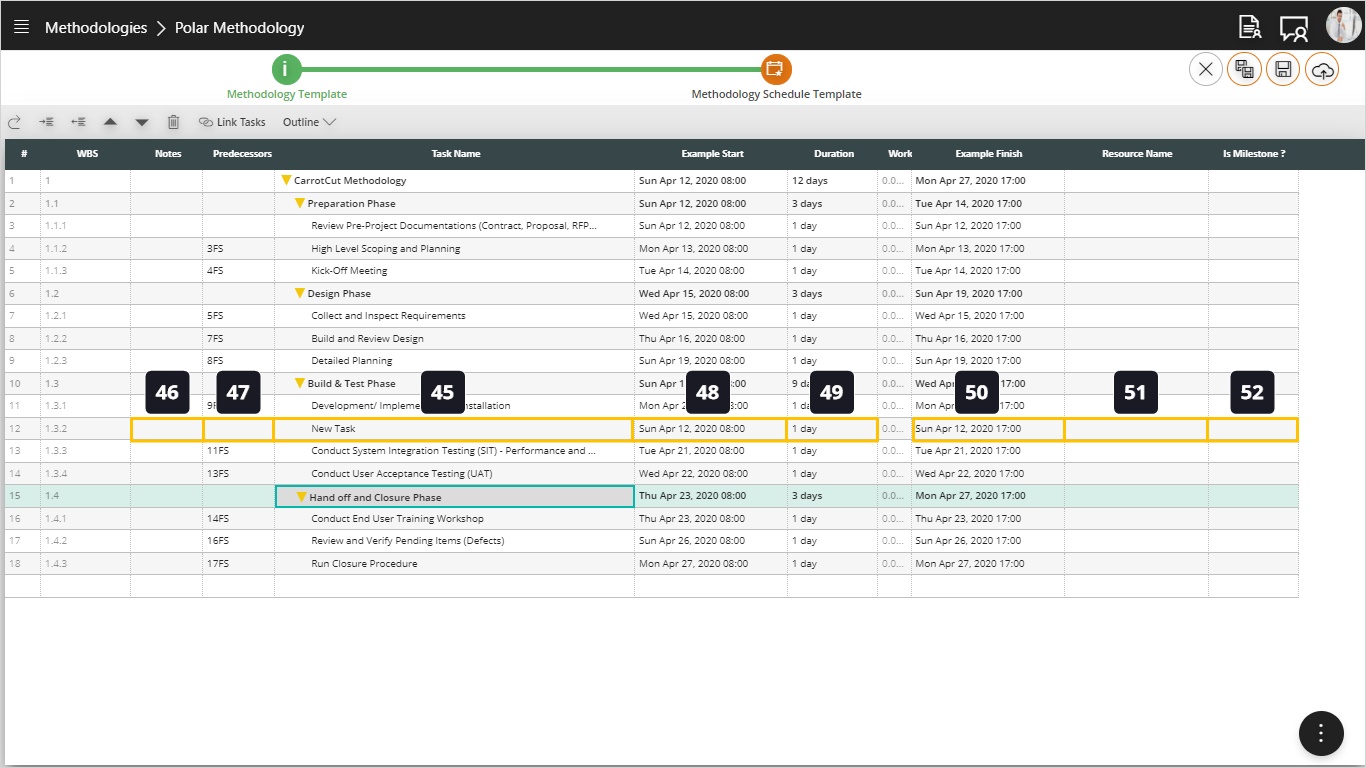
- Add Task to detail your schedule by using the shortcuts.
- Add Note - if Needed - by Using right click – Edit - Note.
- Add predecessors (noting that the applicable relations are FS, SS, FF) by double click on the field itself or by the edit function – predecessor tab. You can add lead time (when you want to overlap between tasks and usually it is in minus). You can add lag time (when you want to set a waiting time between tasks and usually it is in plus). e.g. To set relation with Lead Time just type (FS-1). To set relation with Lag Time just type (FS+1). Or set the relation between two tasks without any lead or lag and shift the start date of the second task to the desired date and CarrotCut schedule will automatically calculate the lag and lead.
- Change Start Date.
- Change Duration.
- Change Finish Date.
- Add resource by clicking on the field or from the Edit function.
- Add milestone by clicking on the field and select milestone.
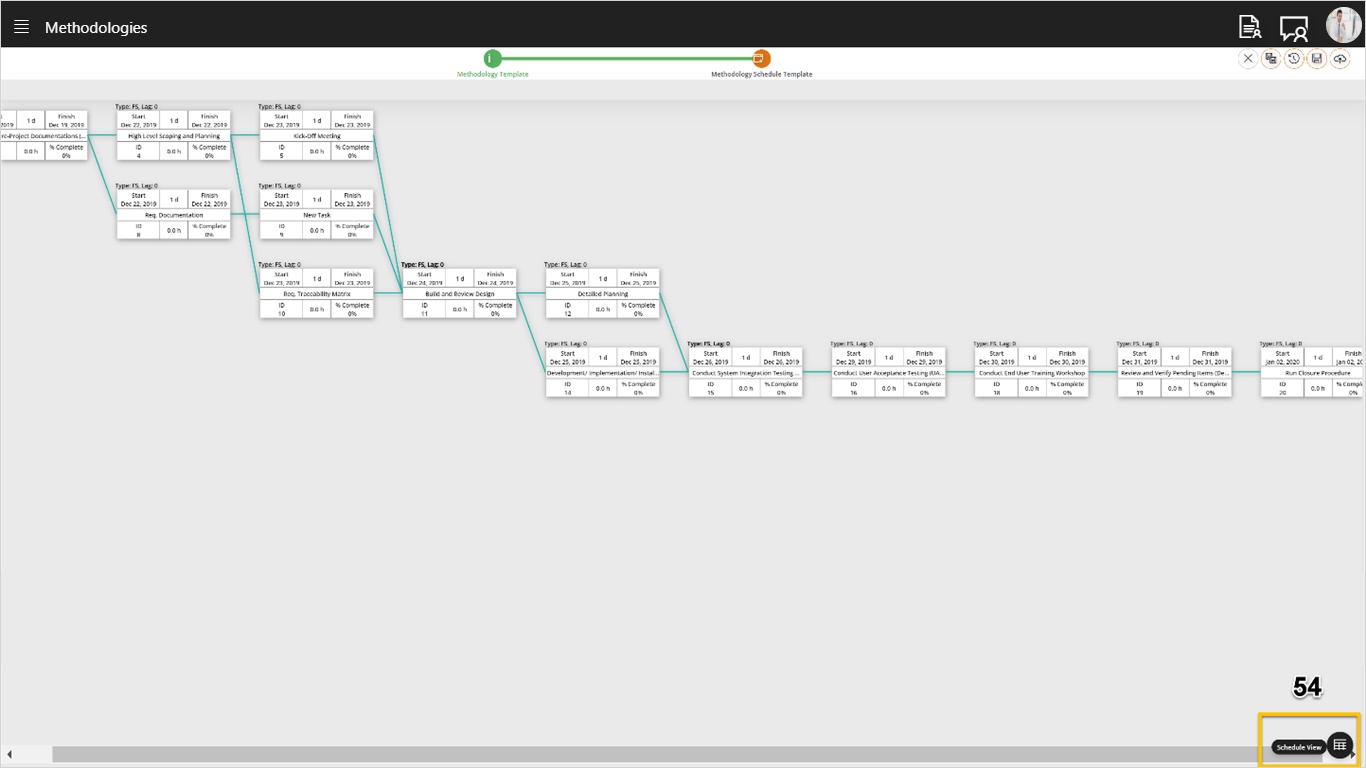
- Click on Network Diagram to check that all tasks are linked correctly.
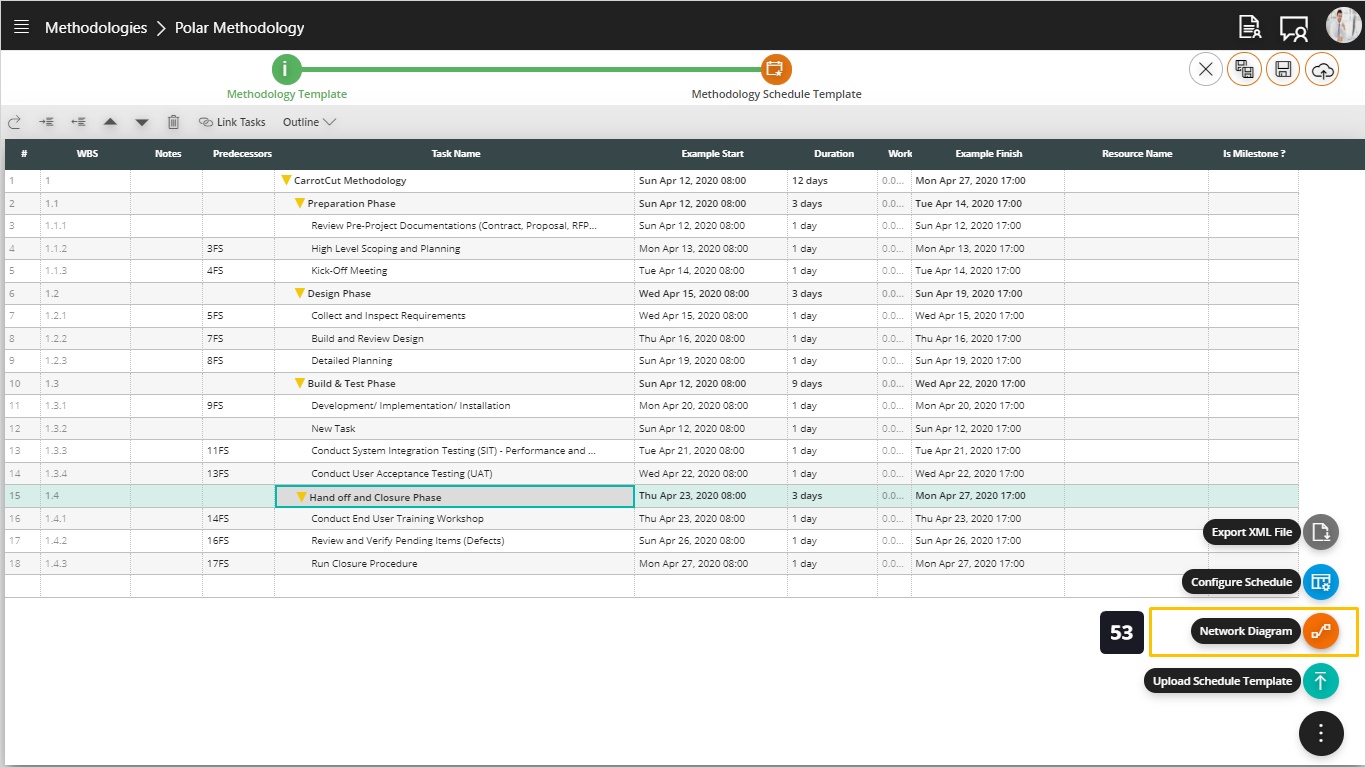
- Network Diagram will present the schedule as a network diagram where you can visually see the dependencies between tasks and to ensure that no task is left unconnected. To back to schedule view, click on schedule view.
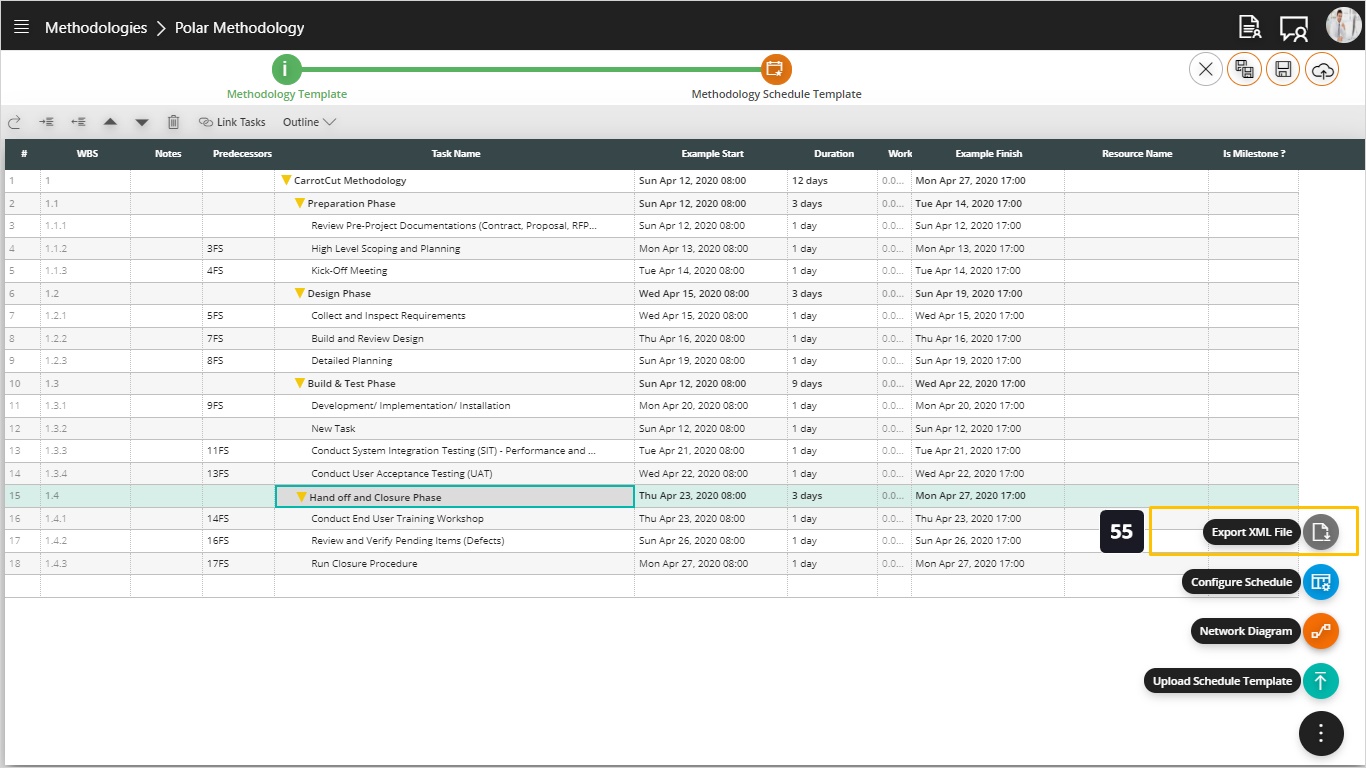
- Click on Export XML File as this feature allows us to export a schedule out of CarrotCut® to be shared with external parties like clients or vendors who don’t have access to CarrotCut®.
Tip: As long as you are still modifying your methodology, use save function and do not publish. Only publish your methodology if you consider it done and approved.
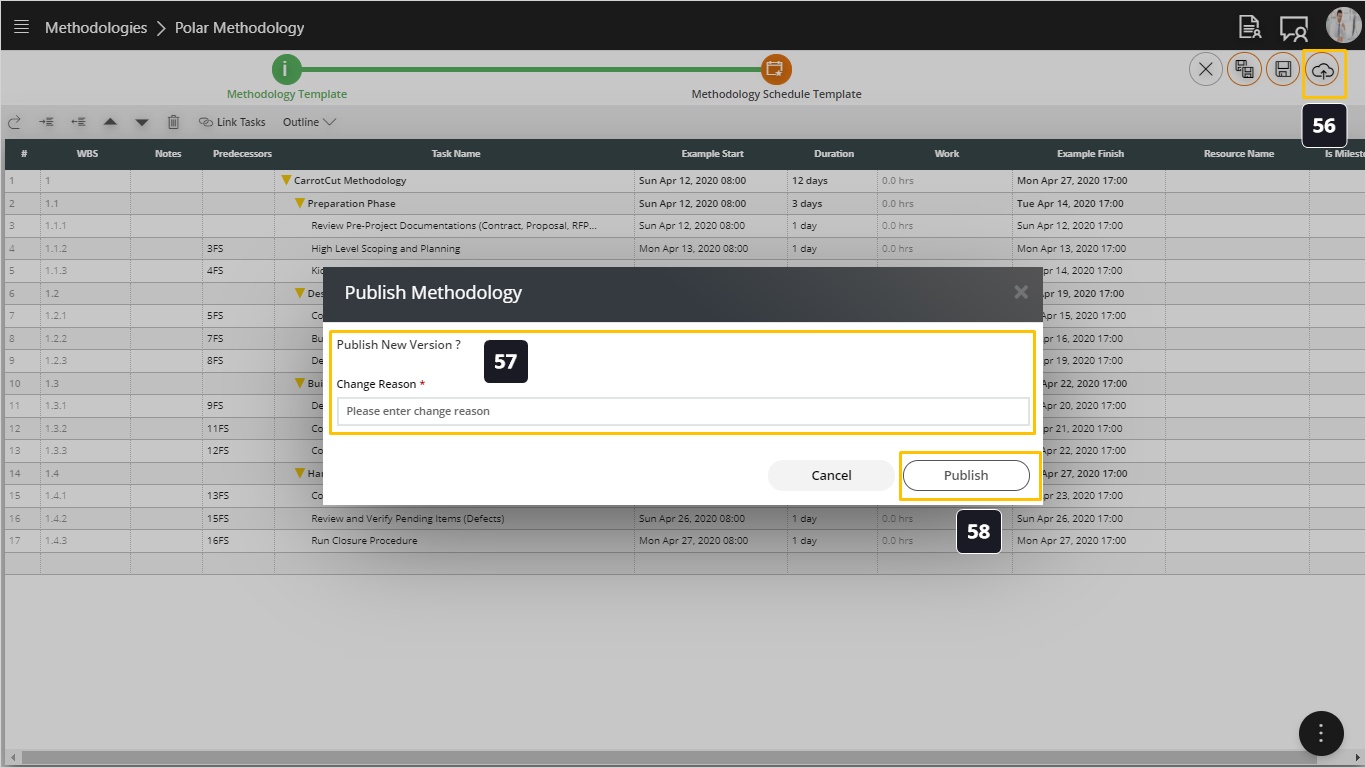
To publish your methodology:
- Click on Publish action which makes it available to link it to newly created projects or to change the methodology of existing projects to use this methodology.
- Once you publish a methodology you can enter an explanation or comment to explain the reason behind this change to the methodology. This is especially useful in the governance when making changes to already approved methodologies.
- Click Publish.
- The screen will look like this: