Manage/ Add/ Edit/ Delete/ Control Unified Task Board
Steps:
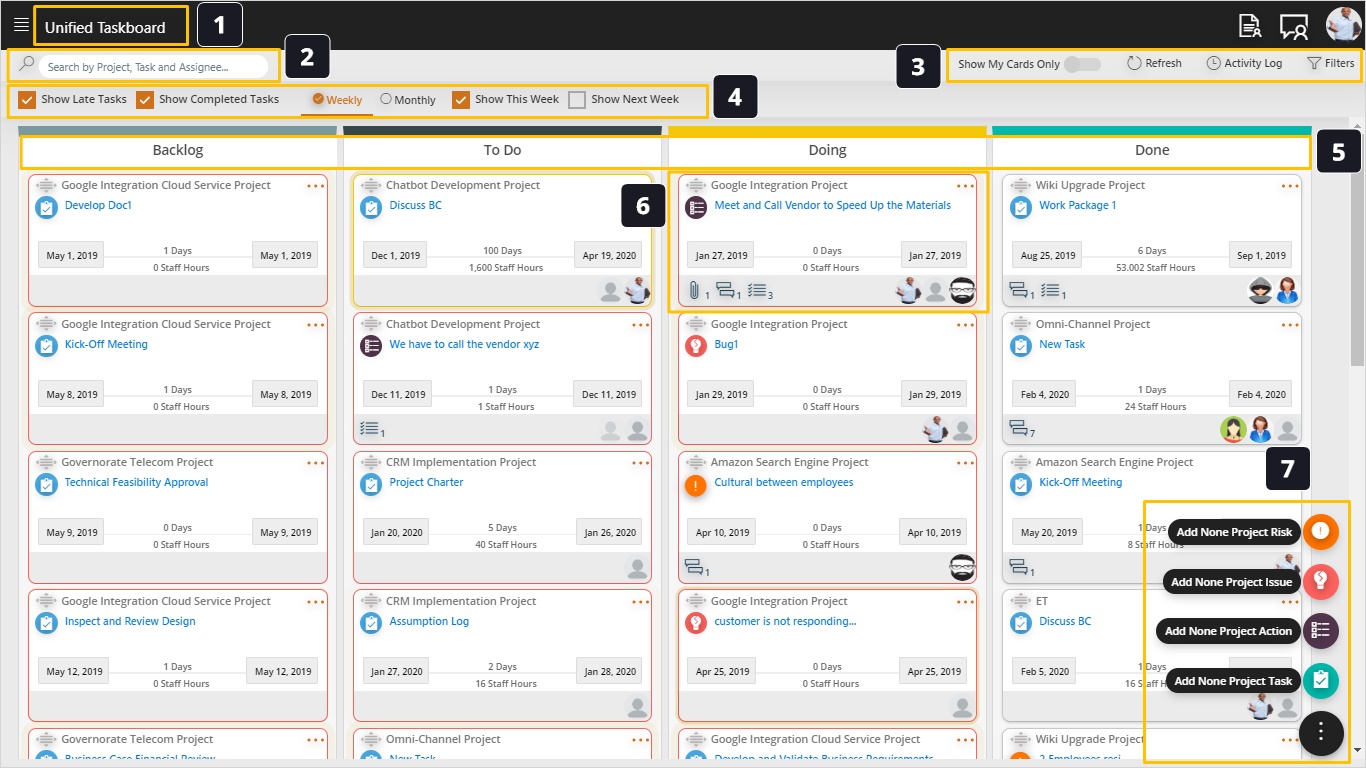
- On top of the screen we can find the board title, which will include tasks, issues, risks, and actions for projects and non-project work.
- Using the search bar we can search for specific cards using project name, task name, or assignee. This is a full-text search so it works with any parts of the intended parts of the search results.
- The Board’s Toolbar allow us to quickly reduce the results using the following options:
- Show My Cards Only, which shows the cards assigned personally to the current user.
- Refresh, to get the latest data if any cards were added by other users or any other data has recently changed.
- Activity Log, which shows us a list of all card movements, comments, mentions, and any other activities.
- Finally, the Advanced Filters action allows us to define additional filtering criteria, like filtering by project name, card type, assignees…etc.
- The Quick Filters bar includes pre-defined filters for quick data filtering, including:
- Show Late Tasks, when you check this box the late tasks will be displayed with a red highlighted border to attract your attention.
- Show Completed Tasks, when checked this will display the completed tasks in the board. We usually hide completed tasks since they don’t require action.
- Weekly, switches the board to show either the tasks of this week or next week or both.
- Monthly, switches the board to show either the tasks of this month, next month, or both. Project managers usually observe the tasks for this/next week since they require the most attention.
- The tasks in this board go into a life cycle made up of four stages:
- Backlog, which includes the tasks required but not for immediate action (usually not to be done within this week).
- To-Do, in this phase we put the tasks that we need to finish this week.
- Doing, this column is for the work in progress (WIP) which we are currently working with.
- Done, includes the complete tasks.
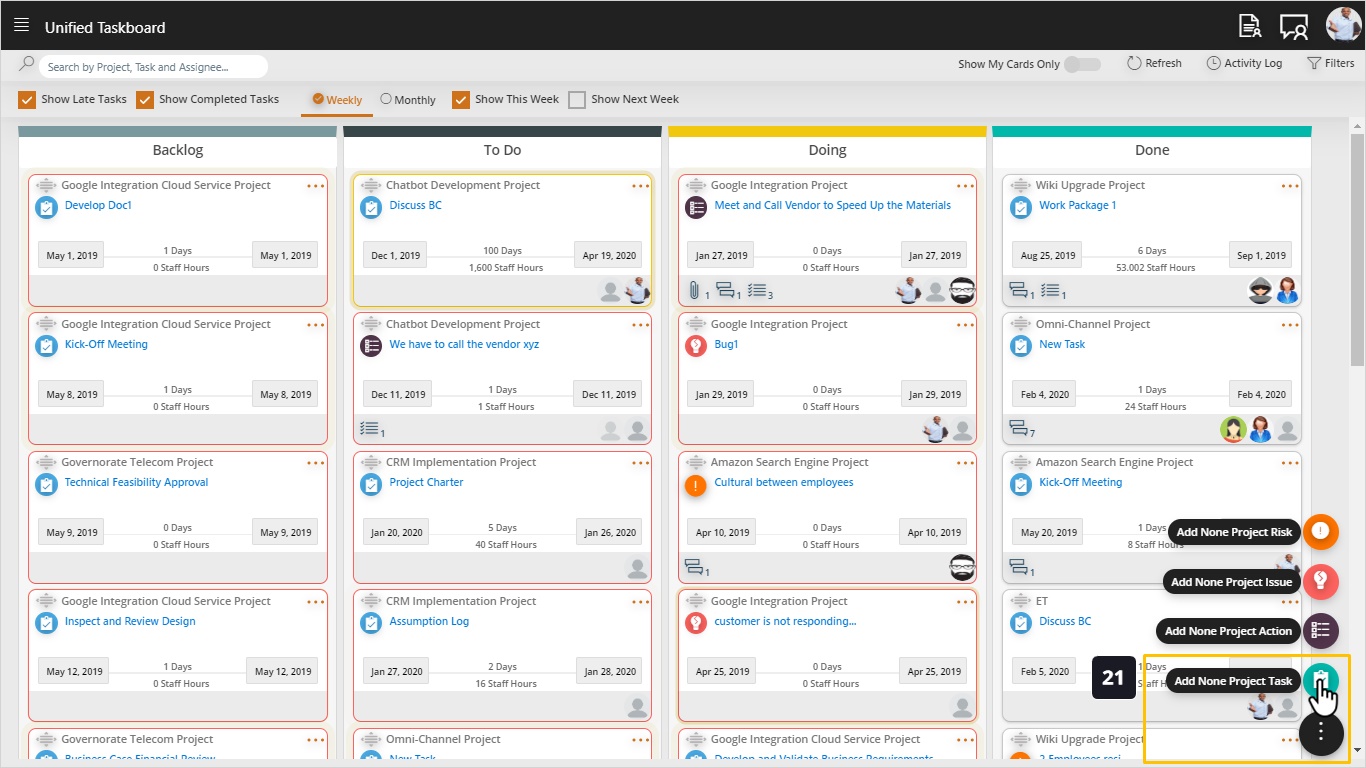
- When you click the FAB menu, you will be able to do the following choices;
- Add None Project Task
- Add None Project Action
- Add None Project Issue
- Add None Project Risks
You can use any of the four options to create the cards with different types as needed. Notice that those actions, tasks, and issues are not related to a specific project, instead we use them for non-project work tracking.
- Any of the cards displayed includes the project name, task name and assignees. For more details on card information, please review the upcoming steps.
- On any card, you can find a handle for dragging the card into the different stages on the board.
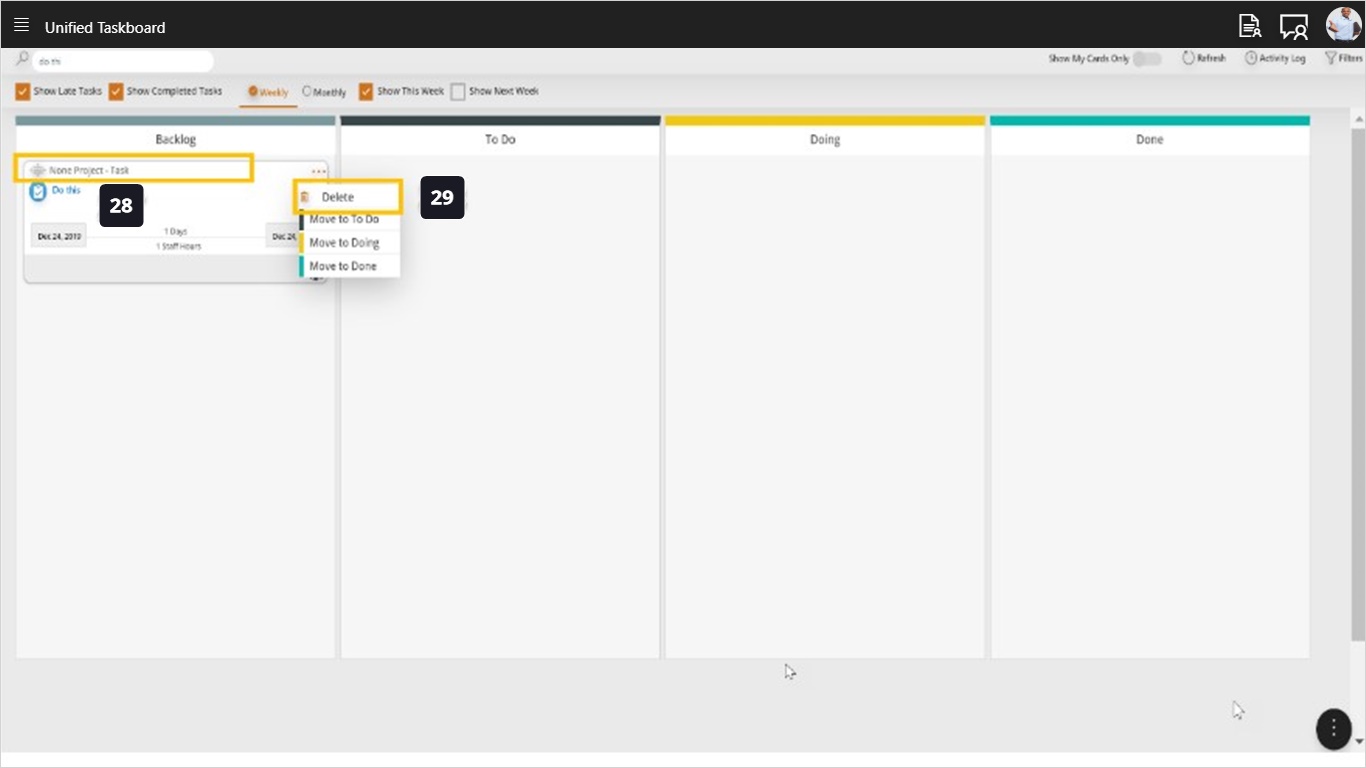
- The dotted menu allows us to move the cards as an alternative to dragging. If this was a non-project card, we can also delete the card using this menu.
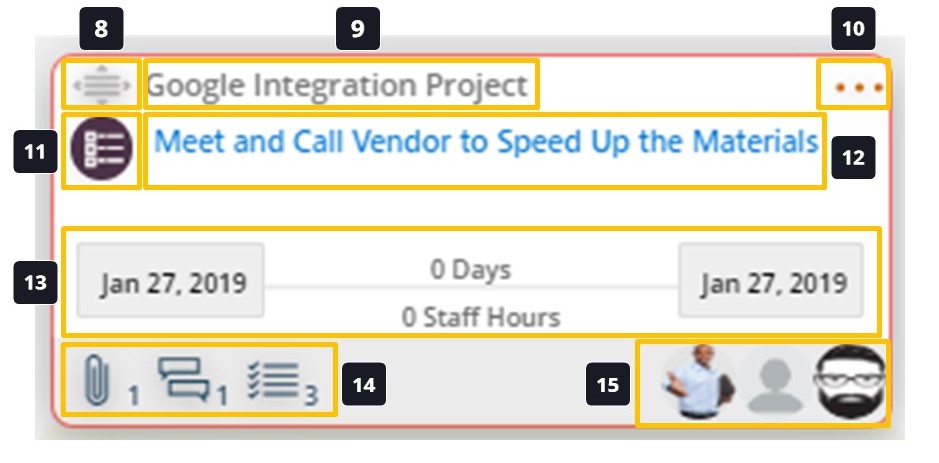
- The top of the card shows either the project name if this was a project related card, or it will be marked as “None Project” if this card doesn’t belong to a specific project.
- This is a visual indicator of the different card type, so there is a specific icon for tasks, actions, issues, and risks.
- In the middle of the card we can see the start date, finish date, duration and staff hours (effort or work).
- Here we have visual indicators to show if we have comments, attachments, and sub-tasks. If any of those components are not in the card, the related icon will disappear.
- In the Avatar part we see the pictures of resource(s) who are assigned to this task. This is a quick and easy way to spot who is doing what in the taskboard. If the Avatar icon is shaded, it means the resource is assigned to or delegated to a checklist item (sub-task).
- Finally, we have the card title which is clickable and when clicked will open up the card for further editing.
- Now we are inside the card and we can see the card title, Percentage of Completion, WBS code…etc. Notice that when this card is a task originated from a project, this data is read-only.
- Using the “Add an attachment” link you can attach any files to the tasks and you can also view, download, or delete already attached files.
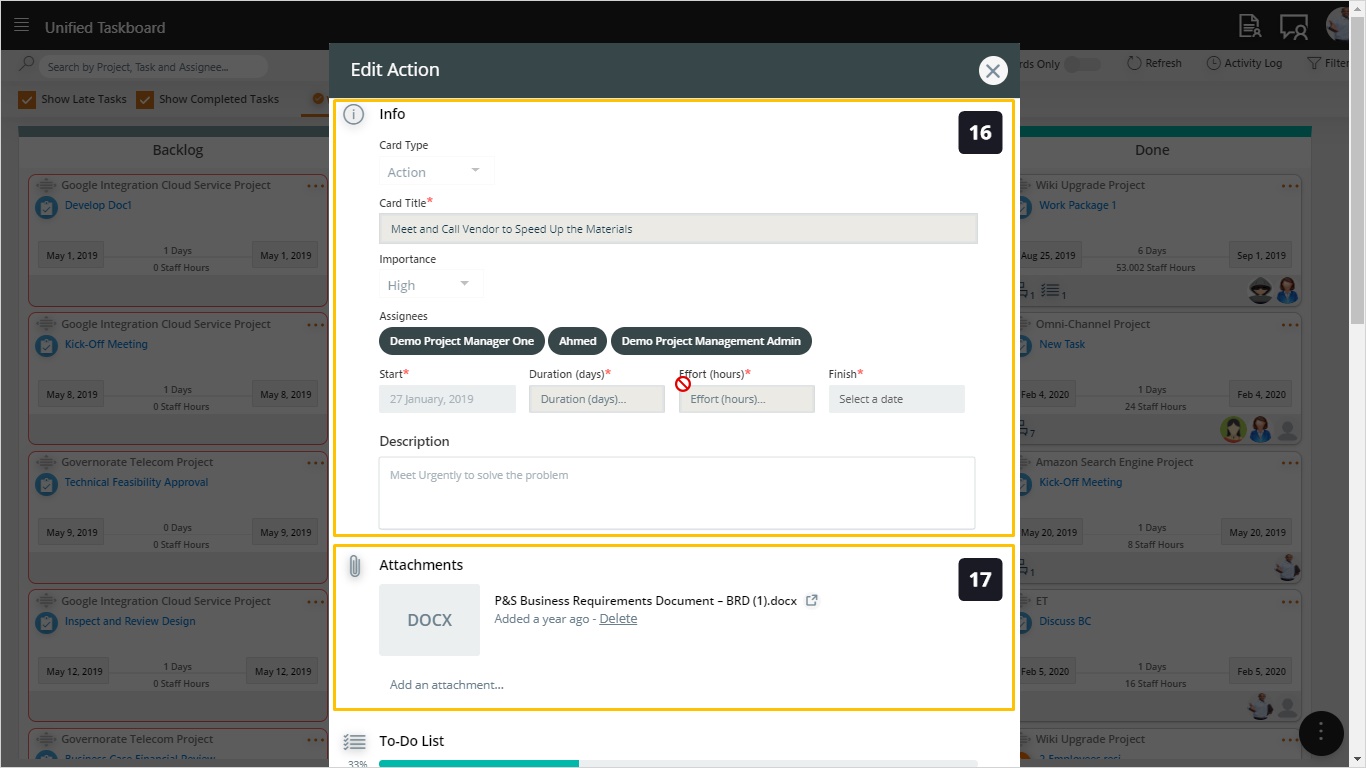
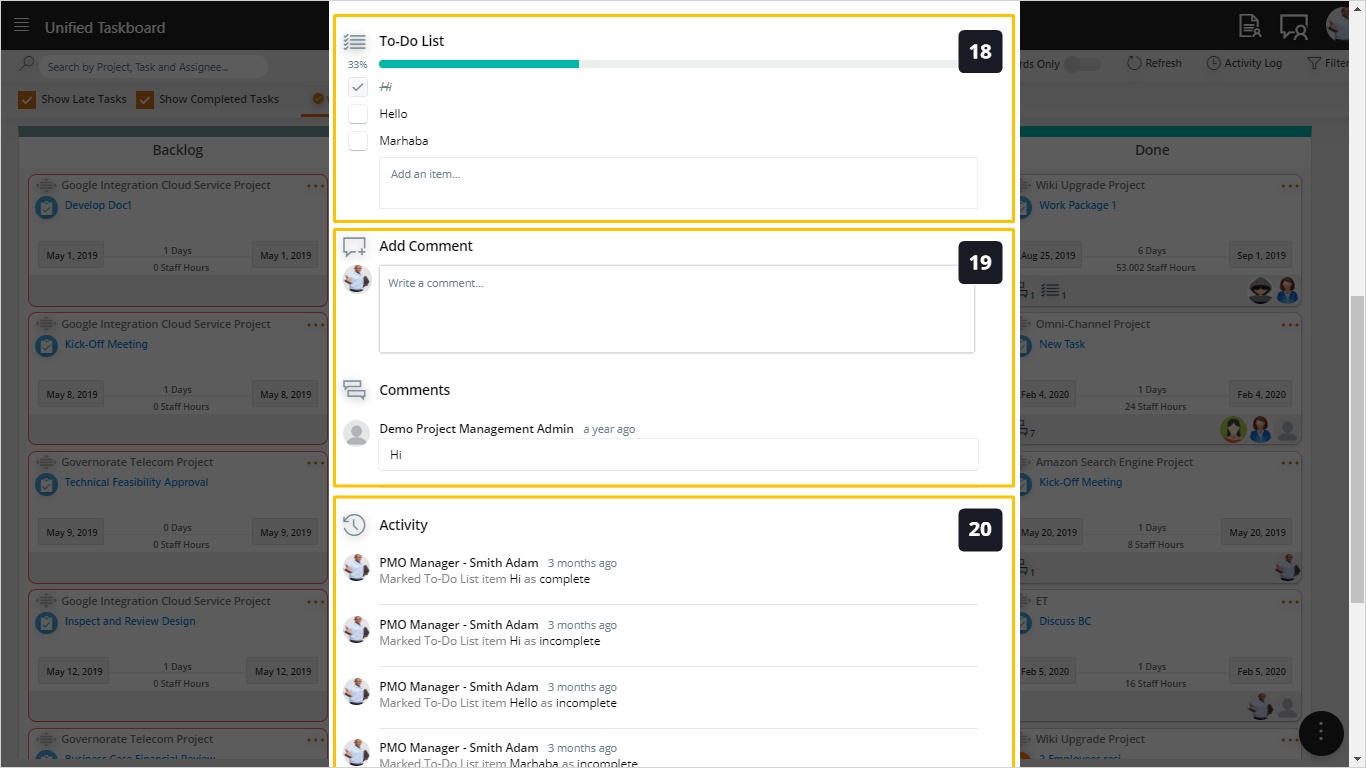
- The To-Do List section allows us to break up the task into subtasks or actions, we can assign one or more assignees.
Tip: This approach allows delegating the task to additional assignees, other than the original assignee fixed in the project schedule. - Finally, we can add comments to the card to indicate latest updates. In the comment you can mention other resources using the @ symbol and typing the resource name. Mentioned resources will get a notification on their inbox, mobile app, and web app notifications center.
- Here you can see the Activity Log (time-stamped).
- To create a new none-project card, you can use the FAB menu. For example try to create a new none-project task.
- As we can see, in the none project card we can define the card title, and severity.
- In this section we can click the people icon to select one or more assignees for this card. By clicking the small x icon on any resource we can remove this resource from the assignees list. Also, we can define the start date, finish date, duration, and the effort expected for this task. We can also define a description to detail the work required to be completed by this card.
- In the attachments section we can upload, download, and remove attachments specific to this card.
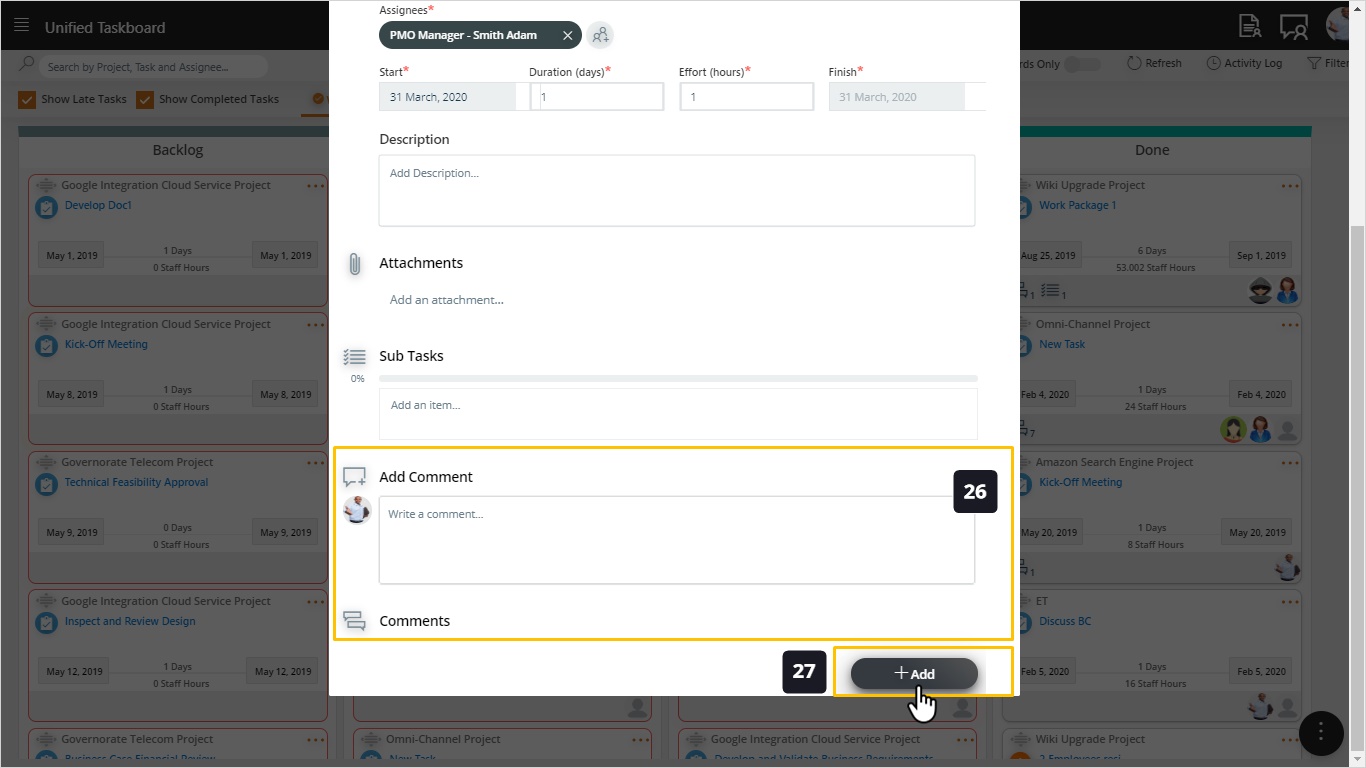
- In the sub-tasks section we can break up the card into sub-tasks, or to-do list and assign or delegate the sub-tasks to different resources.

- In the comments sections we can define comments and mentioned other resources to grab their attention to this card.As we can see, the task we just defined is marked as a Non-Project task which means it is not related to any specific project.
- Click on Add.
- From here you can see that this is a Non-Project Task.
- If you want to delete this card, you can use the dotted menu to delete or move this card. Remember that if this task was related to a project, we cannot delete it from the unified taskboard.