Fill & Submit Timesheet
Introduction:
Just like we plan projects and allocate planned time to perform the tasks, it is essential to track the actual time spent by our resources on the different projects. There is a huge value in understanding and analyzing the actual times spent on projects vs. on business as usual tasks (Non-project work). For example, this would allow a department manager to reconsider the workforce size in the upcoming year planning. This will also help us to fine-tune and adjust our estimates based on how close or far they are from the actual hours submitted.
The timesheet is a tool that allows resources and team members to easily and quickly submit their actual times spent on the tasks for both project and non-project work and it will feed into the actual labor part of the budget in the projects finance.
Tip: Timesheets are usually filled in on weekly basis. You can fill the tasks time on daily basis but you would usually submit the whole timesheet on a weekly basis.
Steps:
- The first step is to open the timesheet module from the mobile app landing page.

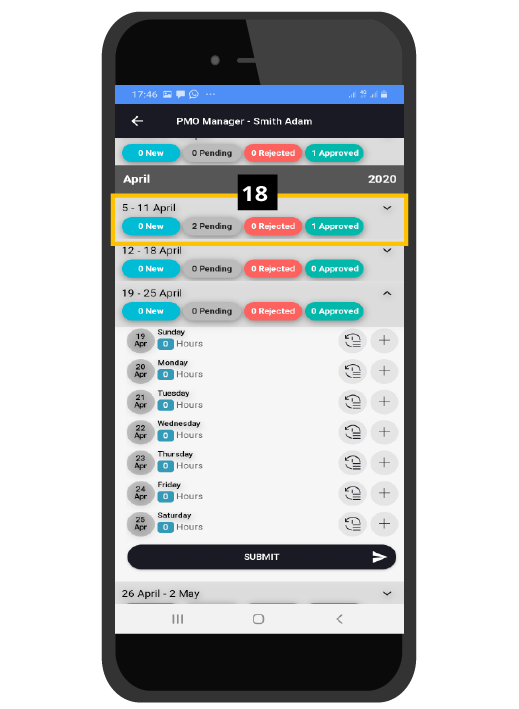
- Once you open the timesheet, the app will display the current year and month by default.
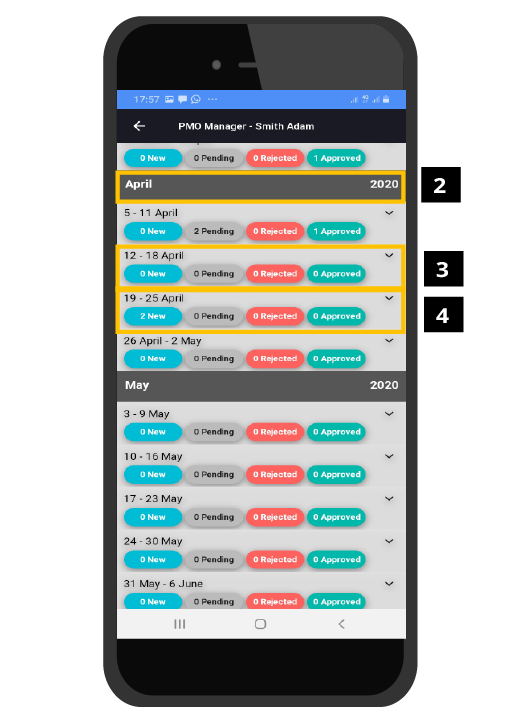
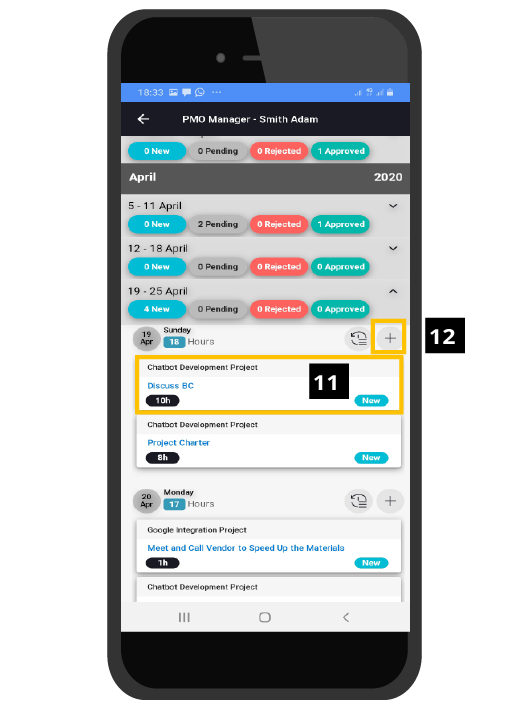
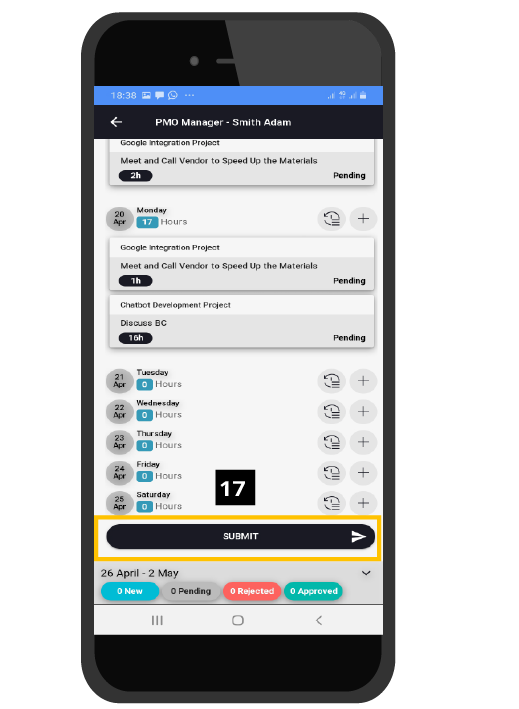
- Inside the month, the weeks will be displayed as horizontal bars. In each week, it will show four colored boxes showing counter of the tasks under each status of tasks in this week’s timesheet, including:
- New, this is a task that is recorded but not yet submitted.
- Pending, this is a task that has been submitted but not yet approved nor rejected.
- Rejected, this is a task that was submitted and rejected by the timesheet manager or project manager.
- Approved, and this is a task that has been submitted and approved.
- Press the down-arrow icon ( V ) that you want to open the week days for that week to insert the daily tasks if it is not auto-opened.
- The application will show the days in the selected week.
- Next to each day, you can use the “Remind Me” Icon, which will bring up any tasks that have been modified, commented on, moved, or mentioned during that day. This will work based on your activity on those cards from the taskboard screen. Click on the button.
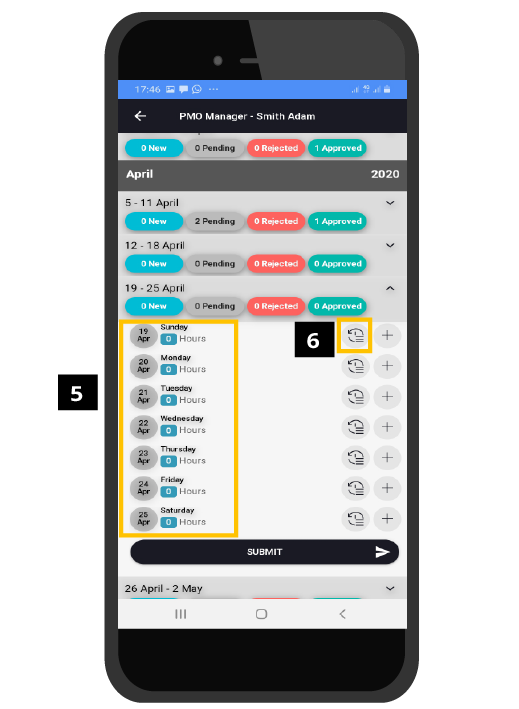
- The app will collect and display all tasks that have been modified, moved, commented on in the taskboard in that day. This way we don’t have to remember what we did in each day as we have to in traditional timesheet applications.
- If you want to edit the tasks for that specific day, click on task name. This will allow you to edit and add details about the.
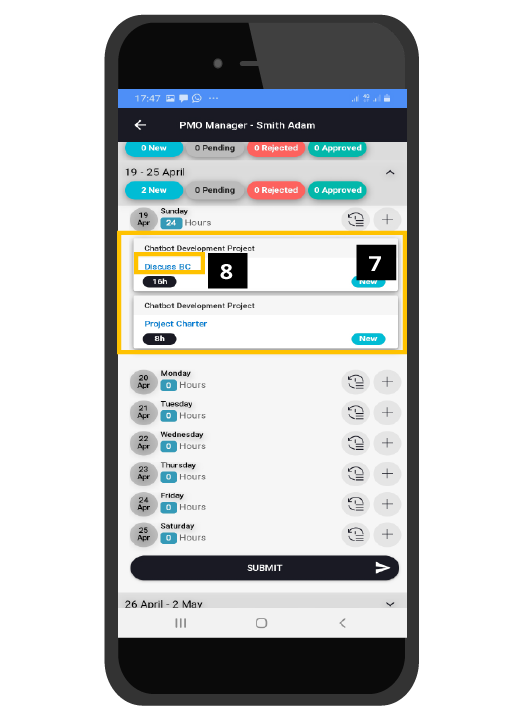
- The application opens the specific task that you clicked on. Modify the hours to 10 instead of 16 in the previous screen.
- Click Save.
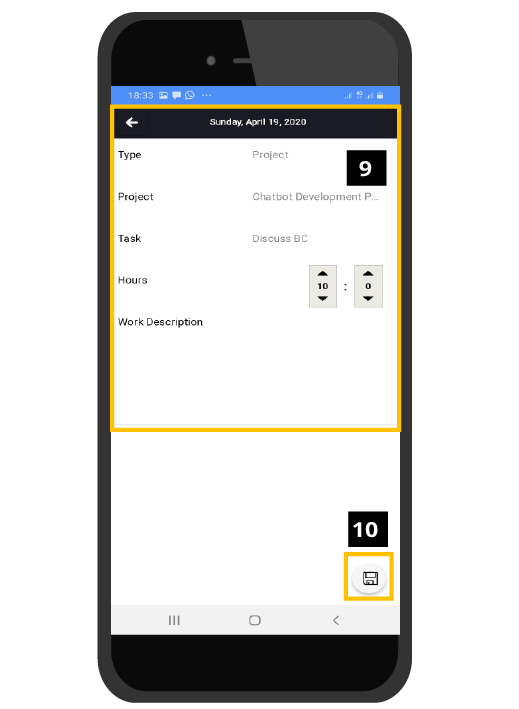
- The task hours is updated. (10) instead of (16).
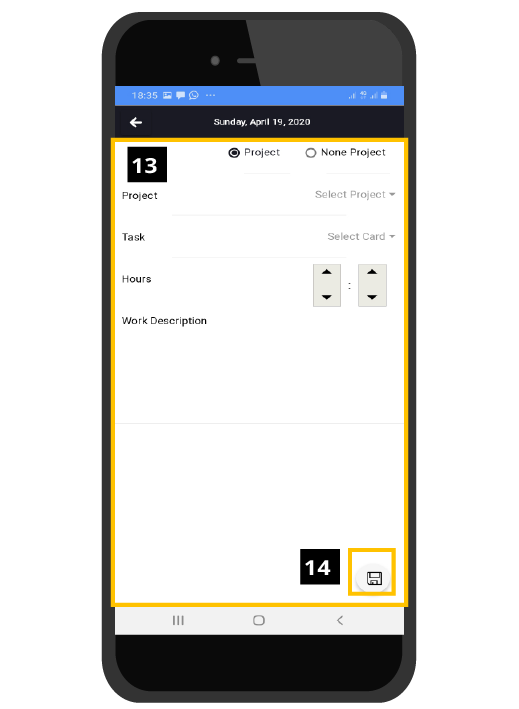
- Use the Add function (+) to manually define new tasks (Project/ NOn-Project).
- Here you can add a project task. select project name, and task name they are not editable. The number of hours will be defaulted to the planned hours from the project schedule but you can modify it as needed. Here we can provide detailed description or notes about your work on this task too.
- Click Save. Notice the number of hours was reflected on this task.
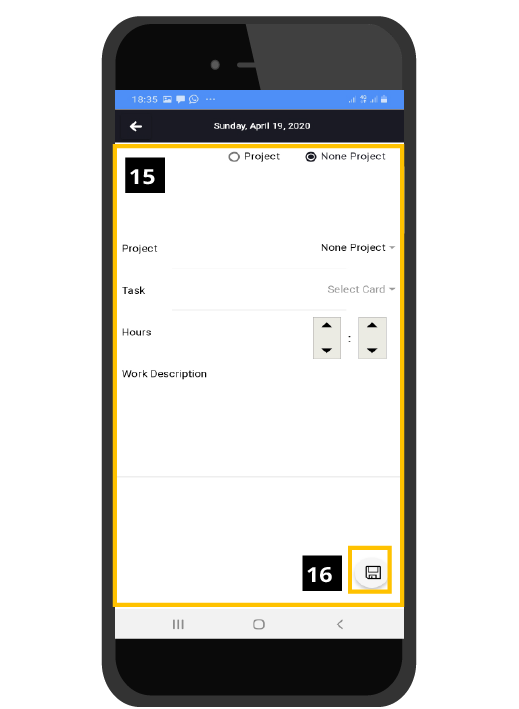
- The is the screen to add non project tasks. Feel free to fill the data, and click Save.
- When you are done adding and editing. click submit. Submit your timesheet. Assuming your work week is from Sunday to Thursday, you would most likely submit your timesheet by end of day Thursday for the whole week.
Tip: project tasks will be submitted to the project manager and non-project tasks will be submitted to the timesheet manager (typically your direct manager).
Tip: You don’t need to submit the timesheet daily or after adding a task. You will submit it only at the end of the week.
- Notice how you can see the progression of your tasks approval, some of them will be approved or rejected, and other will be still pending.